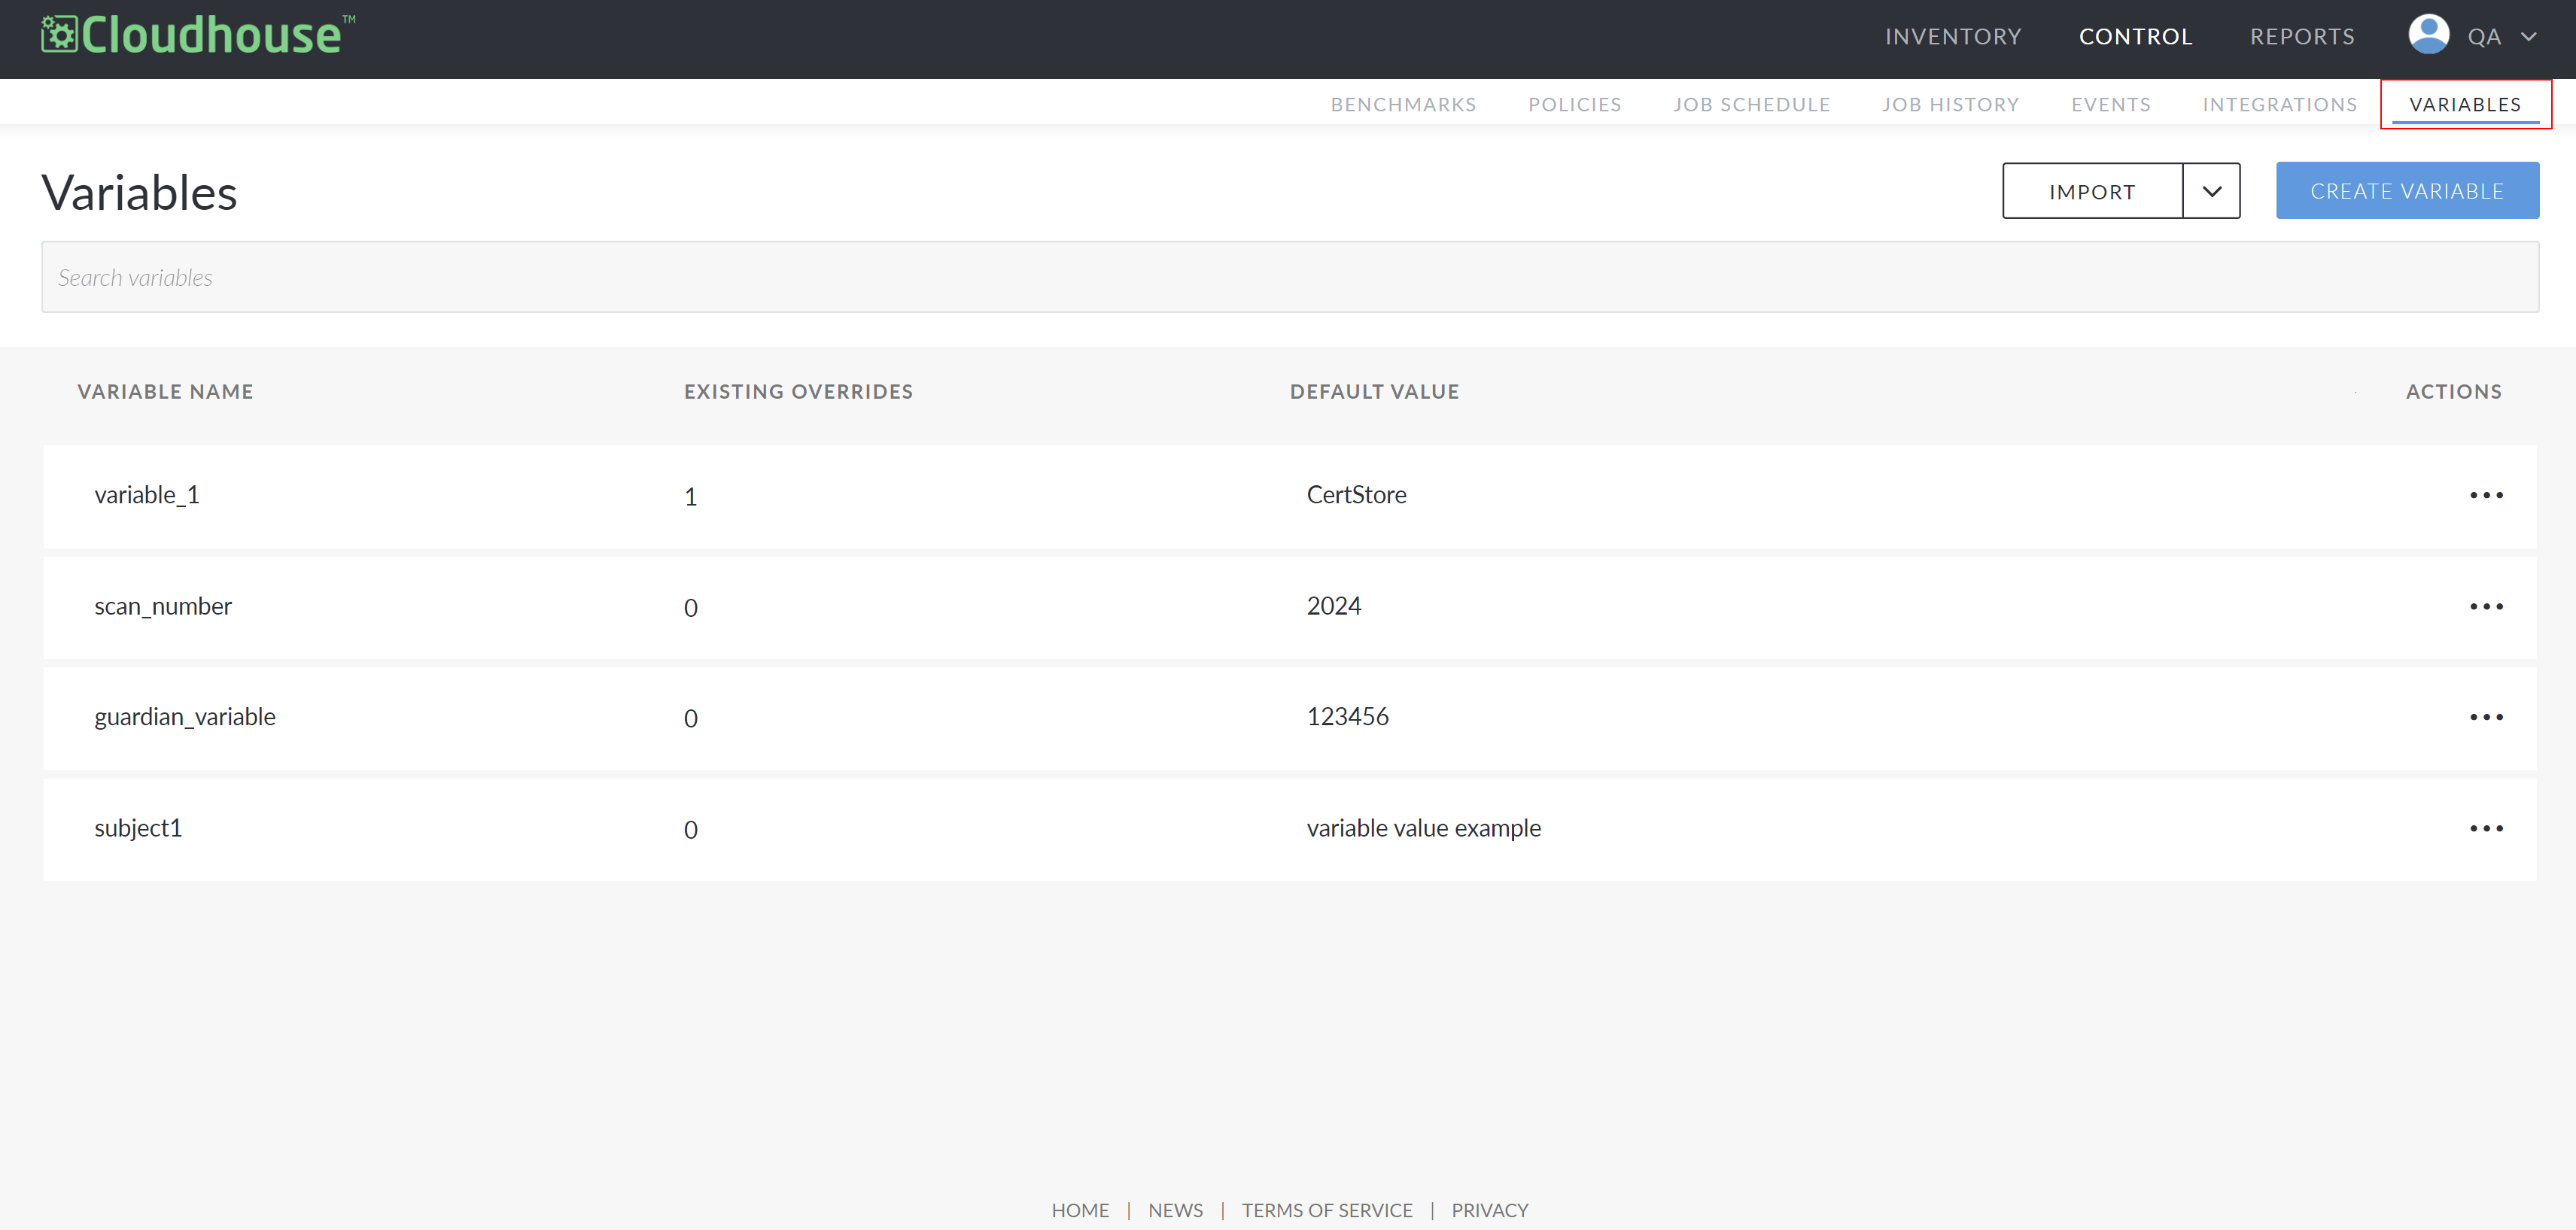
Variables
Variables are used to store values, which can be of various types like numbers (integer, float), characters (char) or strings. They are used as placeholders that are replaced with relevant data allowing you to conveniently store and retrieve values when needed. There are two types of variables in Cloudhouse Guardian (Guardian): built-in variables that are added by default to the appliance and only available to use in specific locations, and custom variables that are manually created and available to use throughout Guardian.
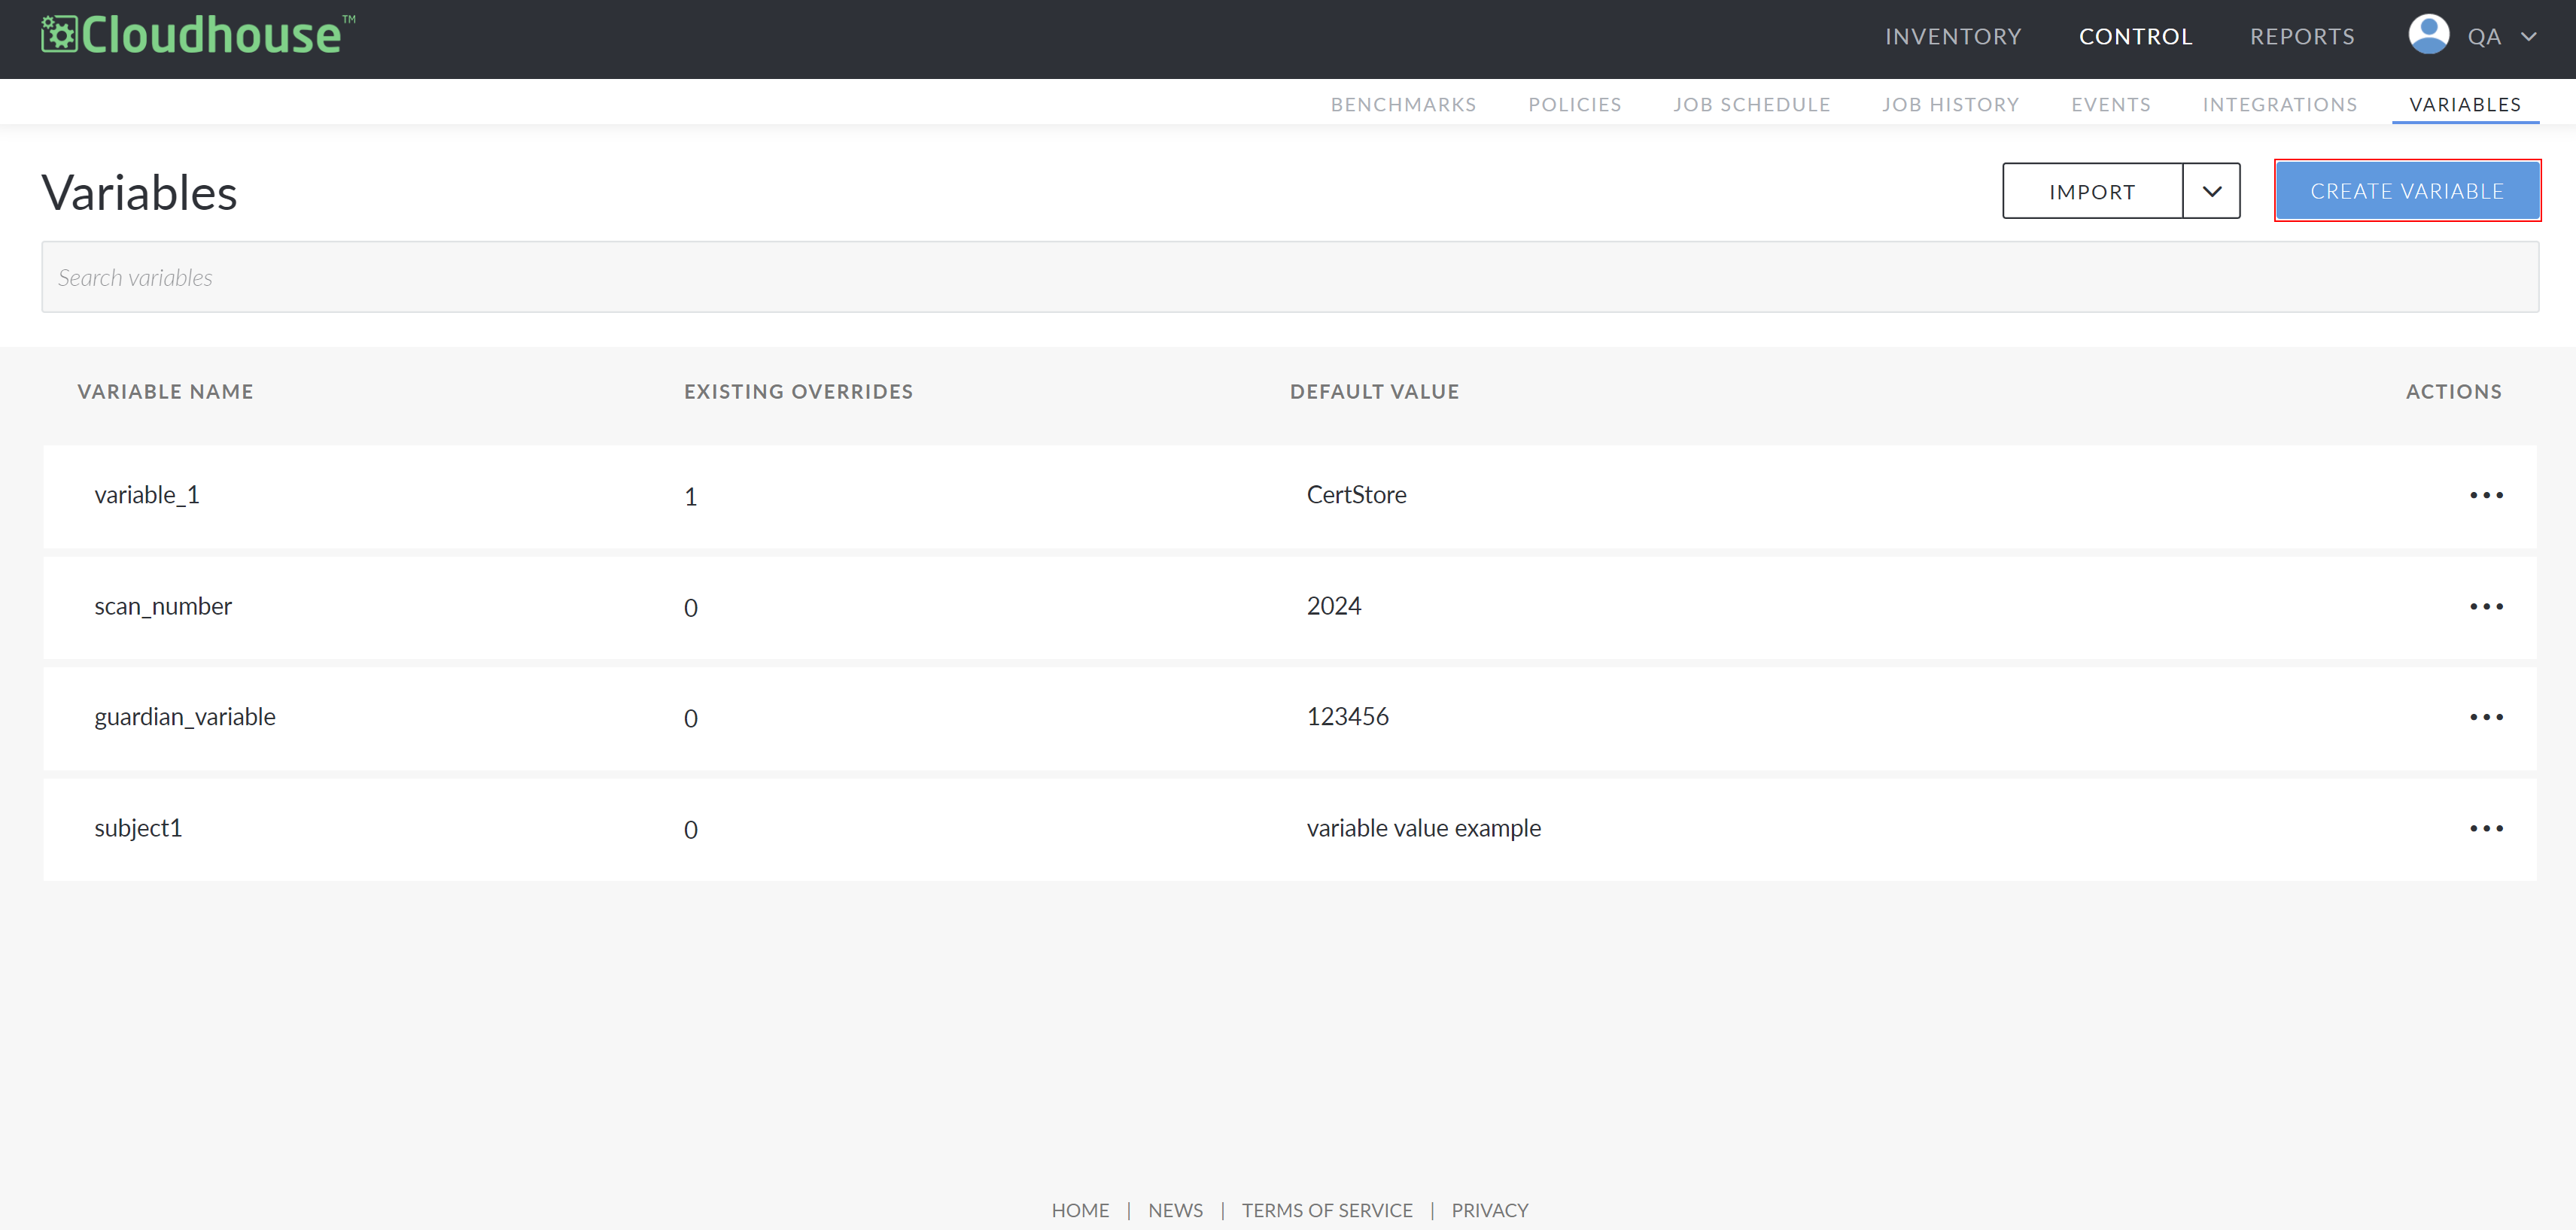
The Variables tab (
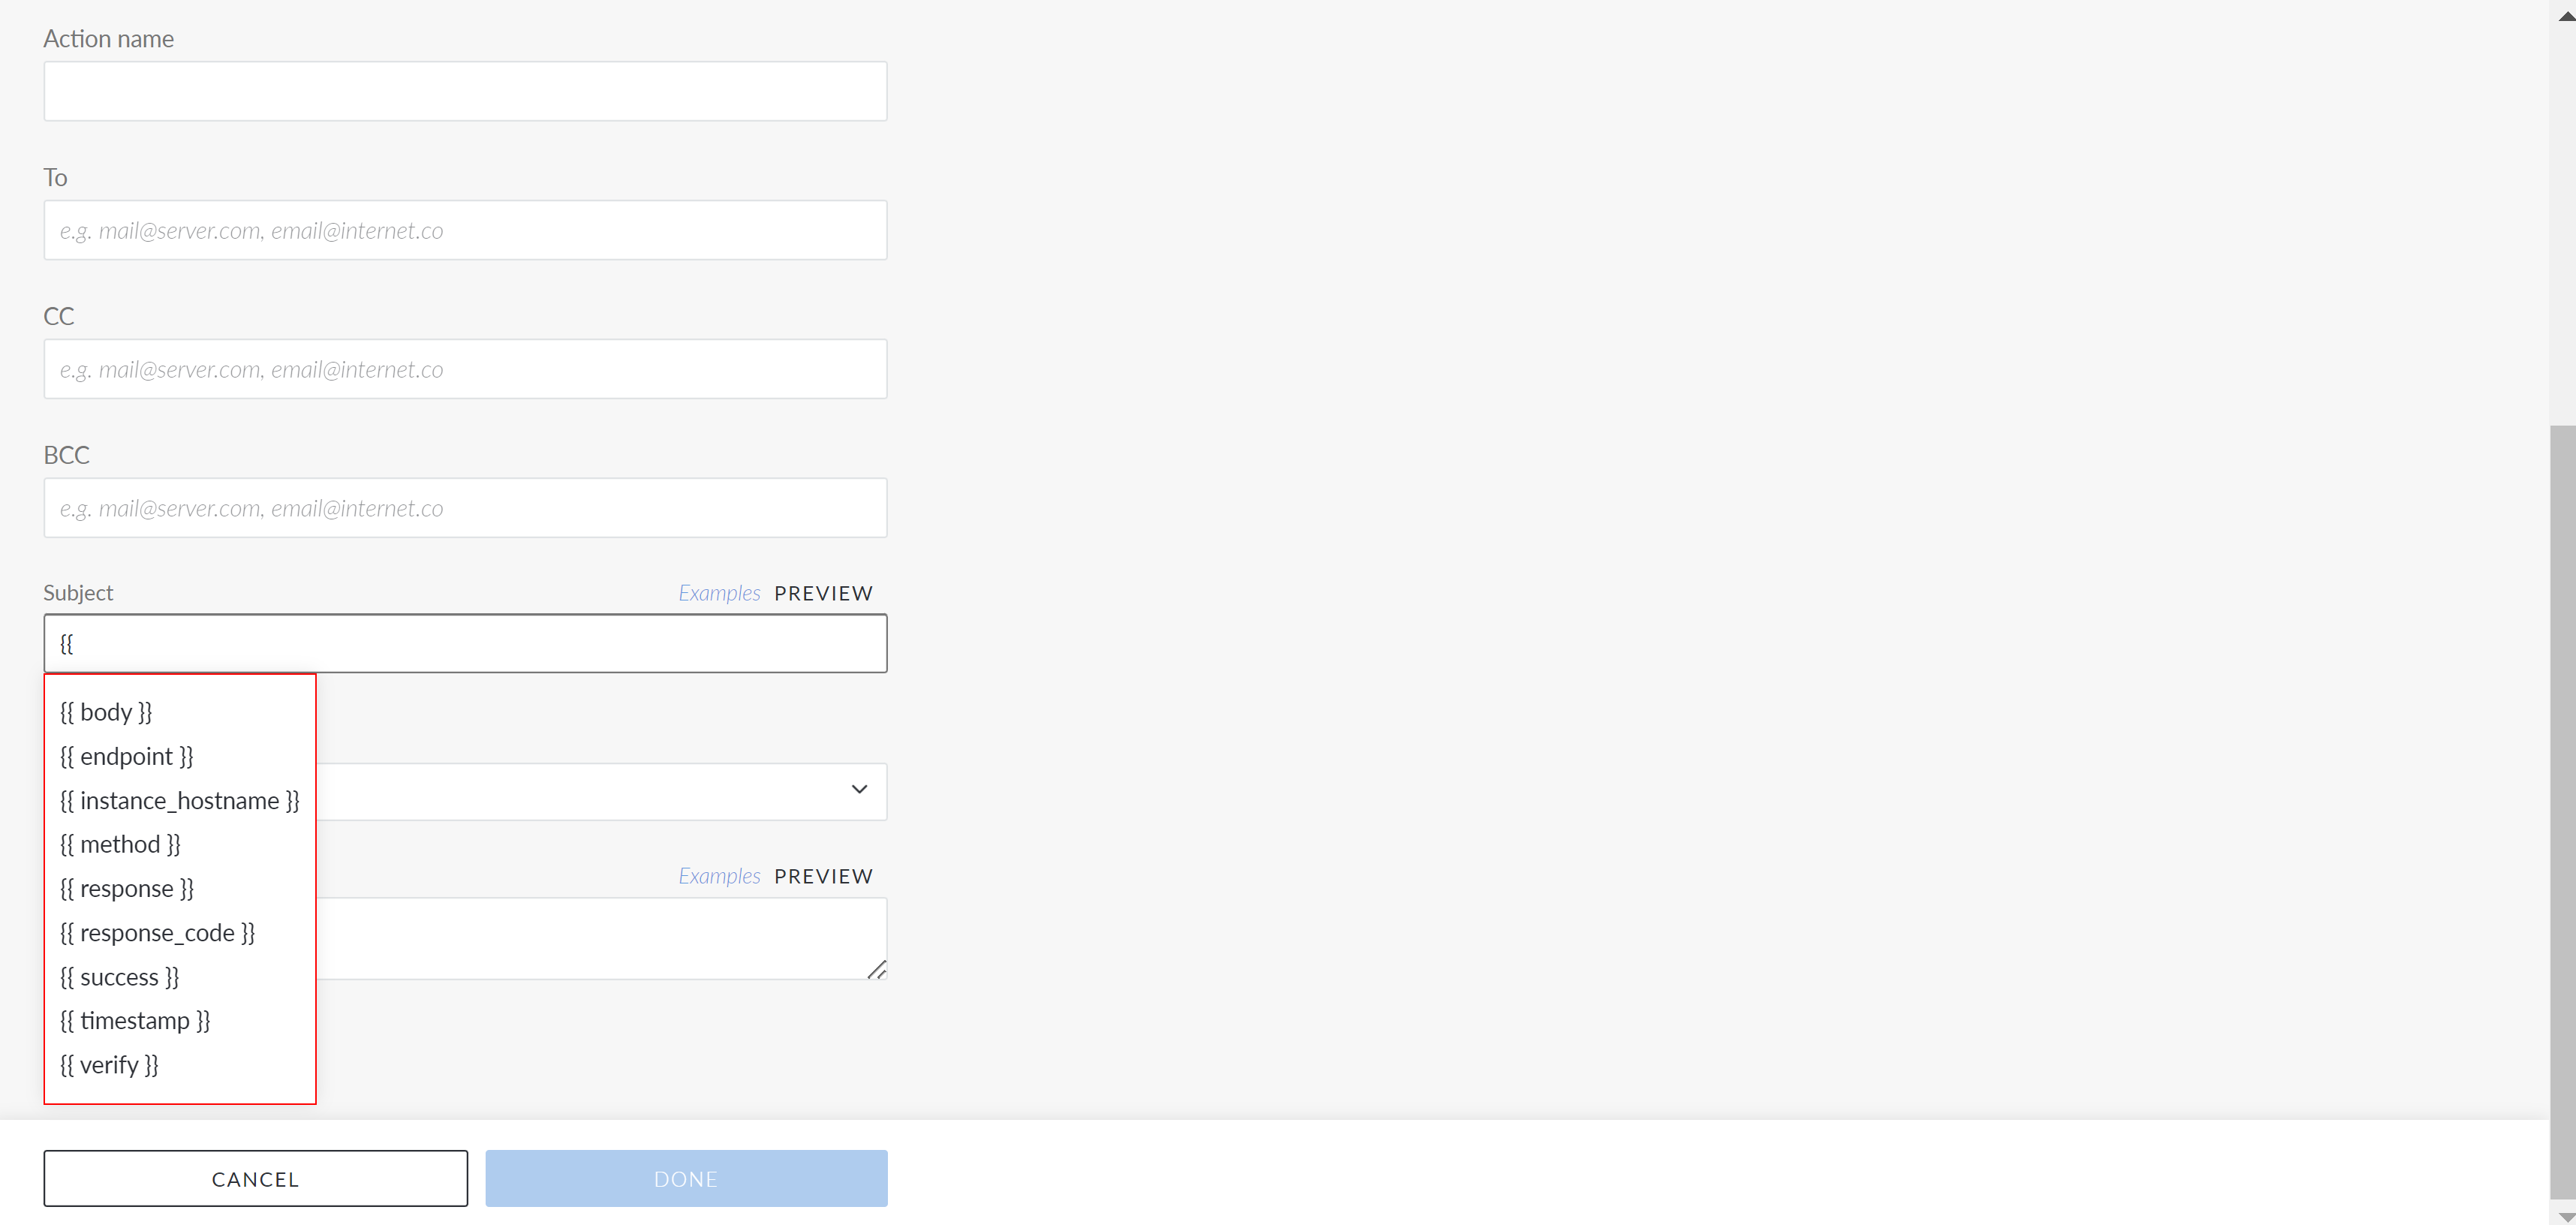
In Guardian, you can use built-in variables and custom variables. Built-in variables can be used while configuring Actions that have been configured to run when specific events occur in Guardian. For example, if you want to add an Action: Send an Email to an event, you can use built-in variables that base their values on the event's details to automatically populate the 'Subject' and 'Message' fields. To use variables, enter double brackets ({{) to see the list of built-in variables.
Note: The built-in list displays different variables depending on the selected event:
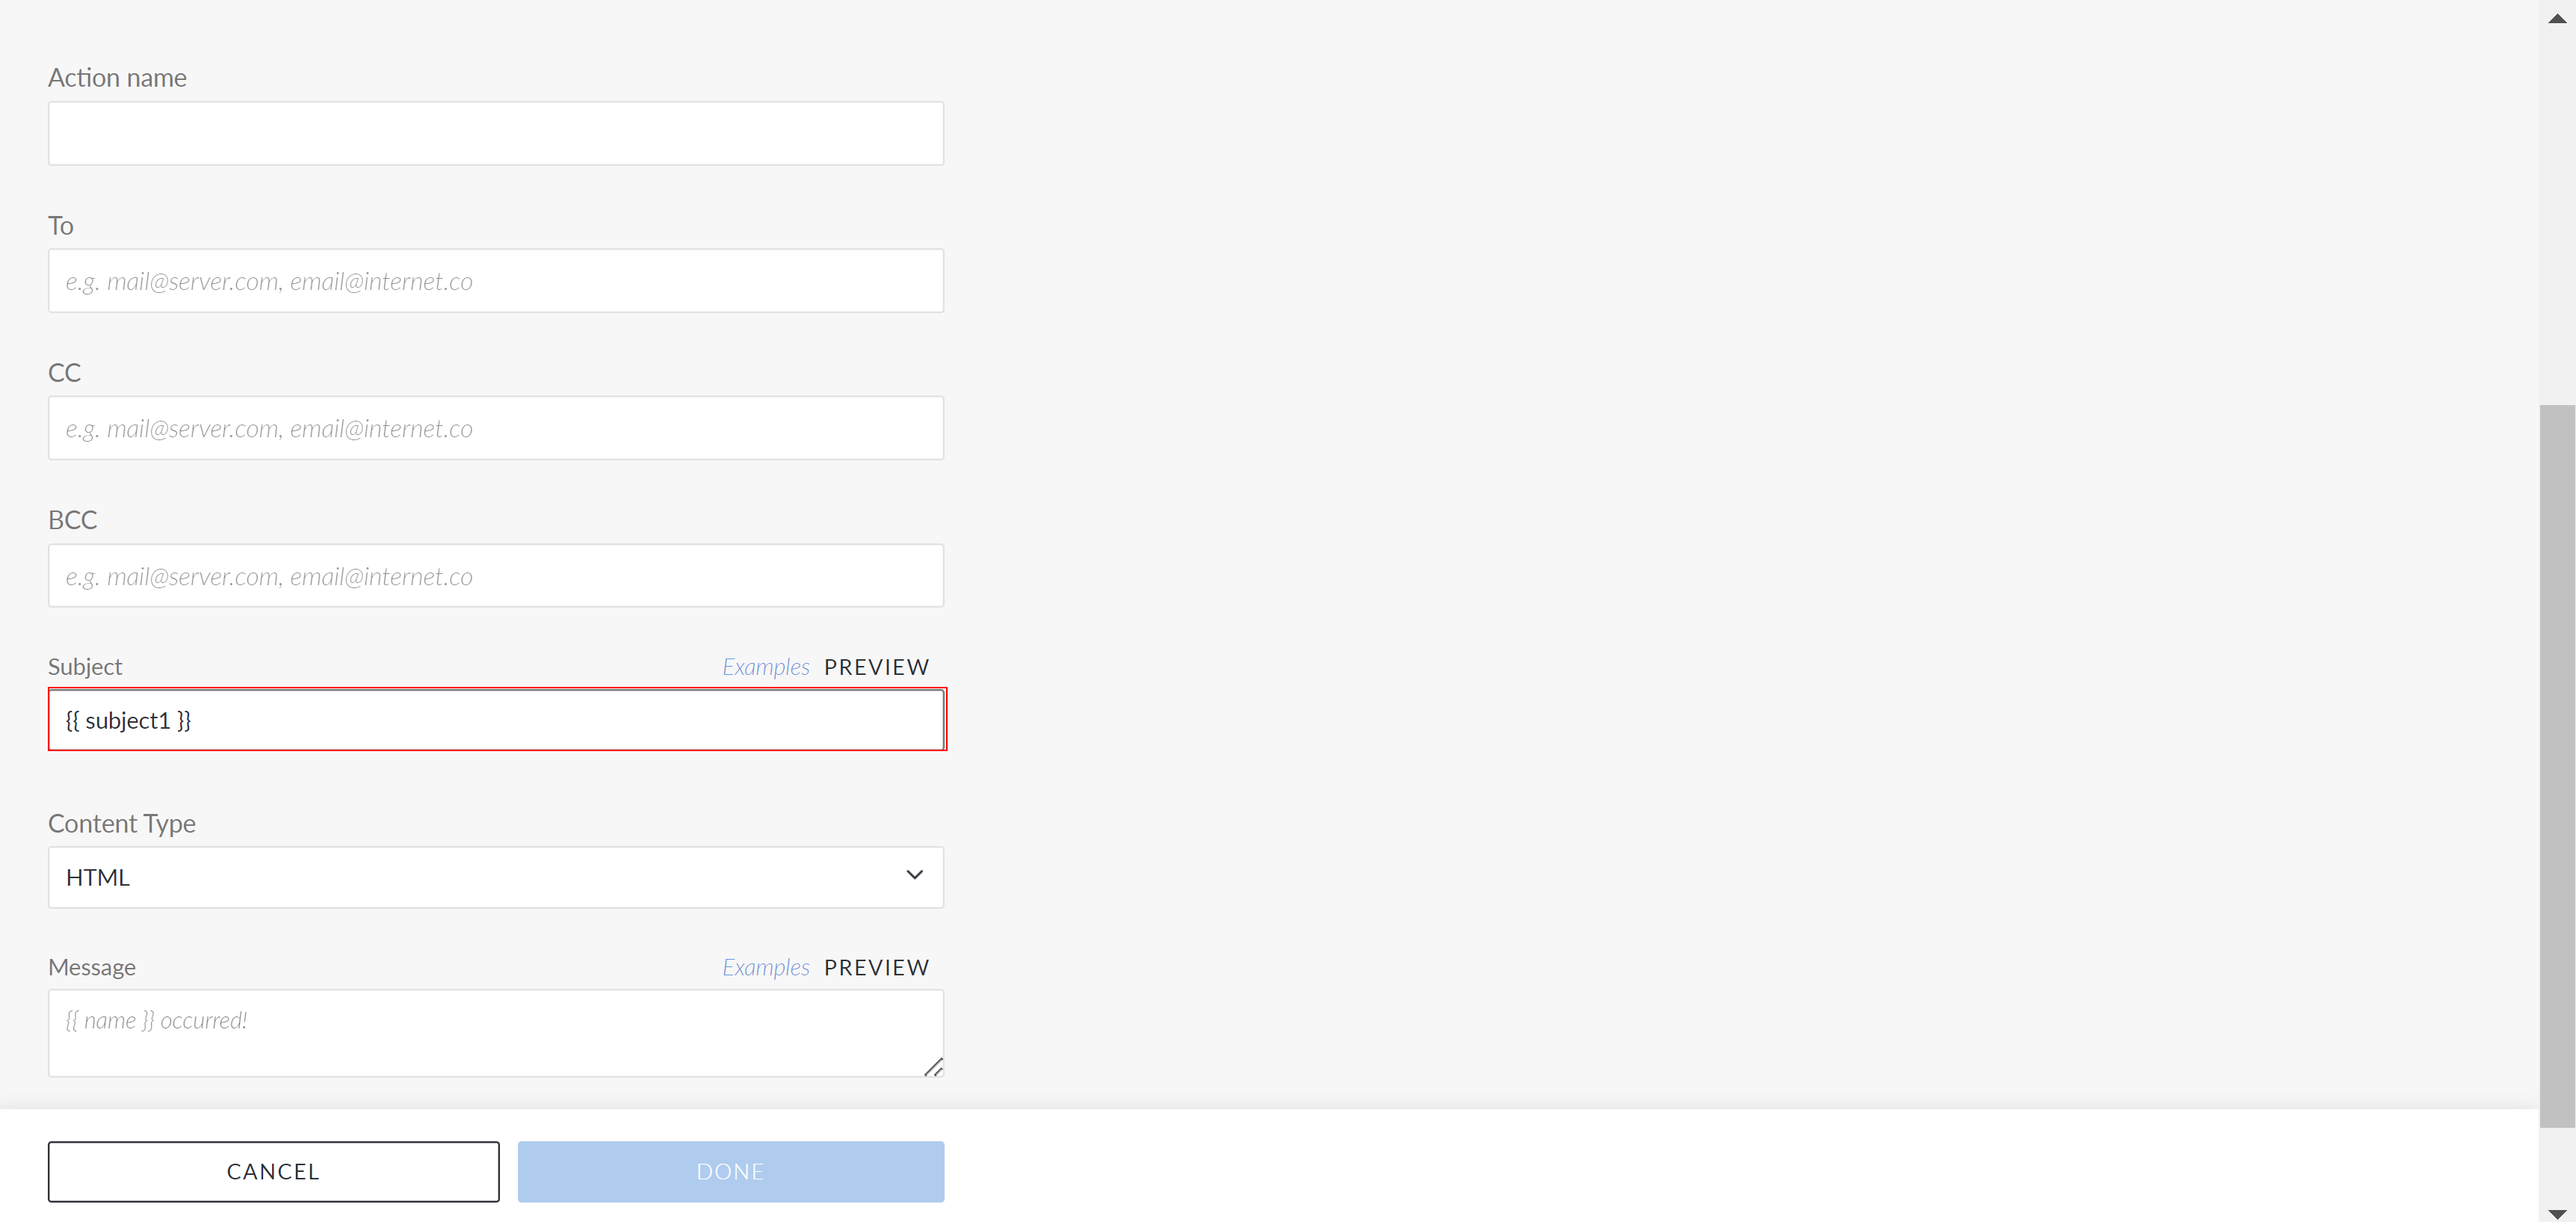
Besides using the built-in variables, you can define your own custom variables to use throughout Guardian from the Variables tab. That means you can name your own variable and set the value you want to associate to it. Once created, you can enter the variable name using double brackets. For example, {{ subject1 }}. Guardian then automatically replaces each of the instances the variable is being used with the value you set. For more information on how to create a variable, see Create a Variable.
Warning: Once you add a custom variable and decide to change a Variable Name, you have to update each of the instances that the variable is being used throughout Guardian. For more information, see Edit a Variable.
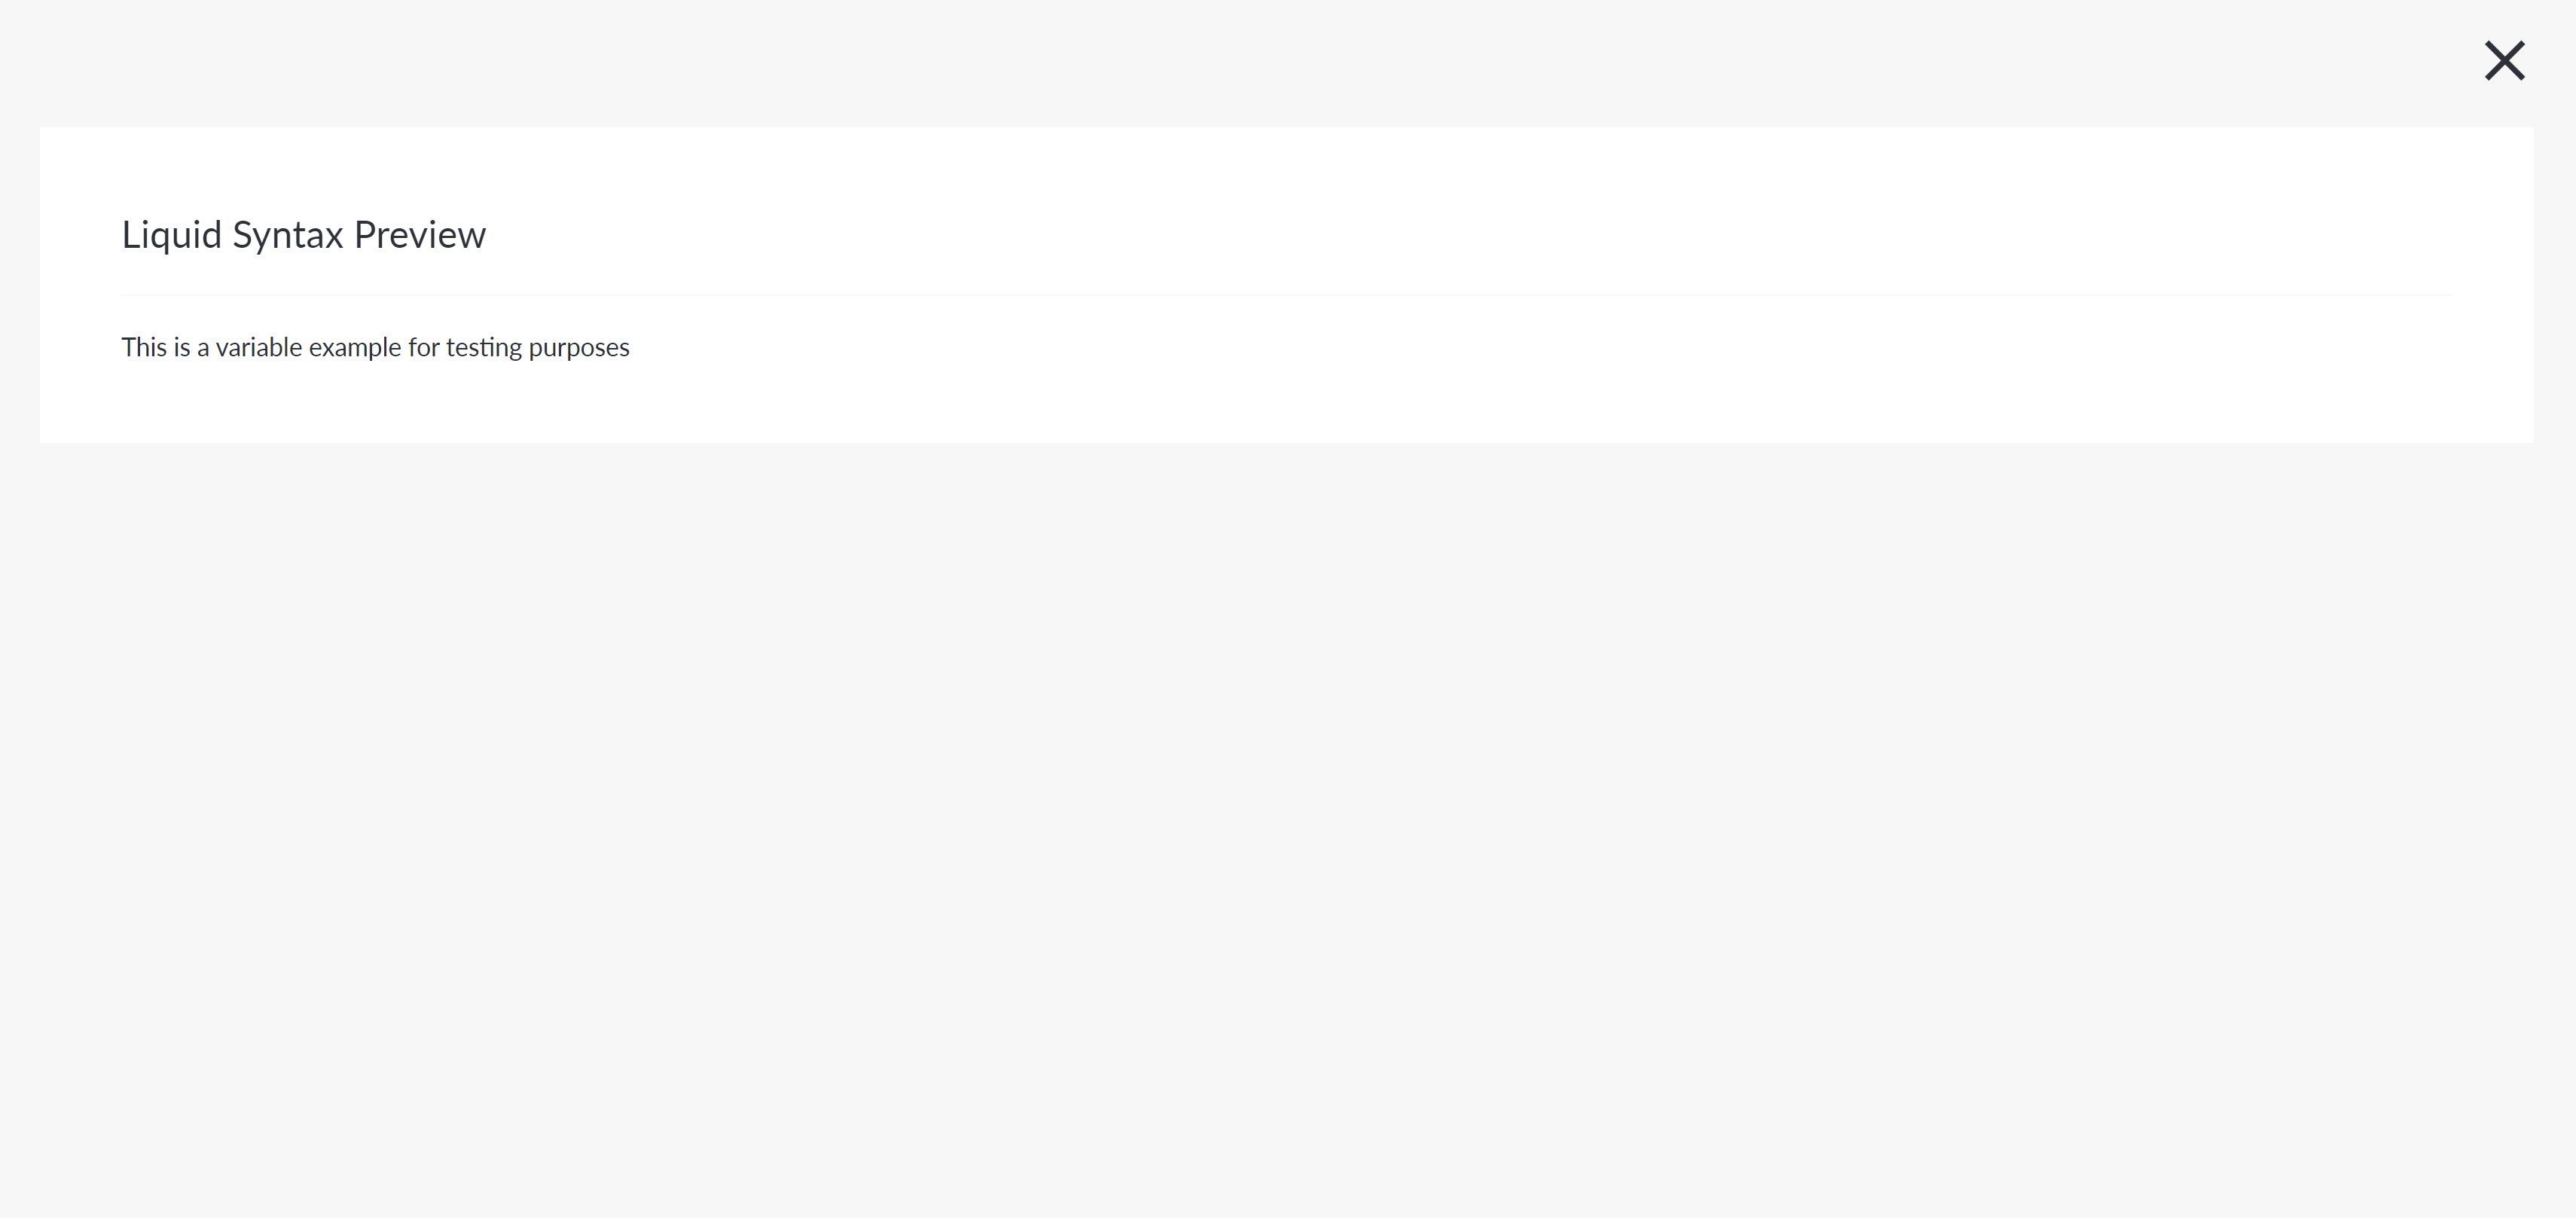
While configuring Actions, if you click Preview next to the field you entered, you can see how Guardian replaced the {{ subject1 }} variable with the 'This is a variable example for testing purposes' value:
The Variables tab displays the existing custom variables that have been added to your Guardian instance. Variable details are displayed in the following table columns:
| Column | Description |
|---|---|
| Variable Name |
The text used to identify and implement the variable throughout Guardian. Use a name that is descriptive and conveys the purpose of the variable. For example, Note: Variable names cannot contain spaces or special characters (such as @, #, !, &). Use underscores to separate words instead. |
| Existing Overrides |
The number of existing overrides for a particular variable. A variable override lets you assign a new value to an already defined variable. If there's an existing override, click anywhere within a row's area to display the following:
For more information on each of the above, see Add Override. |
| Default Value | The data to be populated in the variable |
| Actions |
For each existing variable, you can perform a set of pre-determined actions against it. Click the Ellipsis button (
|
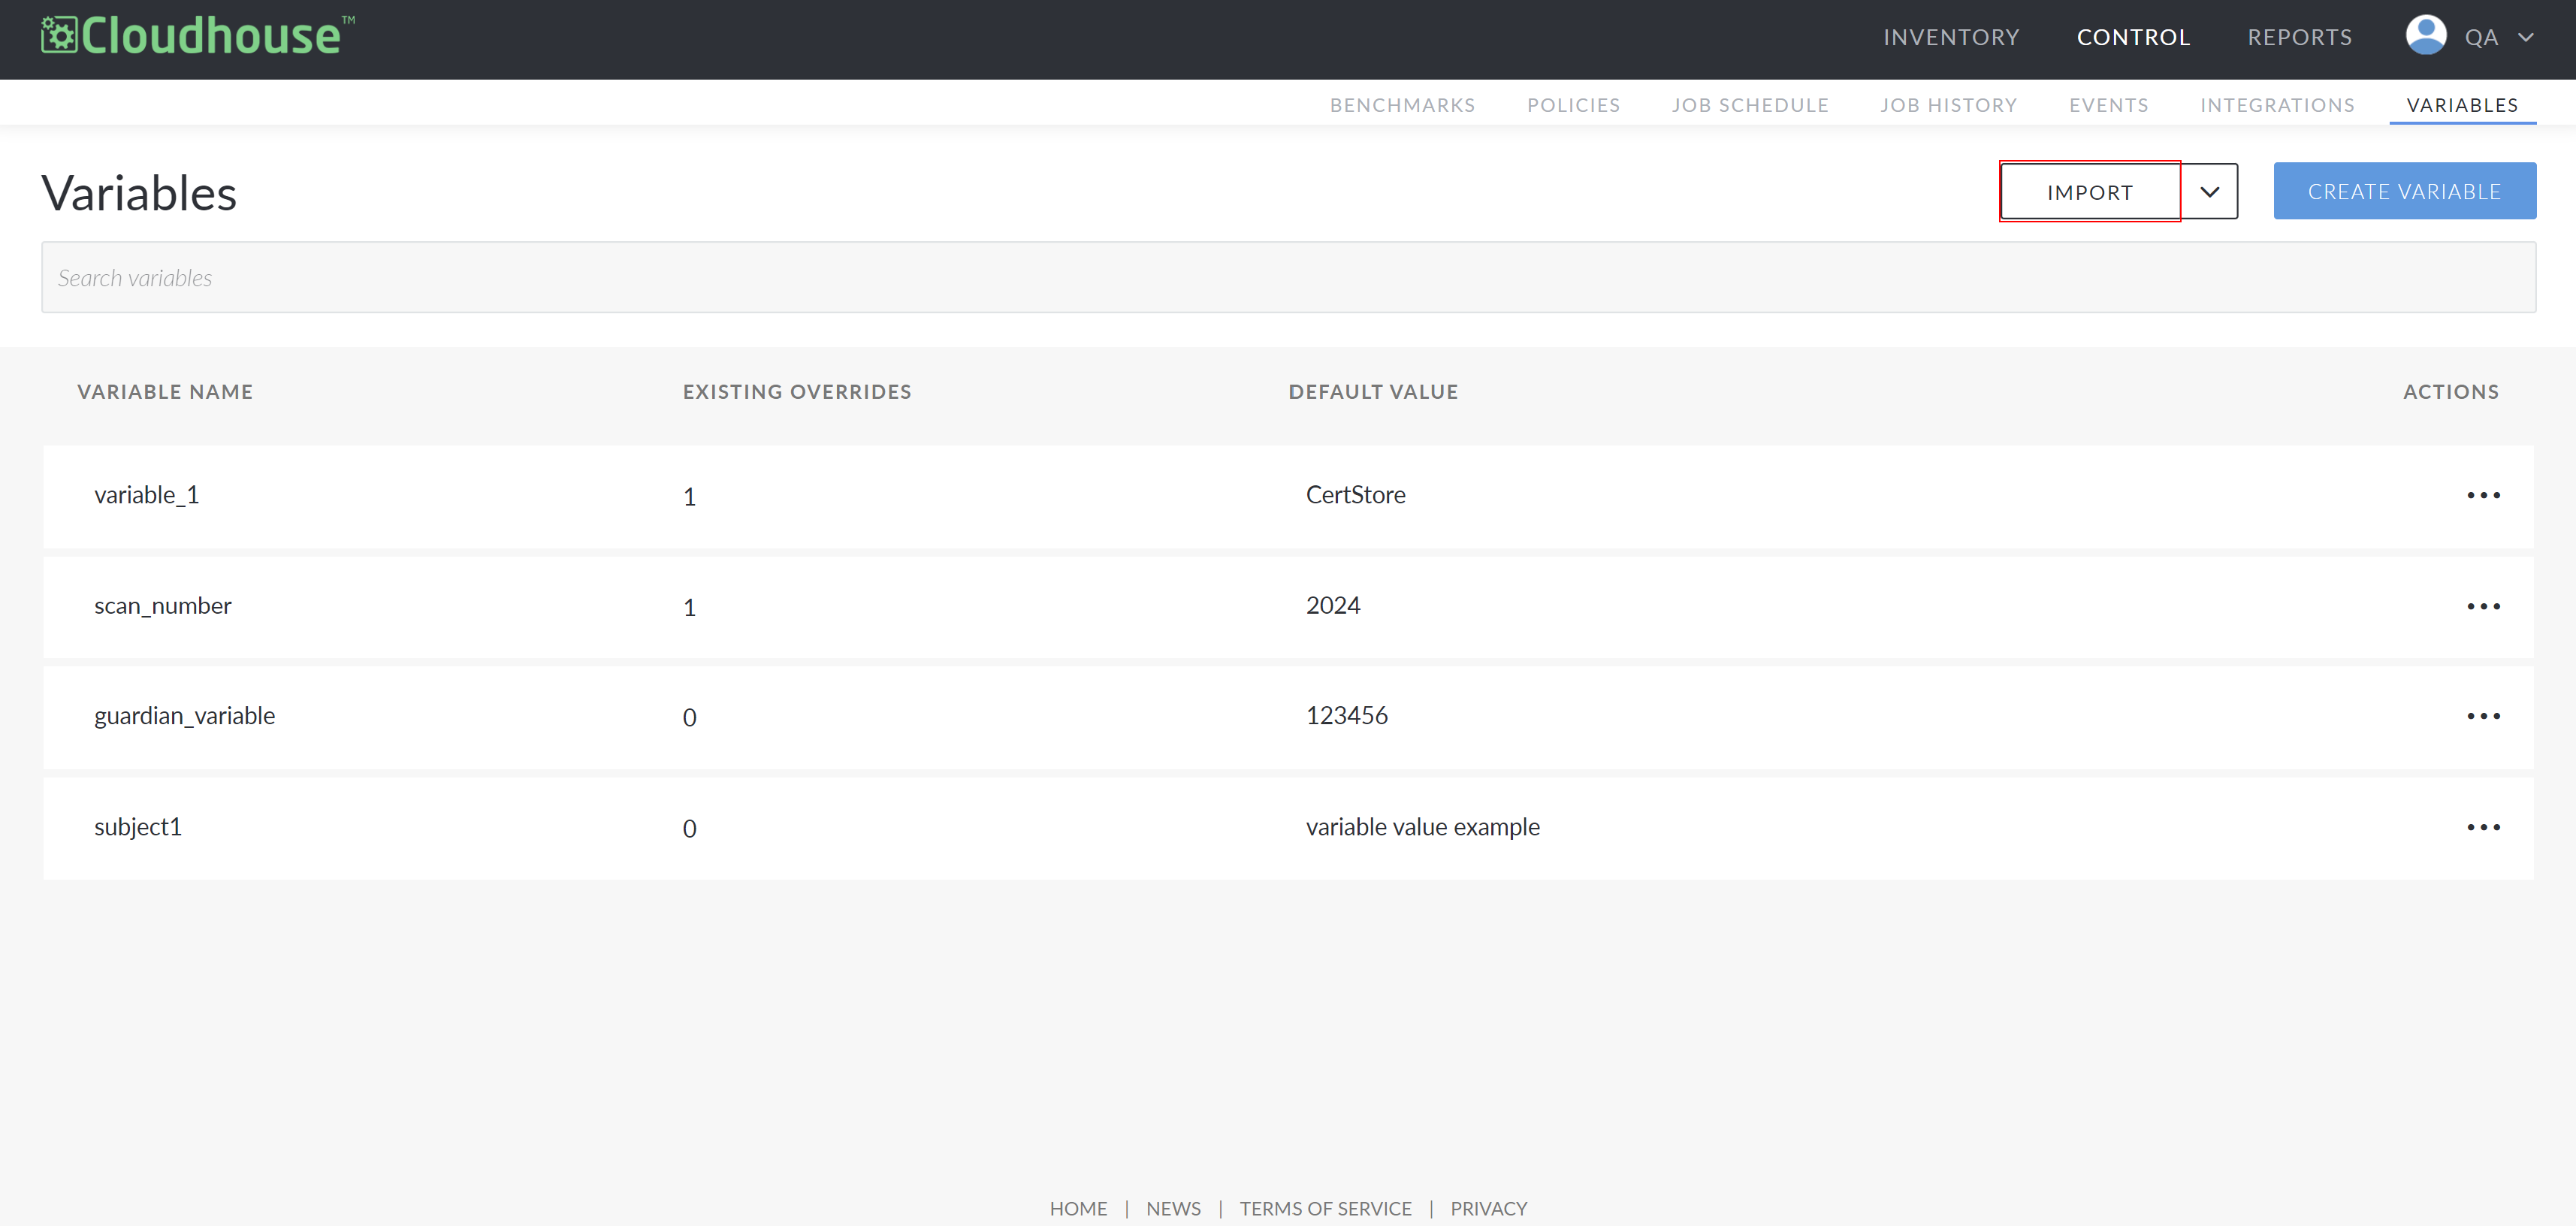
Note: You can import and export a JSON file containing variable values. For more information, see Import and Export Variables.
Create a Variable
Creating a variable allows you to set a custom value that can be used throughout Guardian and automatically updated in case you need to change its value. By creating a custom variable, you ensure all instances where the variable is being used are consistently updated.
To create a variable, complete the following:
-
In the Guardian web application, navigate to the Variables tab and click the Create Variable button. The Create Variable page is displayed.
-
Here, you are required to complete the following fields:
Field Description Variable Name The text used to identify and implement the variable throughout Guardian. Use a name that is descriptive and conveys the purpose of the variable. For example,
node_nameandnode_group.Note: Variable names cannot contain spaces or special characters (such as @, #, !, &). Use underscores to separate words instead.
Variable Value The data you wish to replace the variable when used throughout Guardian. Enter a string value depending on where the variable is intended to be used. For example, ' https://example.com' for a URL field or 'Guardian Directory' for a directory name. -
Once complete, click Save Variable.
Once you create a variable, it is added to the Variables page. You can then perform a set of pre-determined actions against it. For more information, see below.
Edit a Variable
If you want to change a variable's name or value, you can edit them on the Variables page. If you change a Variable Value, Guardian automatically updates each of the instances being used throughout Guardian, saving you some time.
Warning: If you change a Variable Name, you have to update each of the instances of the variable being used throughout Guardian, otherwise the variable value will no longer be displayed.
To edit a variable, complete the following:
-
Click the Ellipsis button (
 ) next to the variable you want to edit and select Edit Value. The Edit Variable page is displayed.
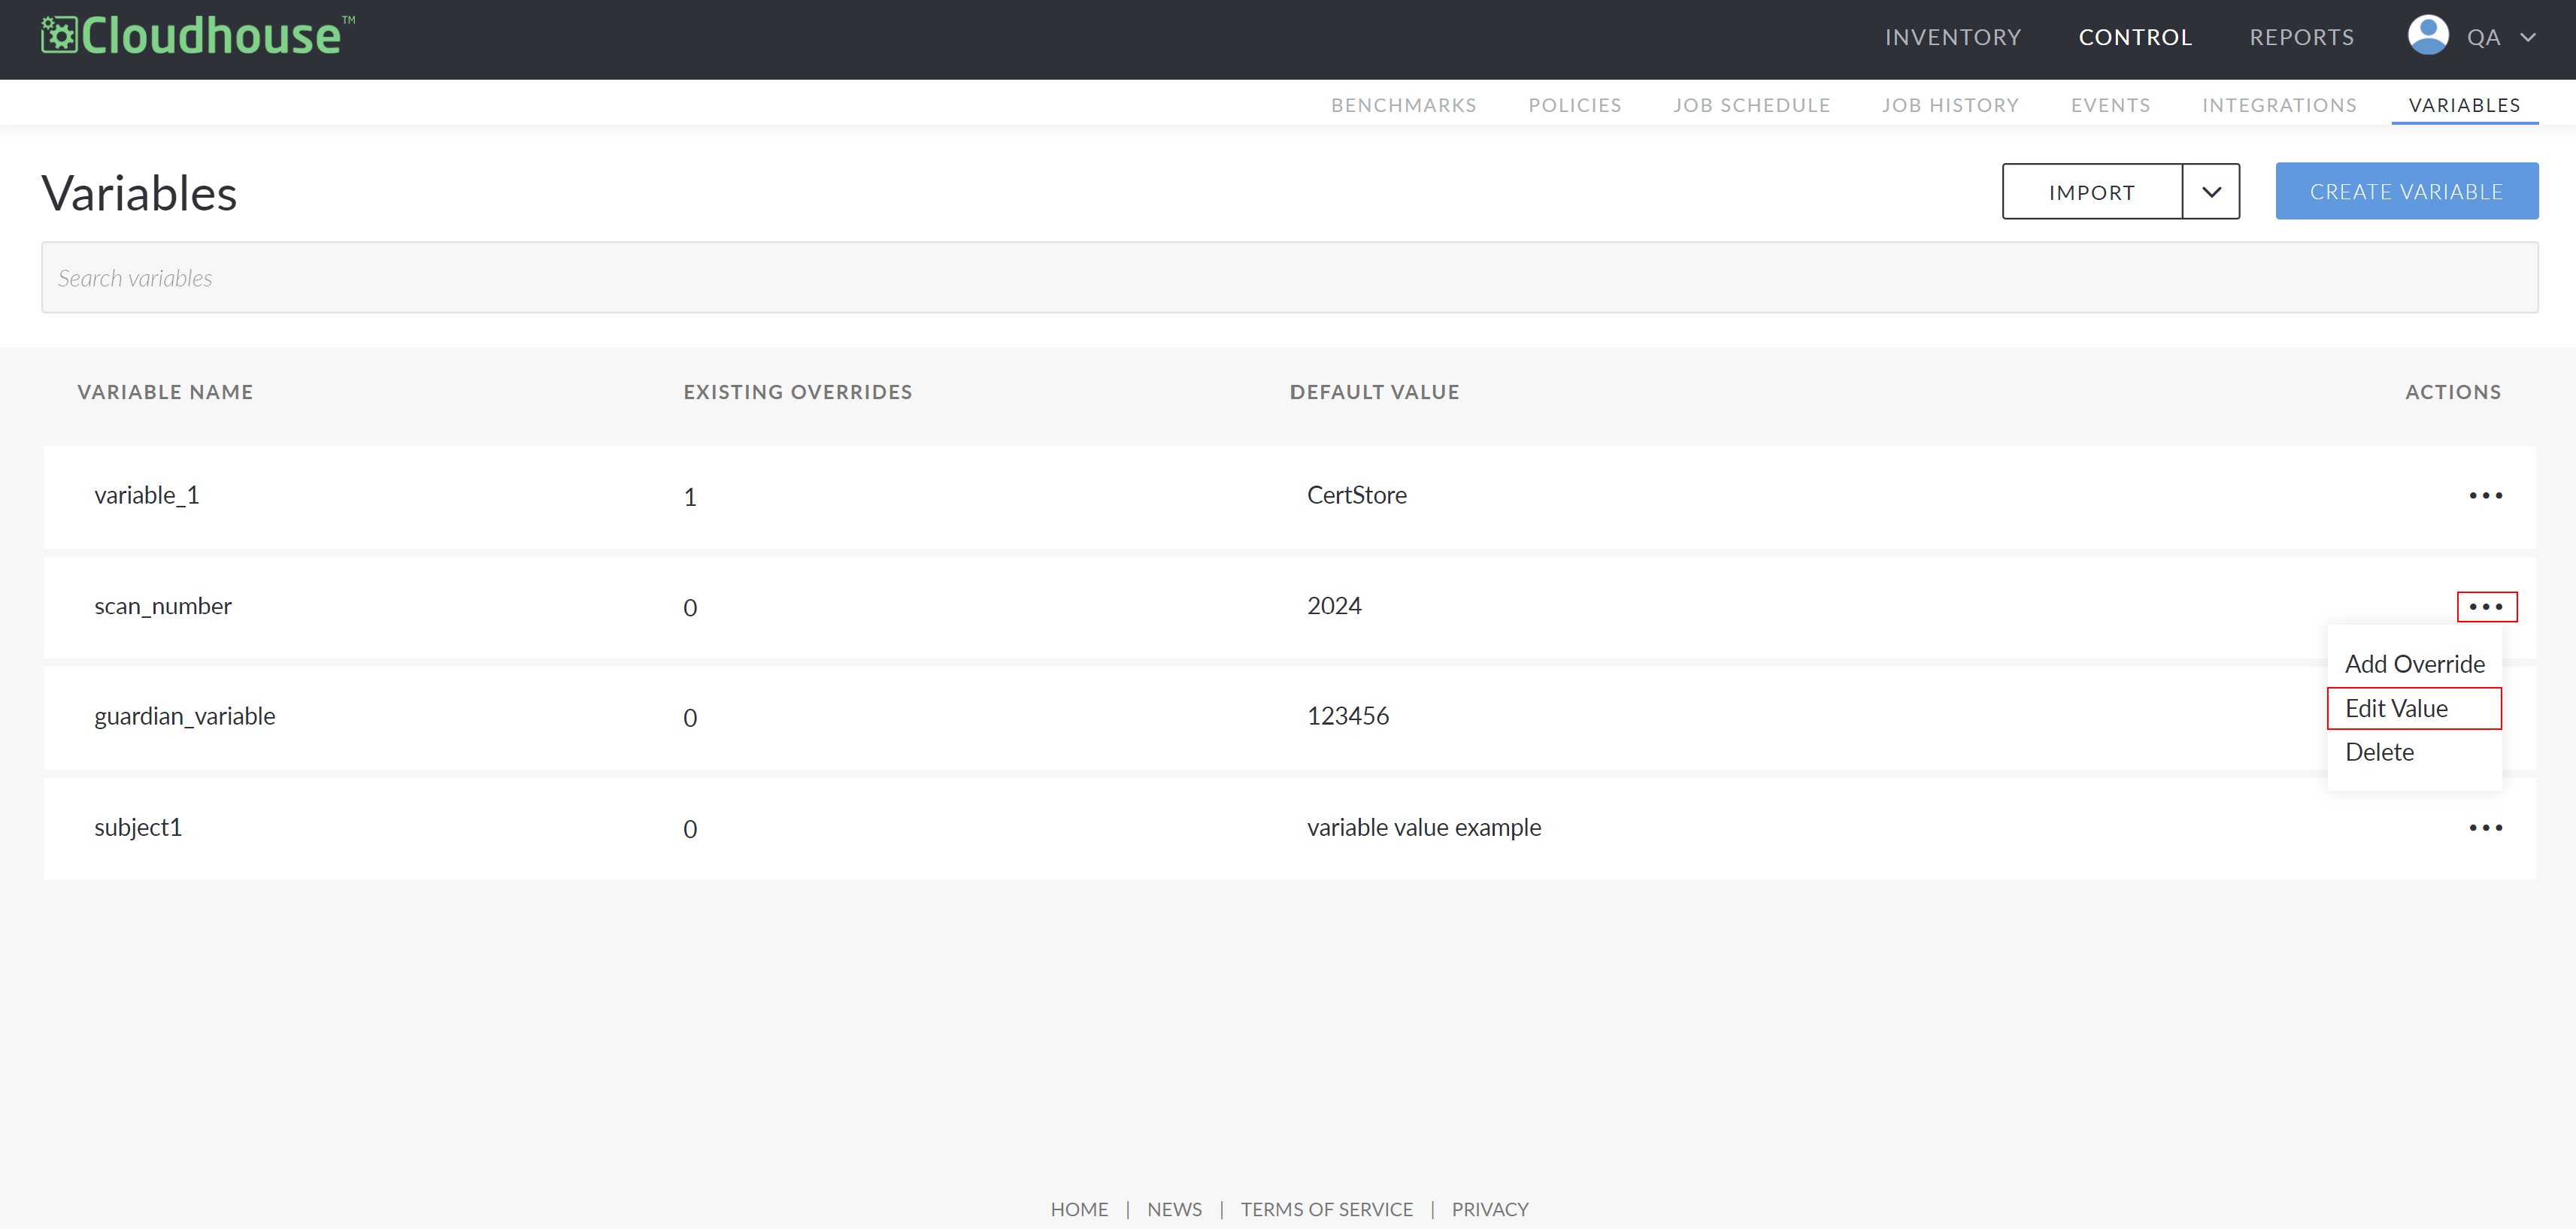
-
Here, you can modify the following fields:
Field Description Variable Name The text used to identify and implement the variable throughout Guardian. Use a name that is descriptive and conveys the purpose of the variable. For example,
node_nameandnode_group.Note: Variable names cannot contain spaces or special characters (such as @, #, !, &). Use underscores to separate words instead.
Variable Value The data you wish to replace the variable when used throughout Guardian. Enter a string value depending on where the variable is intended to be used. For example, ' https://example.com' for a URL field or 'Guardian Directory' for a directory name. -
Once complete, click Save Variable.
The variable is then updated with the new data and displayed in the Variables page.
Delete a Variable
If a variable is no longer needed, you can permanently delete it from your Guardian instance.
Warning: By deleting a variable, you also need to delete the instances where the variable is being used throughout Guardian, otherwise the variable value will no longer be displayed.
To delete a variable, complete the following:
-
Click the Ellipsis button (
) next to the variable you want to delete and select Delete.
-
Click Yes to proceed with deleting the variable.
Once complete, the variable is permanently deleted from your Guardian instance and cannot be retrieved.
Add Override
By adding an override to a variable, you can override an already defined variable with different values that can be used for different types of content, including a specific node group or environment. This is helpful where one node group, for example, may contain significant configuration differences compared to another. In this scenario, adjustments may be required to specific variables to accommodate that configurational discrepancy. Rather than creating a separate set of variables for that one group, you can add an override to the original variable that is only present on the selected node group.
Note: For more information, see Environment Variable Overrides.
To add an override to a variable, complete the following:
-
Click the Ellipsis button (
) next to the variable you want to add an override to and select Add Override. The Create Variable Override page is displayed.
-
Here, you are required to complete the following options:
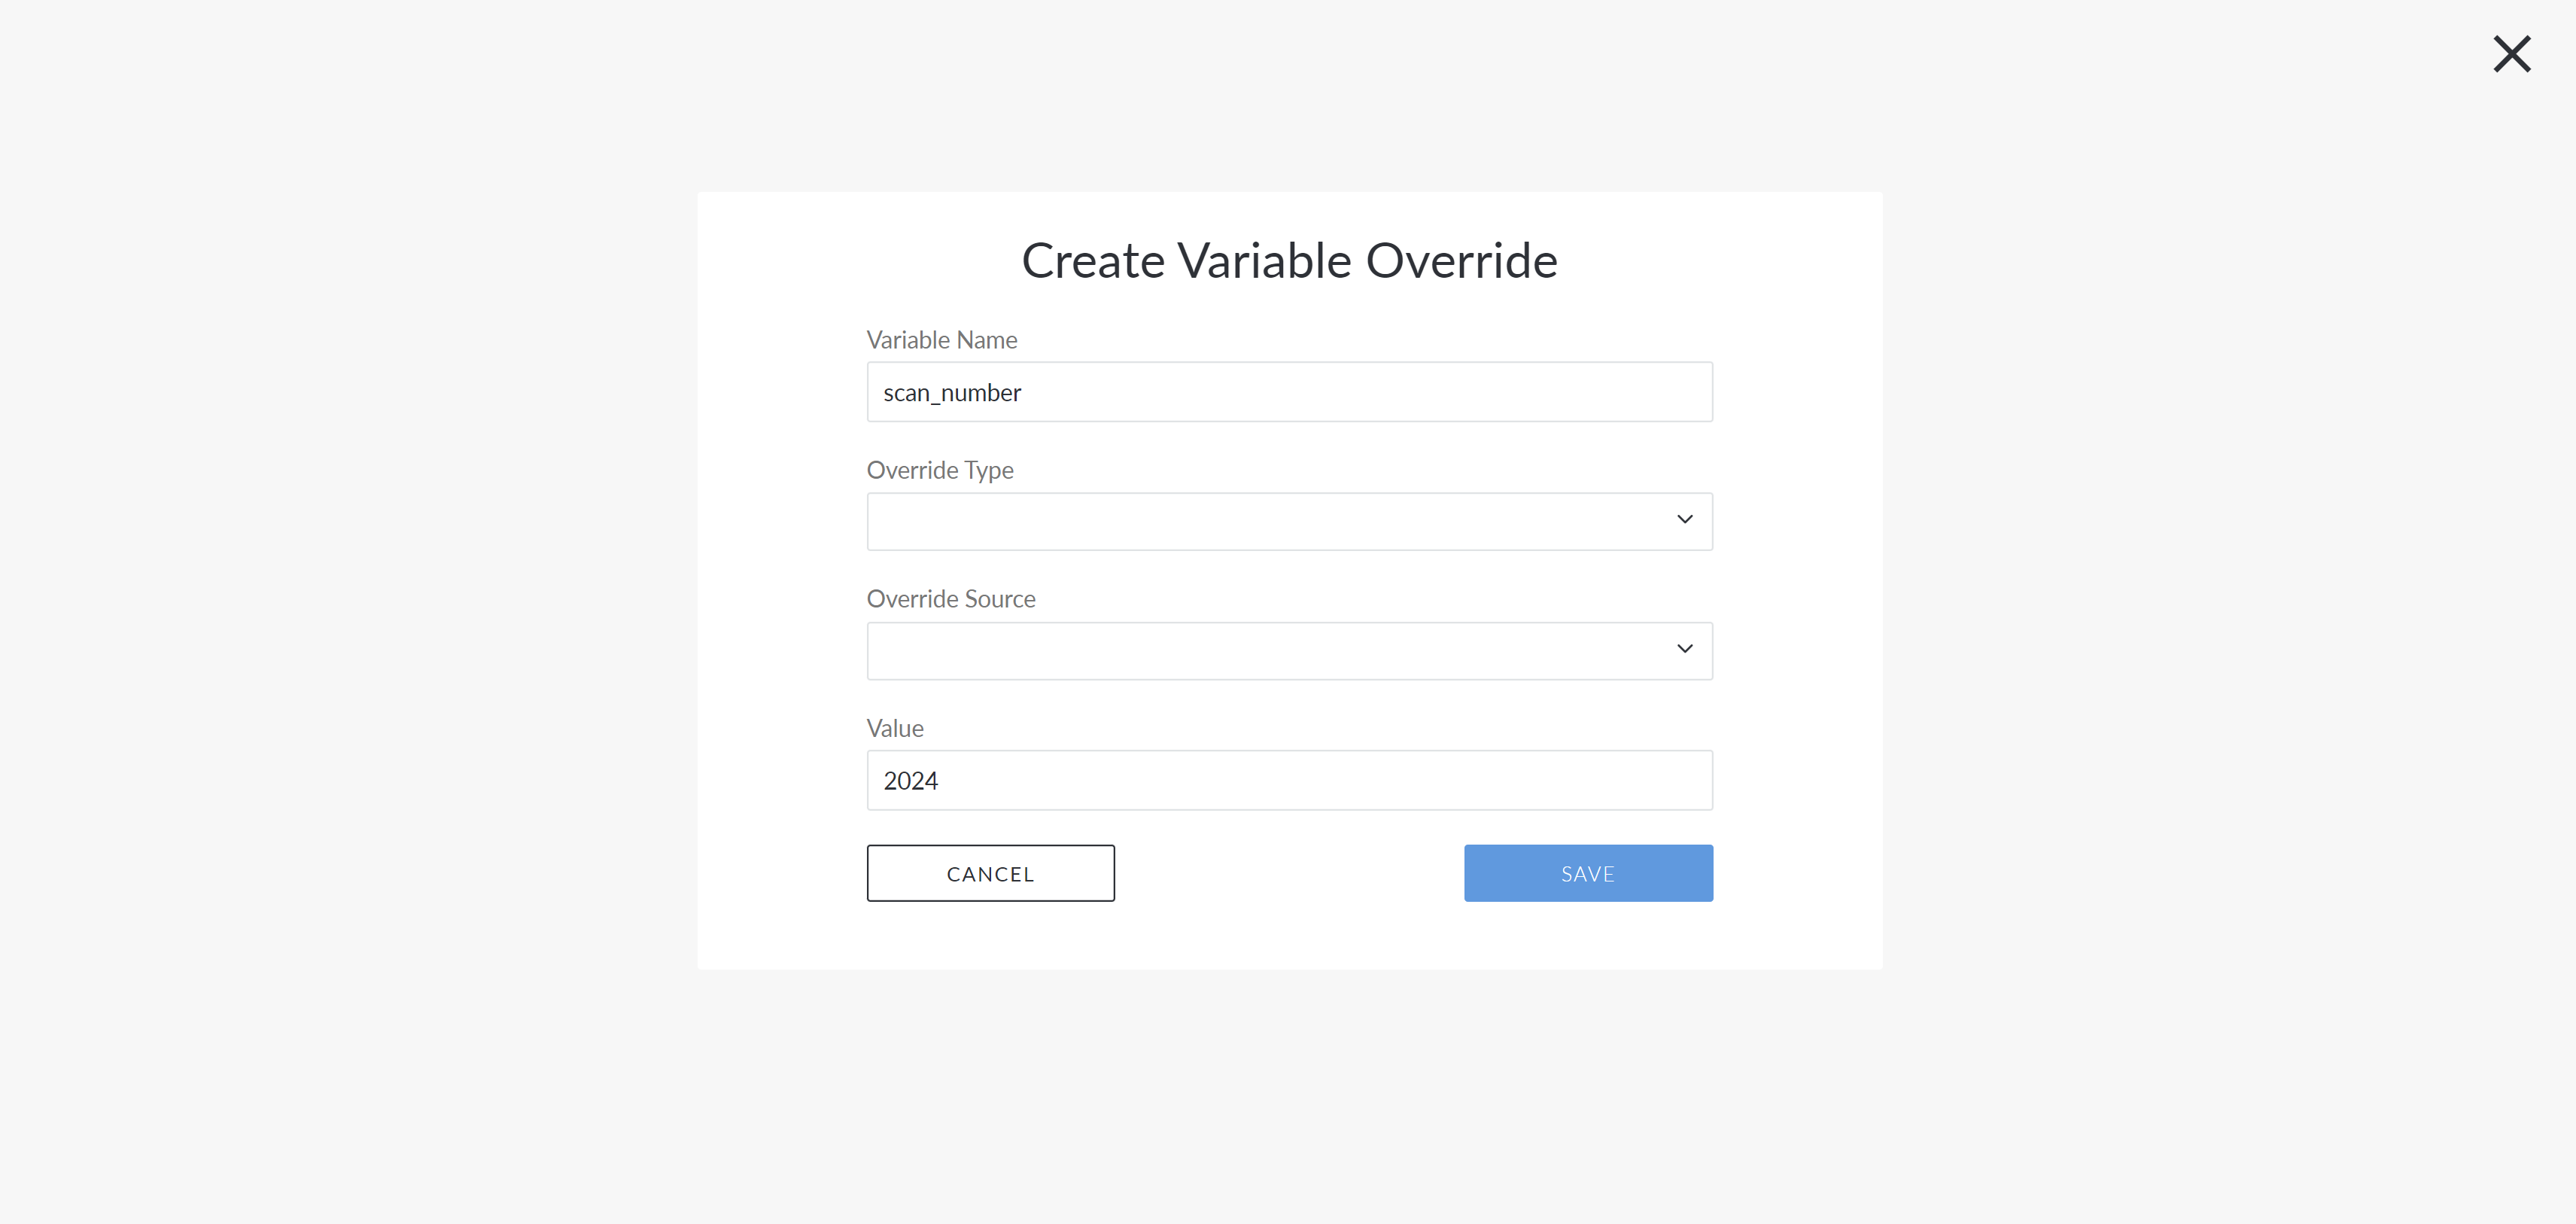
Option Description Variable Name field The text used to identify and implement the variable throughout Guardian. This field is read-only and cannot be changed from this page.
Tip: To edit the variable name, see Edit a Variable.
Override Type drop-down list The type of override you want to add a new value to. Select one of the following override types:
-
'Environment' – Select to apply the override to a specific environment.
-
'Node Group' – Select to apply the override to a specific node group.
Override Source drop-down list Where you want the override to be used. The list displayed here differs depending on the option you selected in the Override Type drop-down list.
-
If you selected 'Environment', a list of the environments configured in your Guardian instance is displayed.
-
If you selected 'Node Group', a list of the node groups configured in your Guardian instance is displayed.
Value field The data you wish to replace the variable when used throughout Guardian. Enter a string value depending on where the variable is intended to be used. For example, ' https://example.com' for a URL field or 'Guardian Directory' for a directory name. -
-
Once complete, click Save.
Once you add an override, the Existing Overrides column is updated with the total number of existing overrides. To view an override's details, click anywhere within the variable's row.
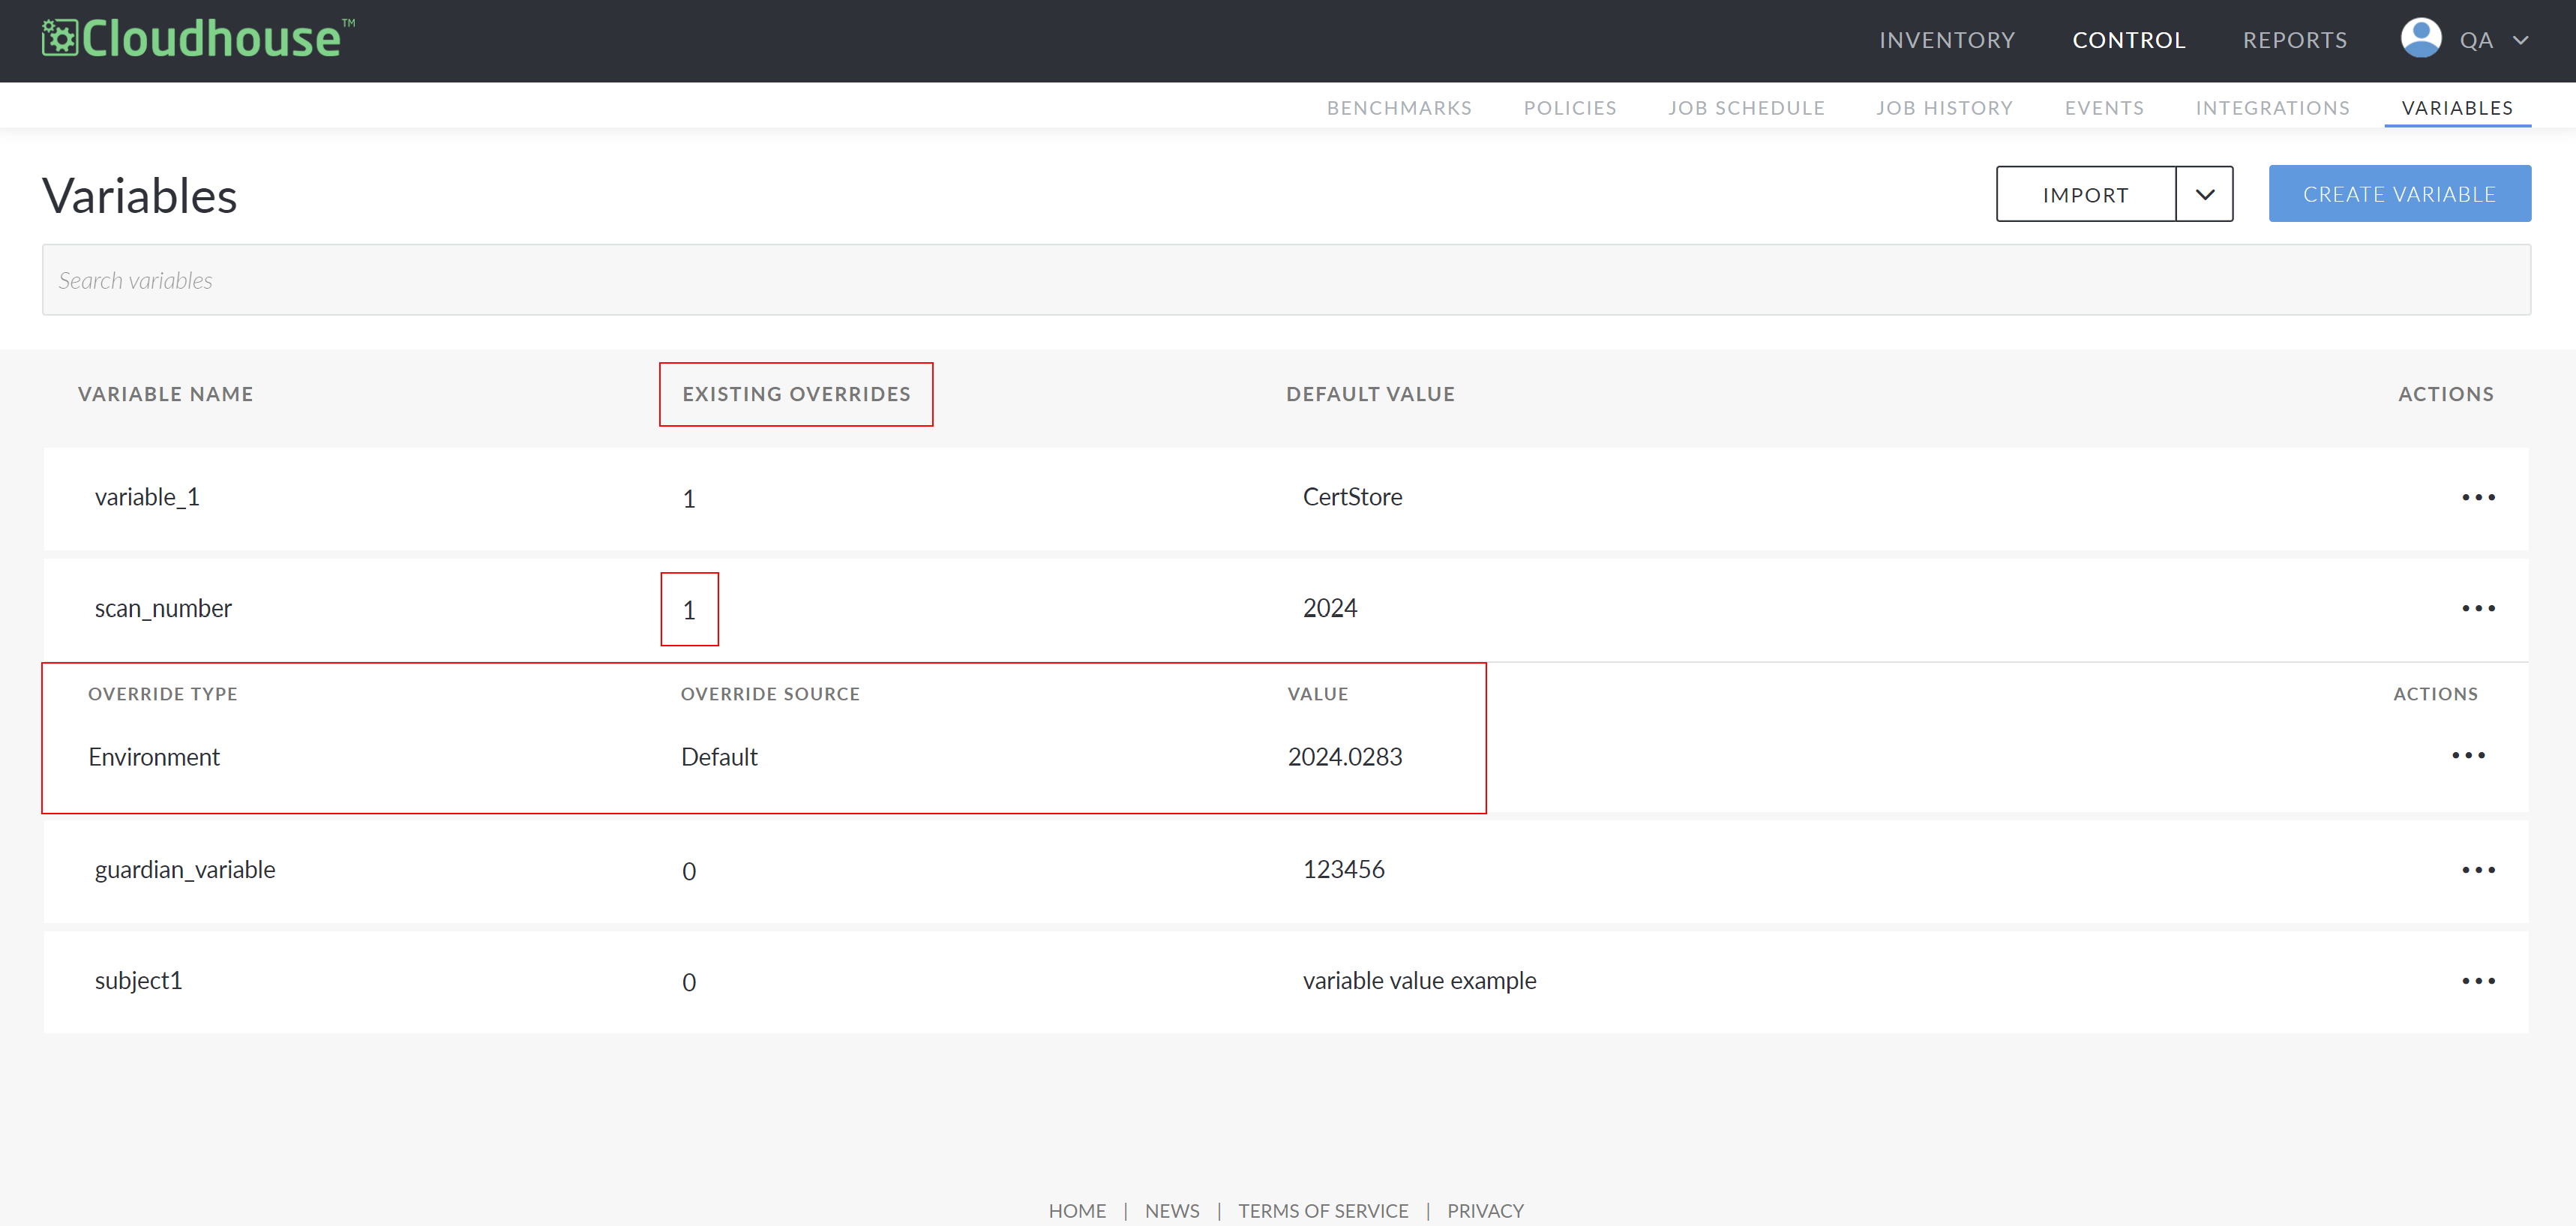
Note: To edit or delete an override, click the Ellipsis button () next to the override and select Edit Value or Delete.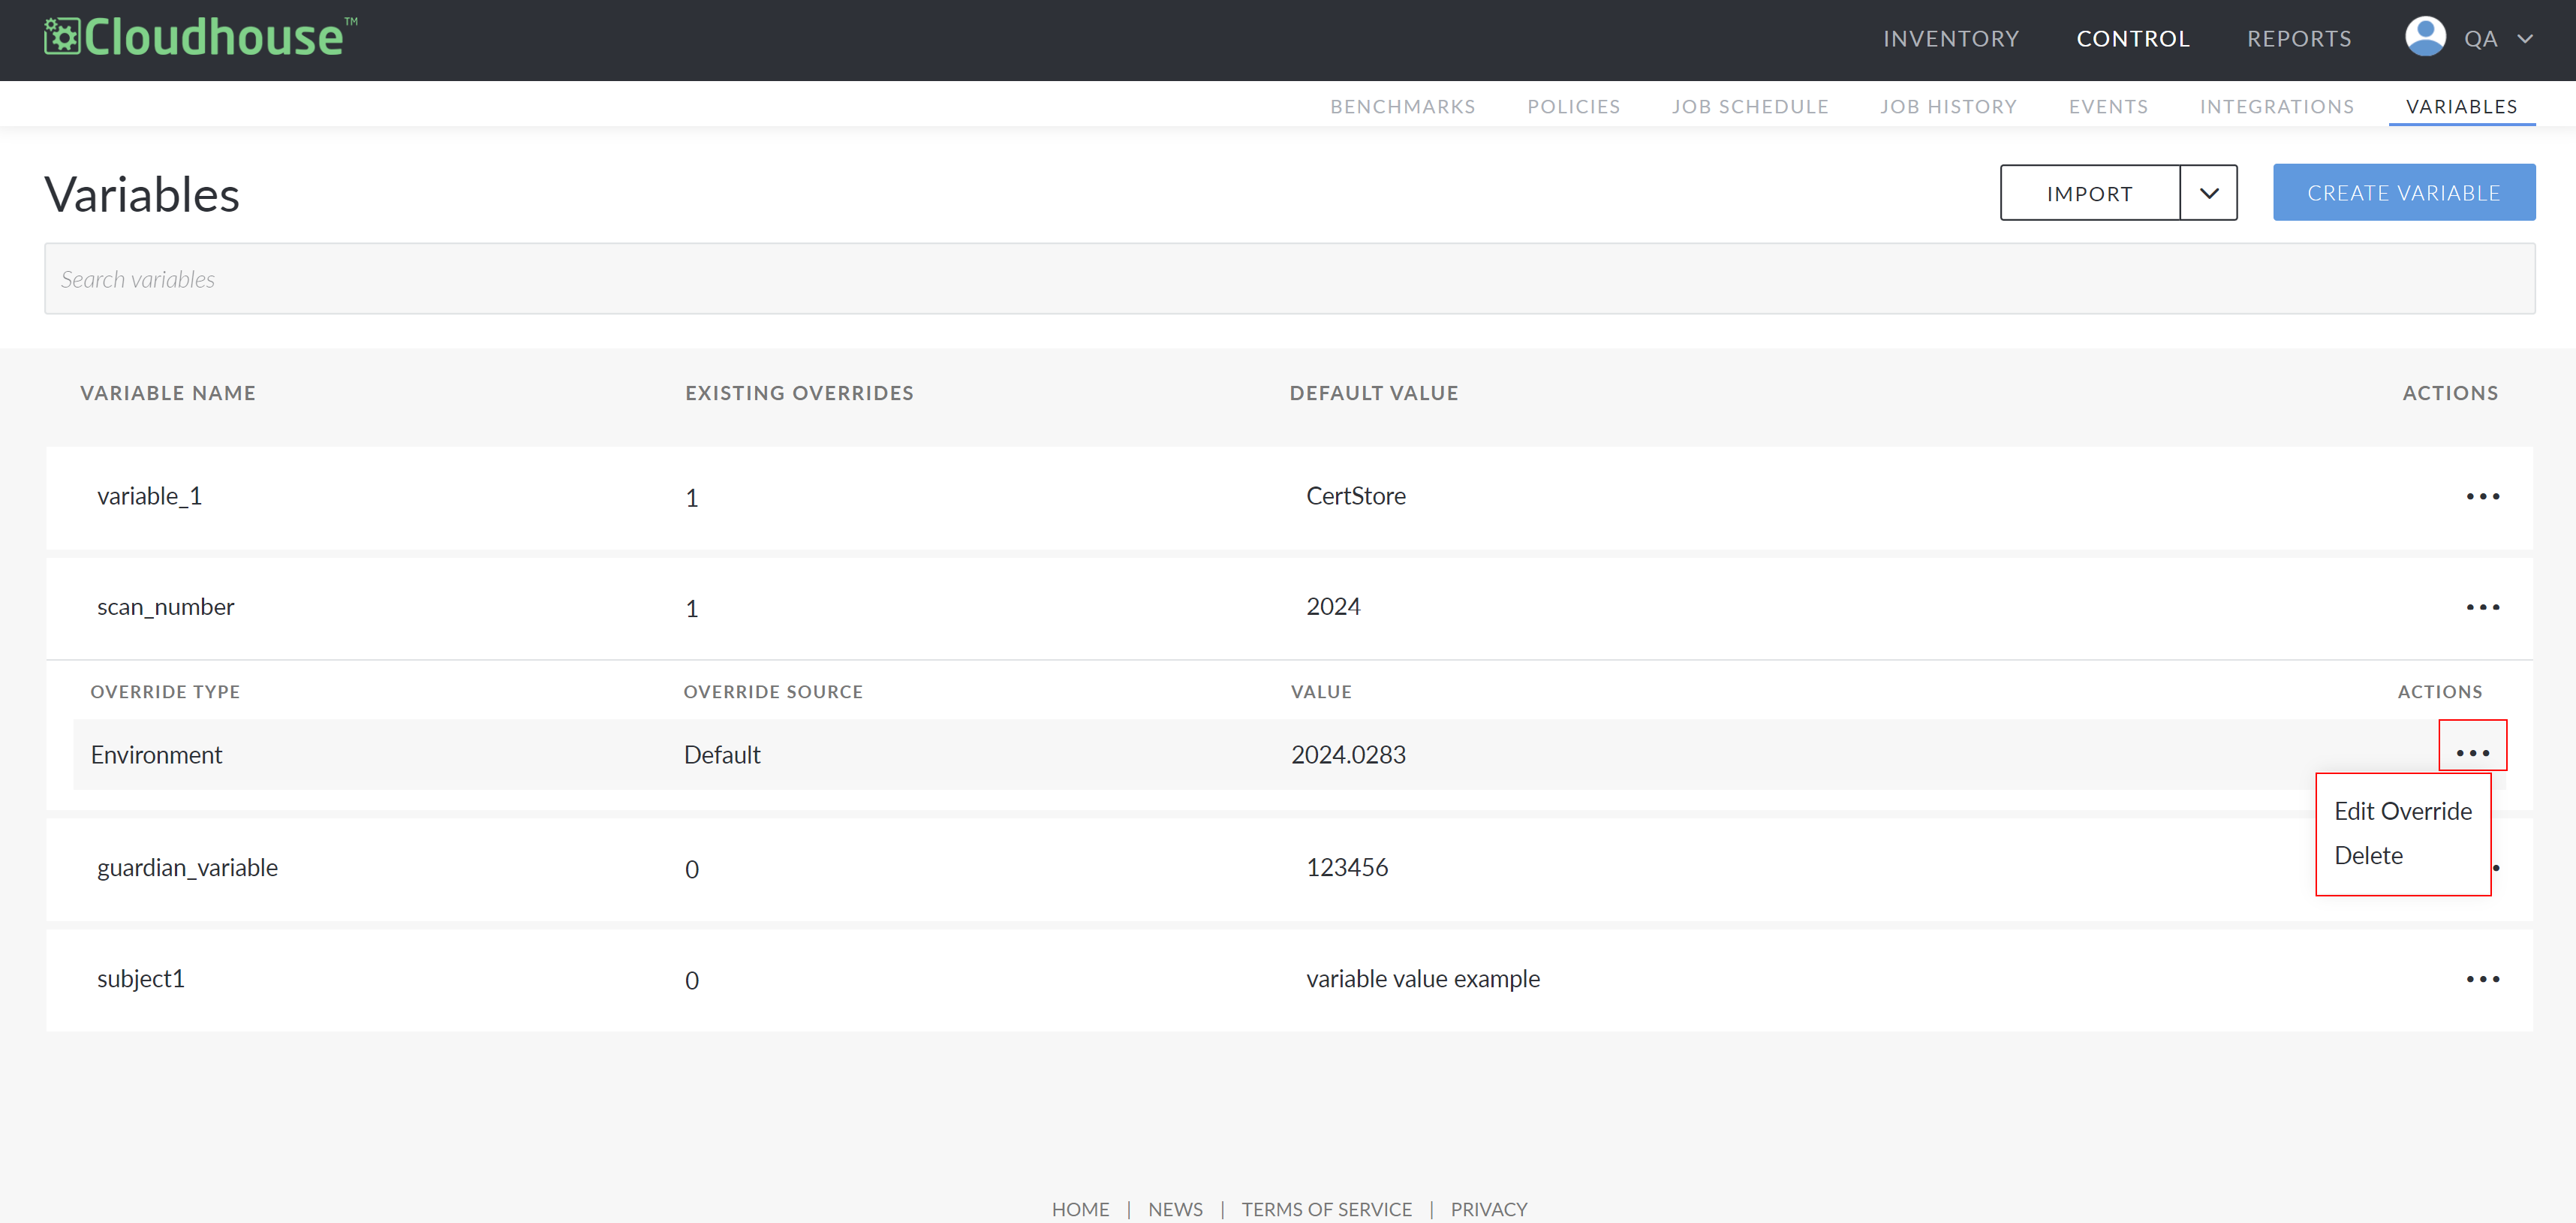
Import and Export Variables
You can import a JSON file containing variable values to create several variables at once instead of creating variables individually.
Note: To export the existing variables as a JSON file, click the drop-down menu next to the Import button and select Export Variables.
To import variables, complete the following:
-
In the Guardian web application, navigate to the Variables tab and click the Import button. The Import Variables JSON page is displayed.
-
Drag and drop your JSON file into the designated area. Or, click the area to select a JSON file.
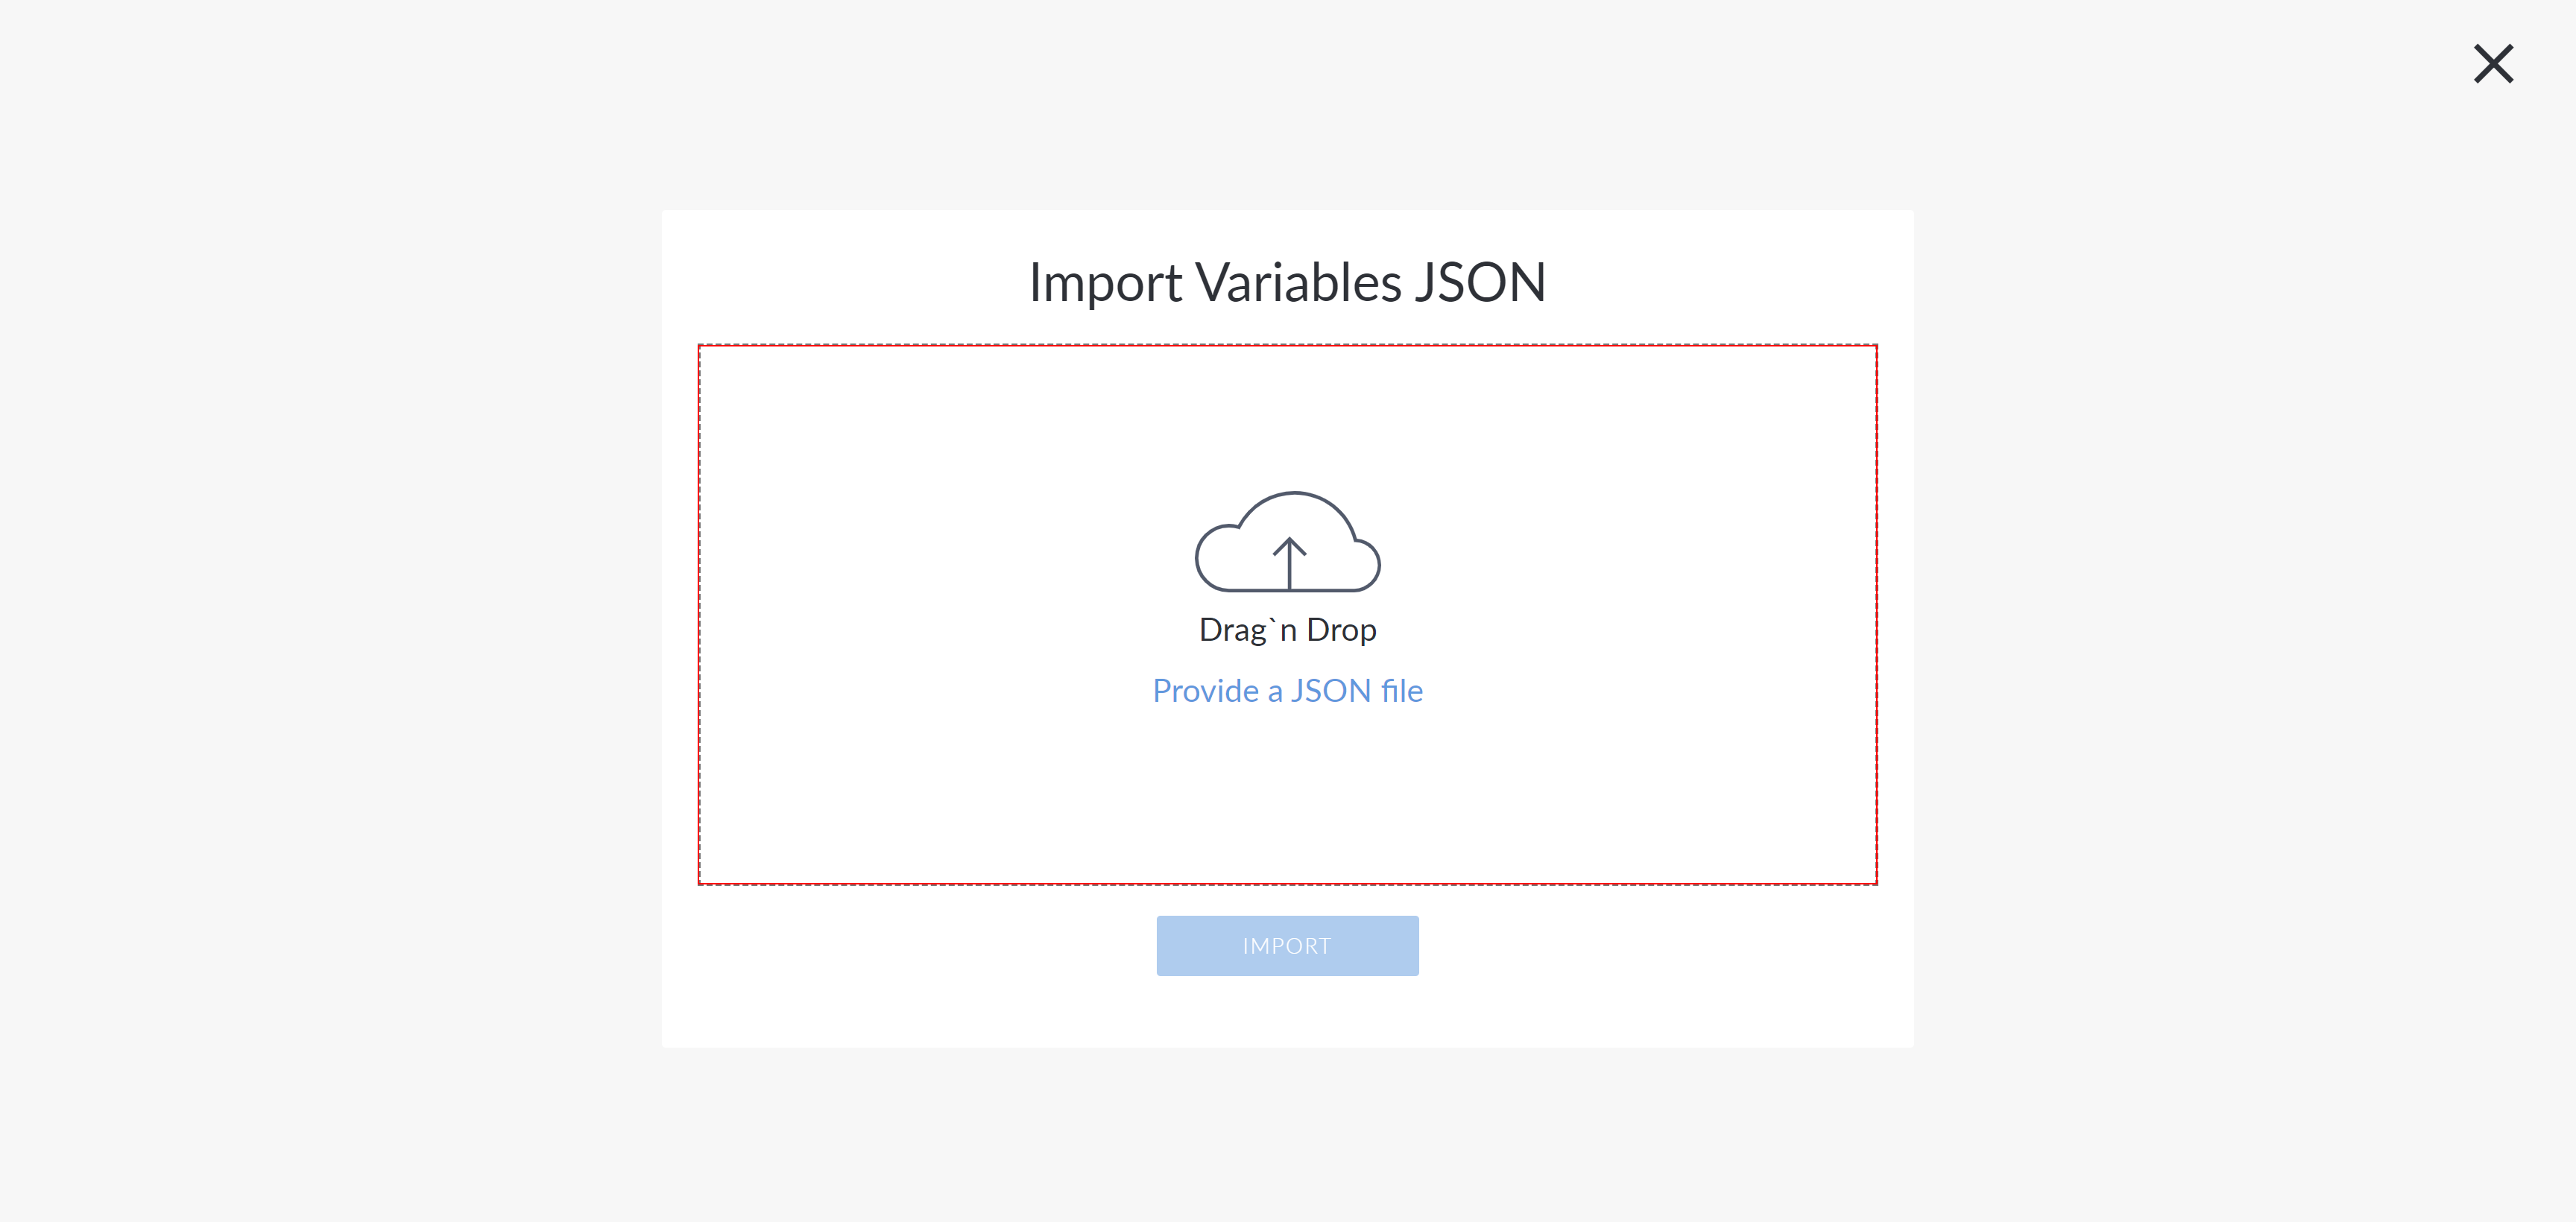
-
Click Import to add the variables to your Guardian instance.
If successful, a message is displayed and you can see the variables added to the Variables page. If unsuccessful, an error message is displayed. Use the information displayed in the error message(s) to troubleshoot the values in the JSON file.