This article describes how to set up alerts to track upcoming SSL expiration.
Keeping your SSL certificates current is crucial to the security and accessibility of your externally facing infrastructure. An expired certificate can lead to company distrust and may even discourage people from visiting your site, as many modern browsers block users from accessing websites with expired certificates as a safety precaution.
This guide describes how to use Cloudhouse Guardian to send an alert when any of your company's websites have an SSL certificate that is expired or expiring within the next 30 days.
Overview
Here we are going to:
-
Add a website node.
-
Create a policy to check for upcoming expiry and assign it to all websites.
-
Create a custom event view to track when the policy detects an expiring SSL certificate.
-
Assign an alerting action to that custom view to notify when a certificate is expiring.
Add a Website Node
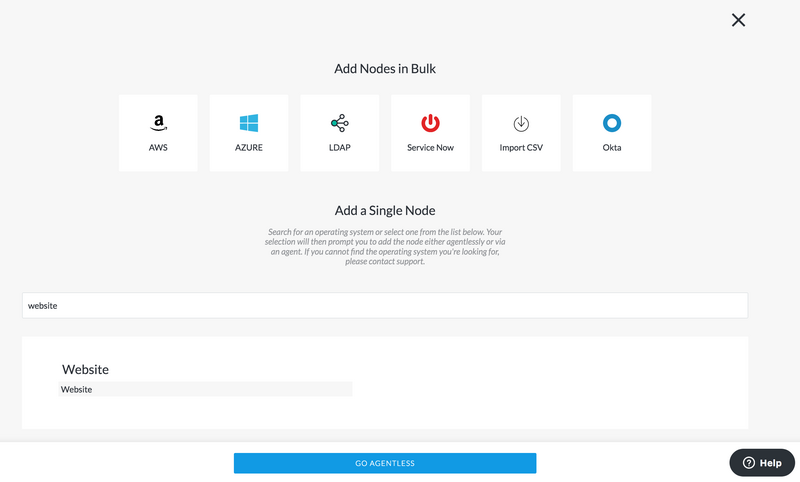
To add a single website as a node, navigate to the Add Nodes tab (Inventory > Add Nodes). Use the search bar to search for the website node type, select Website then click Go Agentless.
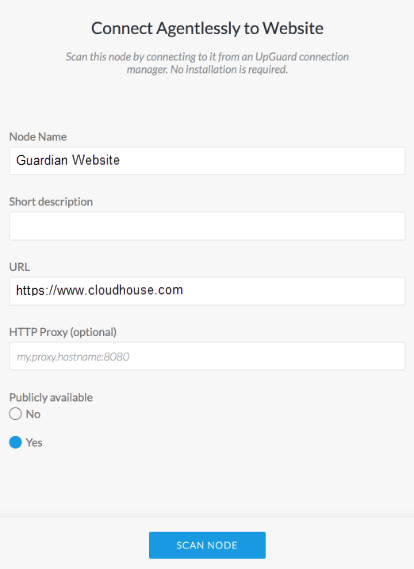
Fill in a nice name for the node and an optional additional short description. Enter the website's URL and select whether the website is publicly accessible from the internet or not (this will help determine how we attempt to generate a node scan for this node). Click Scan Node to finish configuring the node's settings and initiate the first scan.
After the node has been scanned you should be able to view the external configuration of the website. You will also notice that the new website node has been added to a node group called Websites. The Websites group is created automatically when website nodes are added to the system and automatically includes any website nodes added in the future.
For more information on bulk importing nodes, please see Add Nodes in Bulk.
Create a Policy
The next step is to create a policy that we will eventually attach to the Websites node group so that it will check every website-based node with every scheduled or ad-hoc node scan.
The easiest way to create an SSL expiry check is to use the added website above as a baseline. If you are not already viewing the contents of the baseline website's node scan, navigate to the Monitored tab (Inventory > Monitored) and then click on the node's name to view the most recent scan details.
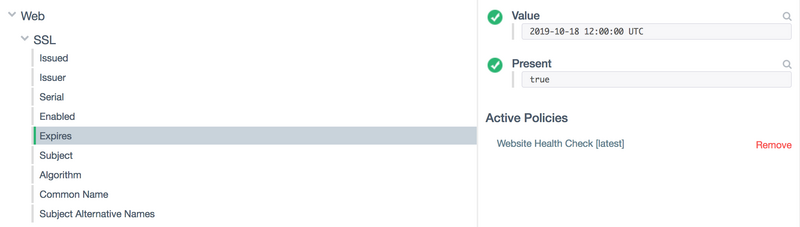
The SSL Expiry date for a particular website can be found under Web > SSL > Expires > Value. Navigate to the Expires item by expanding the Web and SSL views, then right-click on the actual date value and select Add to Policy on the Websites node group, then New Policy.

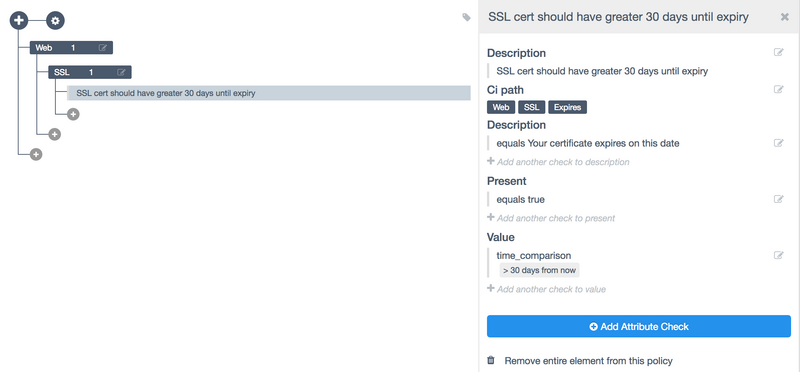
Type a name for the policy and click Build. This should create a new policy with a single check against the Expiry value. When creating a policy check from a baseline scan, the creation tool assumes that you want to comply exactly with the baseline value, so we're going to need to modify the created policy check slightly.
When viewing the policy, click on the check to bring up the right panel. Against the Value attribute, click the edit button to modify the Value check. Instead of having a Check-Type of Exact Match, change this to Time Comparison. Use the Expected conditions for value dropdown to select > and then in the textbox type 30 days from now. The policy evaluation engine will automatically re-evaluate what 30 days from now means after each scan. Click Add to add the time comparison check, then click save to save the check.
The corrected policy and check should look like the following screenshot.
All website nodes should now have this check applied to them. To confirm, navigate back to the Monitored tab and view the last scan results. The node's scan should now be augmented with a green pass and the right panel will show the results of the policy.
Create a Custom Event View
Every time a policy is evaluated against a node scan, it generates an event in the Guardian Event stream. the next step is to create a custom view that recognizes failures of our SSL cert expiry policy so we can attach an alerting action to it.
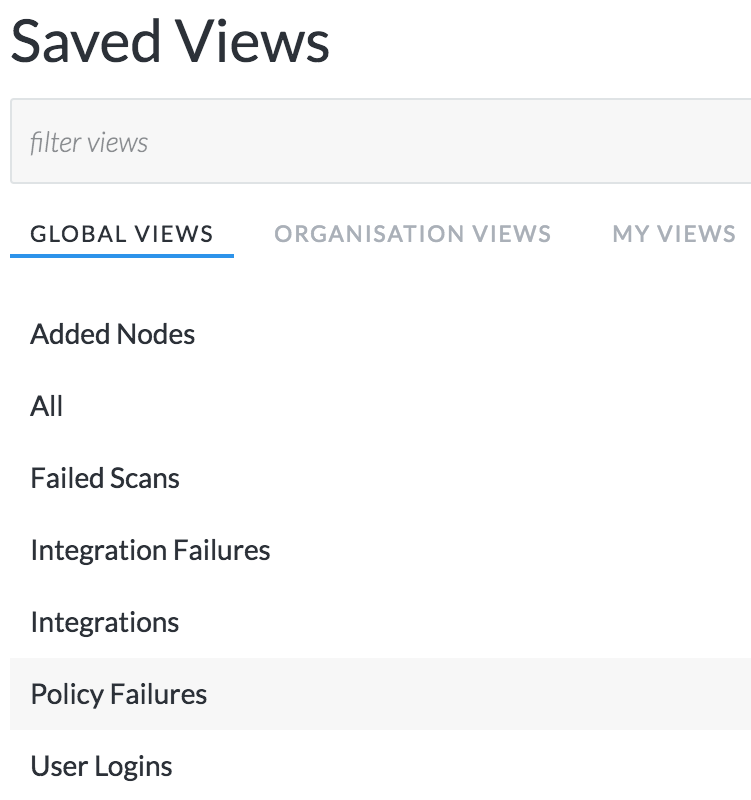
Navigate to the Events tab (Control > Events) to view all events. First, we are going to show all policy failure events by using a built-in global view. Under saved views, click on the Global View called Policy Failures.
This helps us form most of the final query we are going to use. Augment the policy failures query by adding an extra condition to find failures only for our SSL cert expiry policy. The final query should look like this (assuming you named the policy Website Health Check:
type=Policy Ran AND variables.success=false AND variables.policy=Website Health Check
Executing this query should select only failures for our SSL cert policy. You'll likely get no results this time as you've only just set up the policy against a good baseline. If you happen to have any pre-existing website nodes then policy failure (or pass) events will begin to trickle in right after their next scheduled scan. For now, click Save View and give the view a good name, such as Websites with SSL expiring.
Add an Action
You can add one or more actions to an event view. An action is triggered every time a new event that matches a query in a saved view occurs. For a particular event view, navigate to the actions page, then click Add Action.
For more information on the types of actions, please see Event Actions.