Detect AWS Multi-Account
Multi-account detection helps streamline security and compliance monitoring by enabling Cloudhouse Guardian (Guardian) to identify and track resources across different AWS accounts. The following topic describes how to integrate AWS accounts with Guardian for multi-account detection. You can set up this integration either using the CloudFormation template provided by Cloudhouse or manually configuring the required resources in the AWS Console.
Integrate via AWS Console
First, you need to integrate via the AWS console. If you don’t want to use the CloudFormation template provided by Cloudhouse, you can create the resources individually within the AWS Console by using the process described below.
Create StackSet with the AWS Console
To integrate via the AWS console, the resources need to be created individually. The following process describes how to manually create the Guardian scan user account, the Guardian scan user’s access key, the CloudFormation management account role, and finally the new CloudFormation StackSet.
Creating the Guardian Scan User – In the Root Account
If you do not have a user set up for Guardian in AWS’ Identity and Access Management (IAM) service, follow the process below to create the Guardian scan user.
-
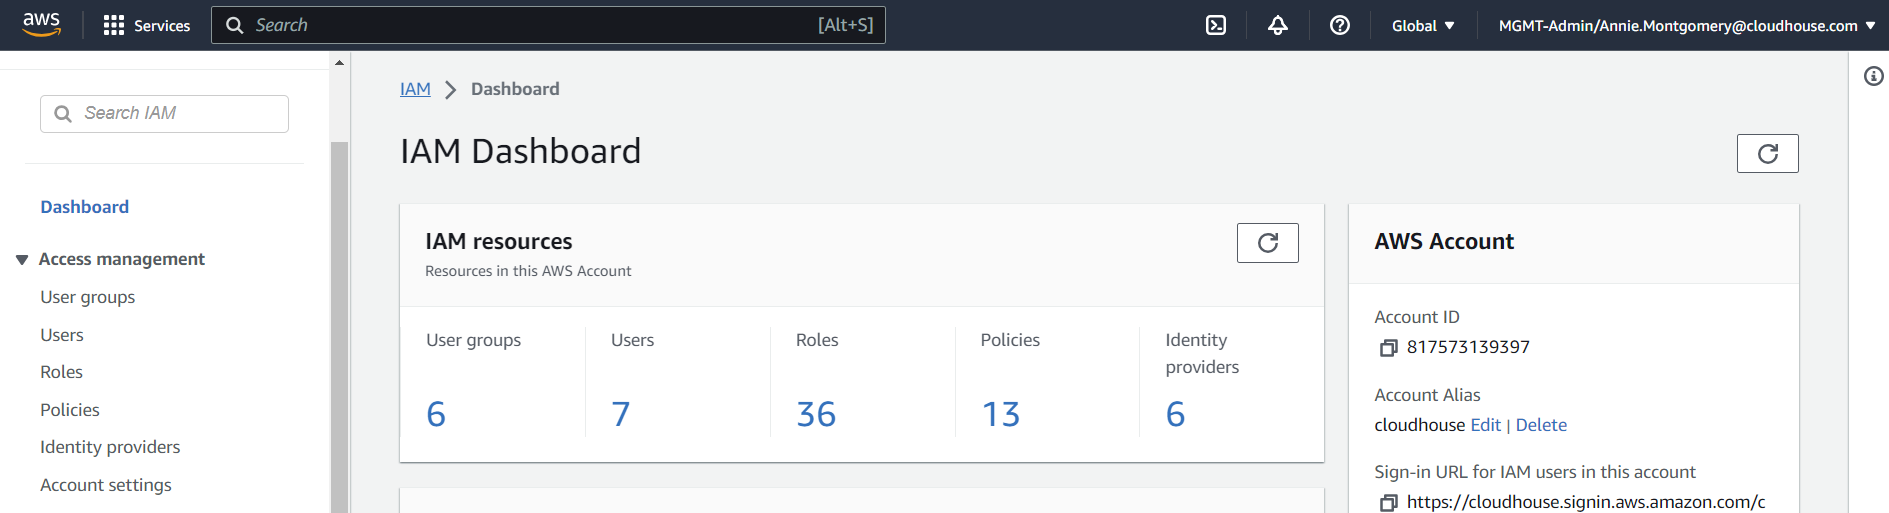
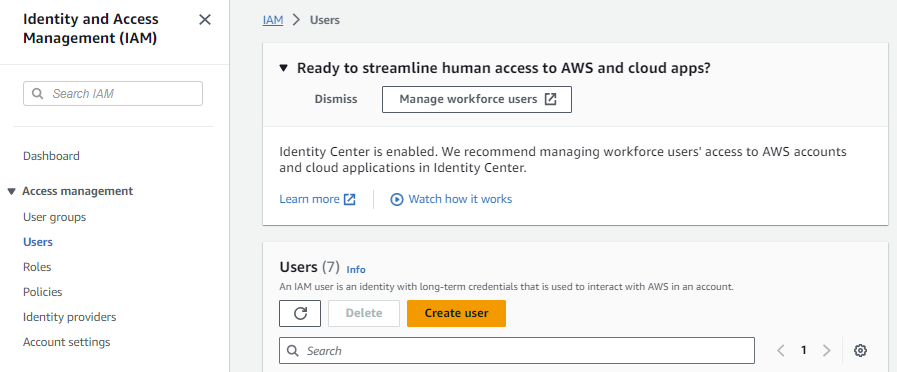
Access the IAM Dashboard (IAM > Dashboard). Then, select Users from the Access management drop-down menu on the left hand side of the screen. The Users page is displayed.
-
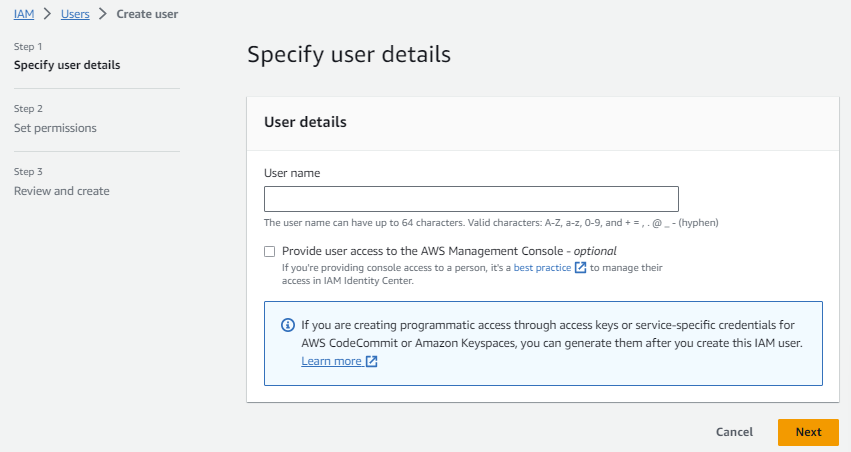
Click to Create user. The Specify user details page of the Create user process is displayed.
-
Enter a User name in the field provided, then click Next.
Note: In the provided template, this user is referred to as ‘Guardian-Integration’.
-
The Set permissions page is shown next. This root user only requires the
AssumeRolepermission against the member roles that will be deployed by the stackset. -
Choose Add Inline Policy and using the visual editor add
STS:AssumeRoleand the resource isarn:aws:iam::*:role/GuardianIntegrationMemberRole. This resource is created by the stackset. The Review and create page is displayed. -
Check the information you have provided is correct; make any adjustments as needed. Then, click Create user.
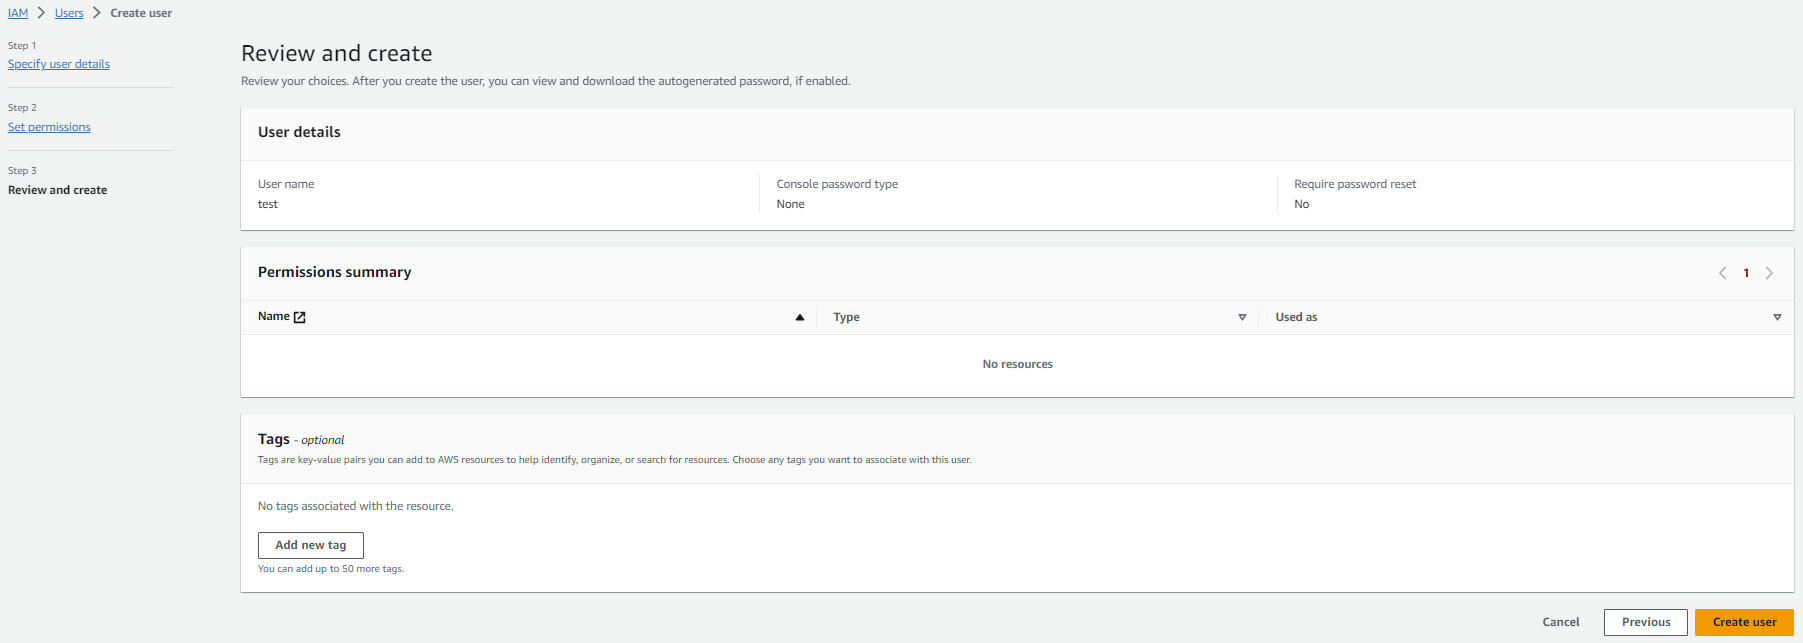
Note: Make sure to take note of the user’s ARN to create the CloudFormation Management Account role and CloudFormation StackSet. If you have an existing role you want to use, add the user’s ARN to the trust relationship’s configuration.
Creating the Guardian Scan User’s Access Key – In Root Account
Next, you are required to create the Guardian scan user’s access key for the AWS integration in Guardian.
-
Access the IAM Dashboard (IAM > Dashboard). Then, select Users from the Access management drop-down menu on the left hand side of the screen. The Users page is displayed.
-
Select the user you just created from the list of Users. The [user name] Details page is displayed.
-
In the Security credentials tab, click the Create access key button, displayed in the Access keys section.
-
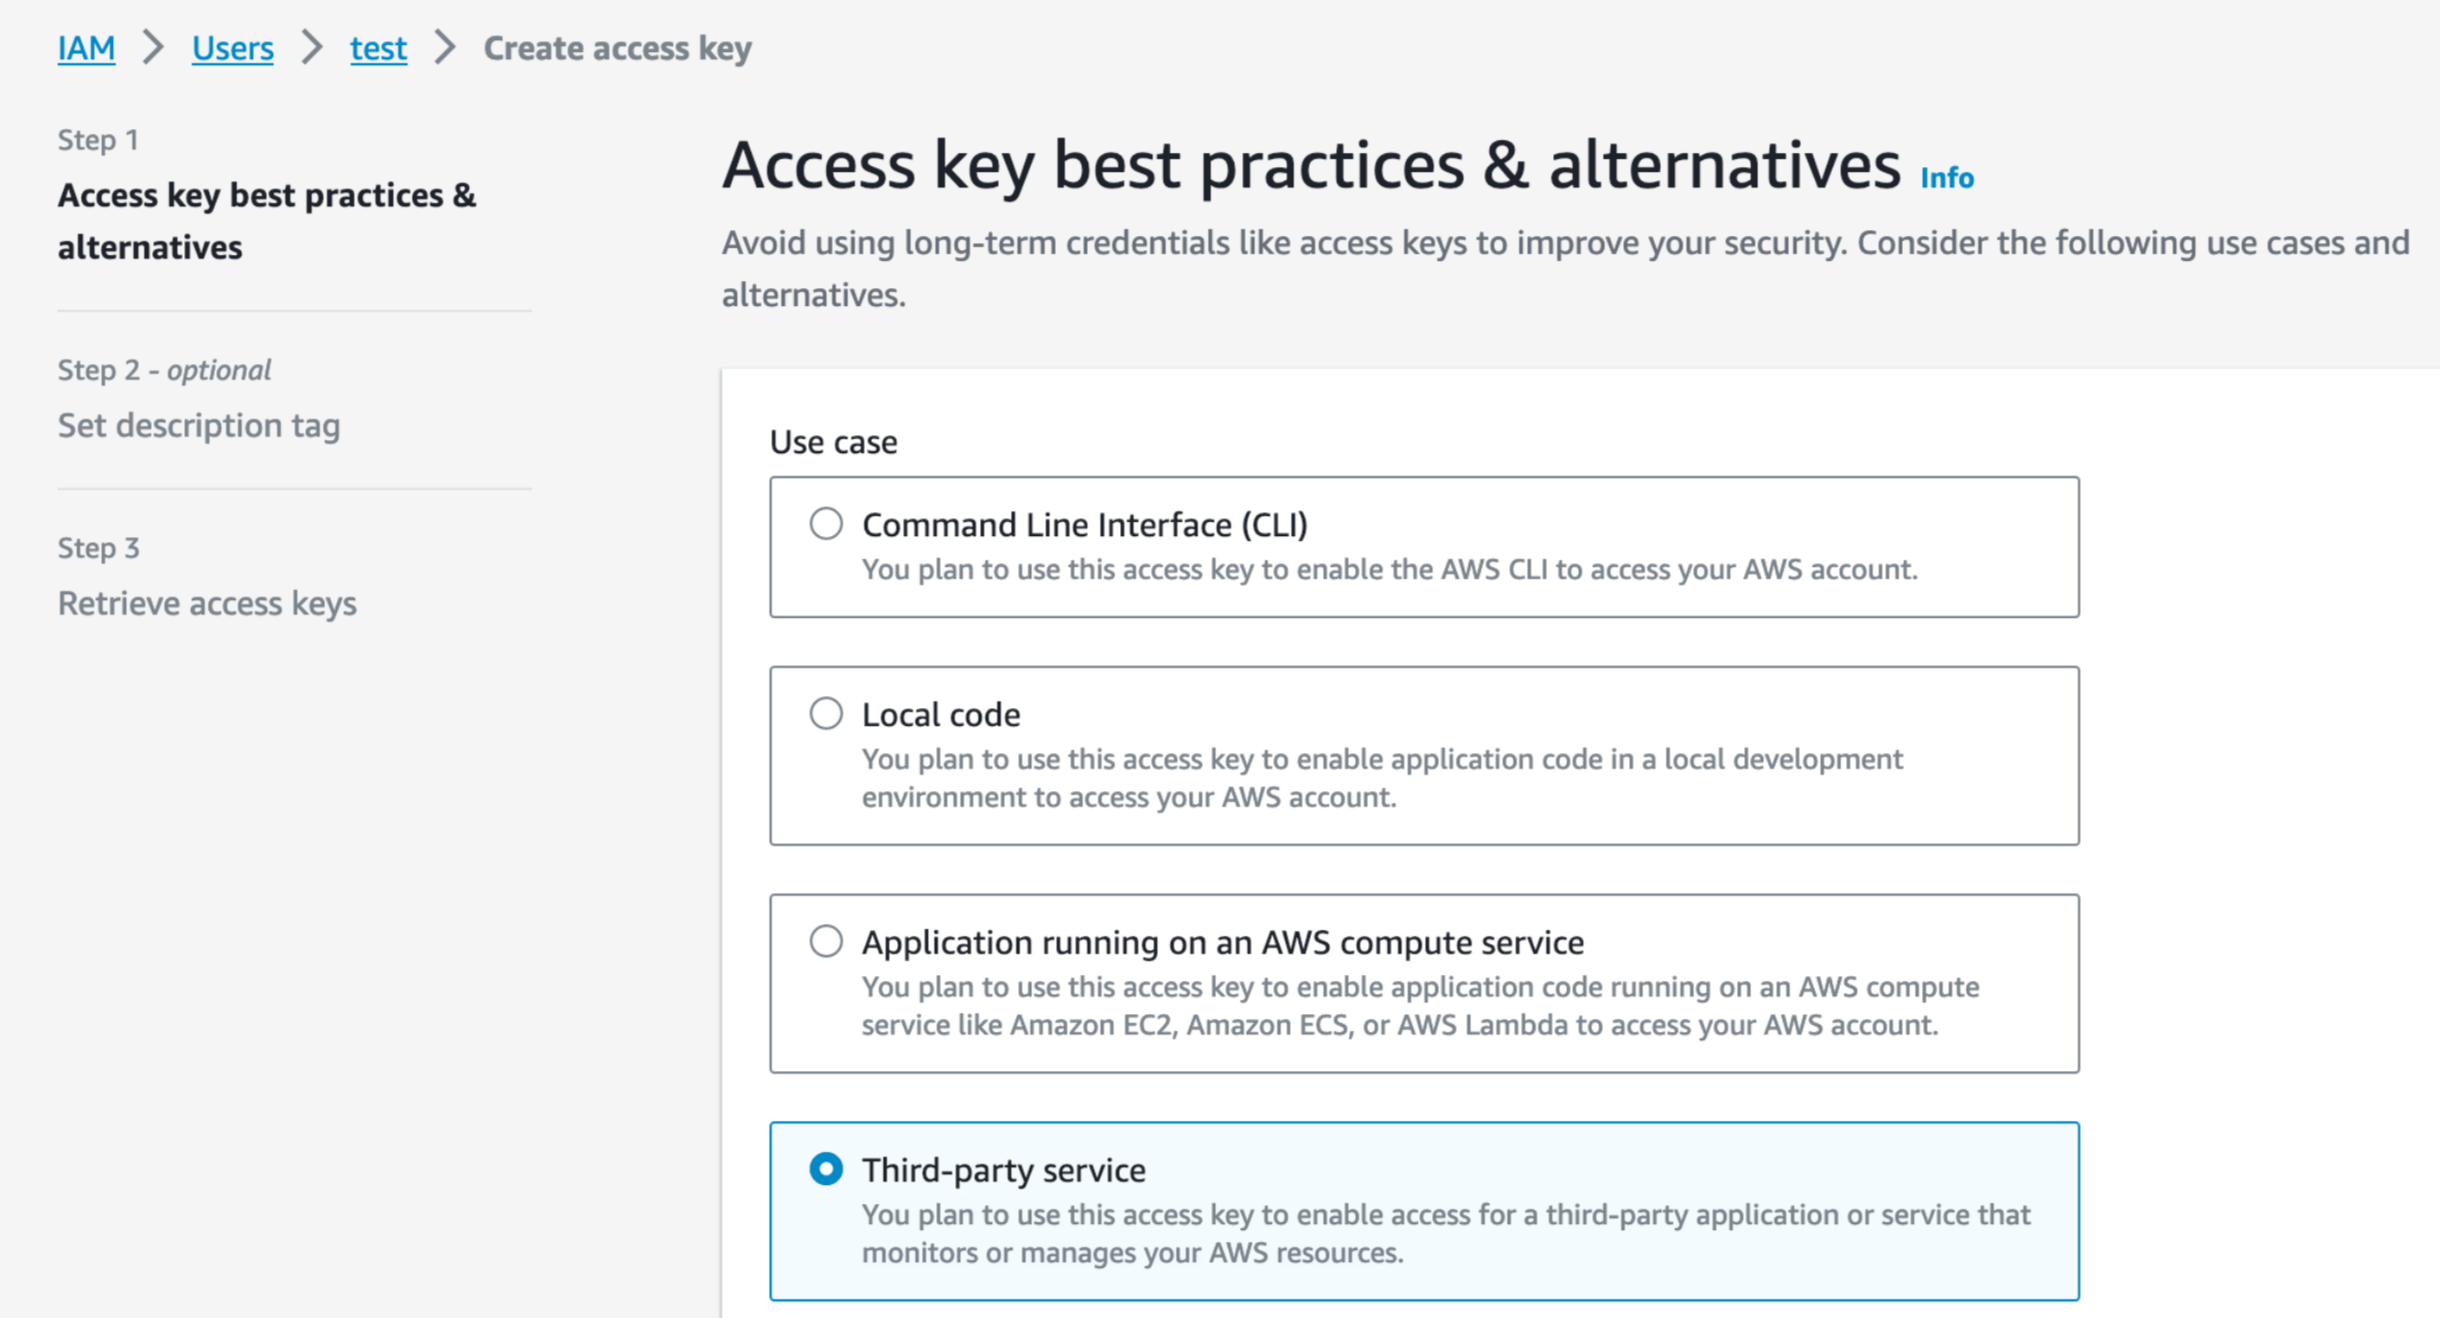
The Access key best practices & alternatives page of the Create access key process is displayed.
-
Select the Third-party service toggle.
-
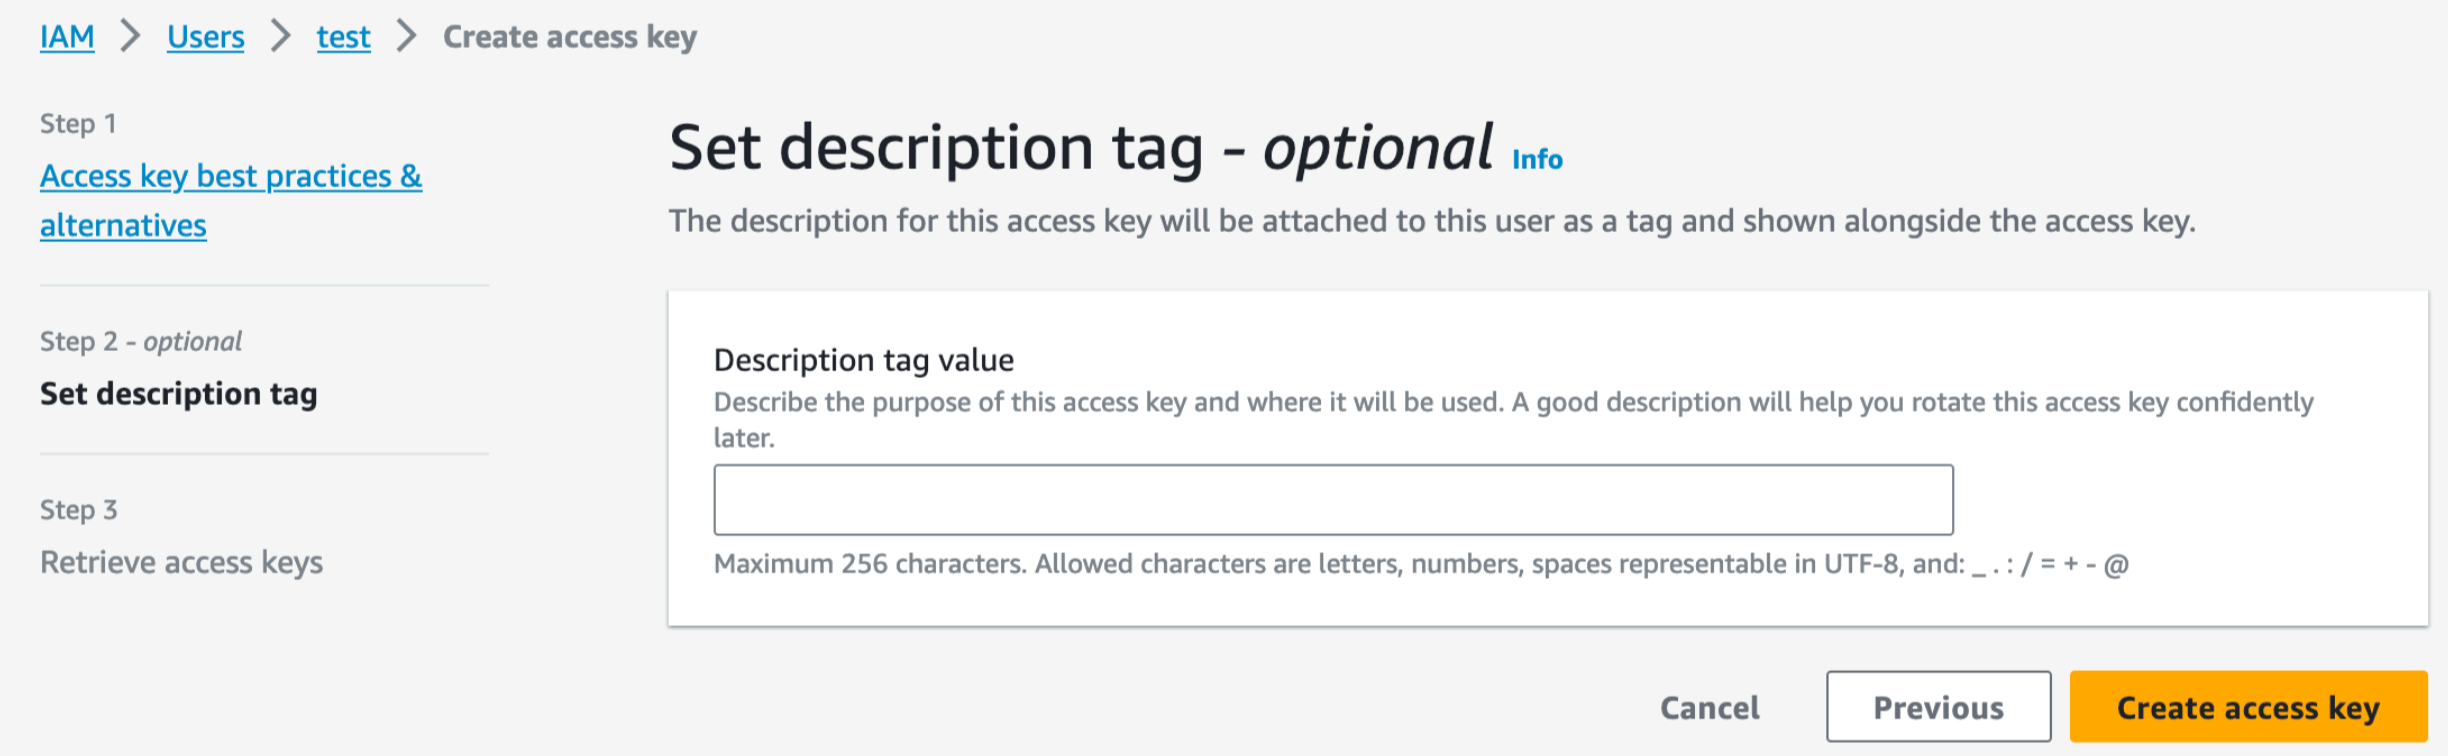
Select the I understand the above recommendation and want to proceed to create an access key check box and click Next. The Set description tag – optional page is displayed.
-
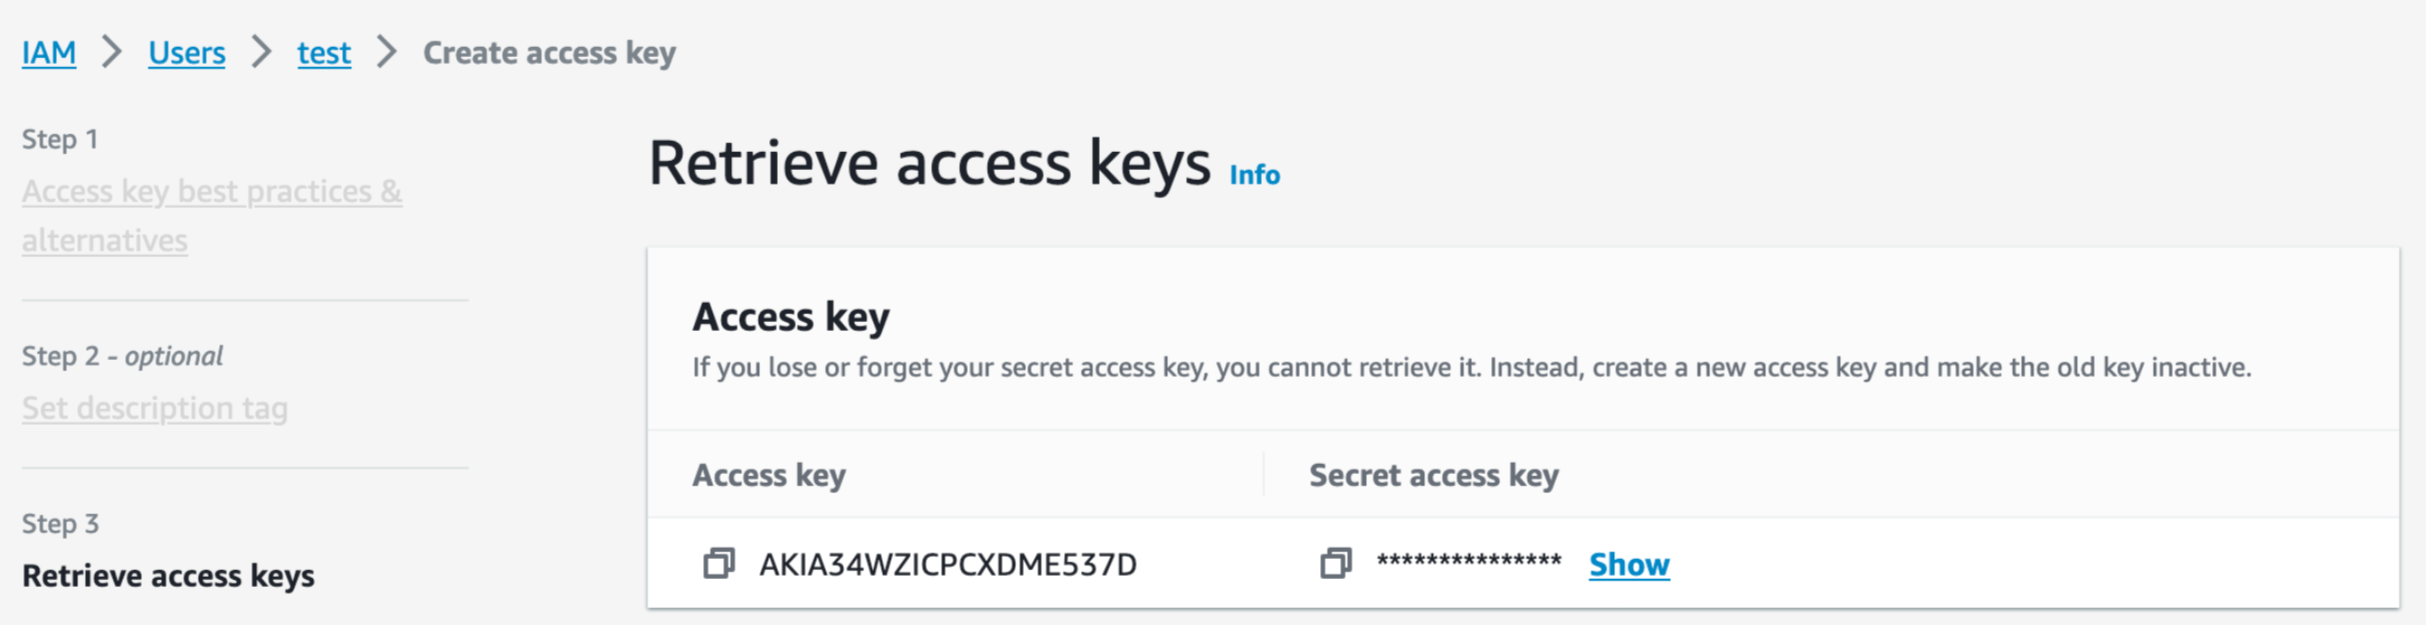
Click Create access key. The Retrieve access keys page is displayed.
-
Copy the Access key and Secret access key and save it for later, as it will be required for adding the AWS integration in Guardian, as described in Adding the AWS Integration in Guardian.
Creating a CloudFormation Management Account Role – In the Root Account
Next, you are required to create a CloudFormation Management Account role with the correct permissions by following the process described below.
-
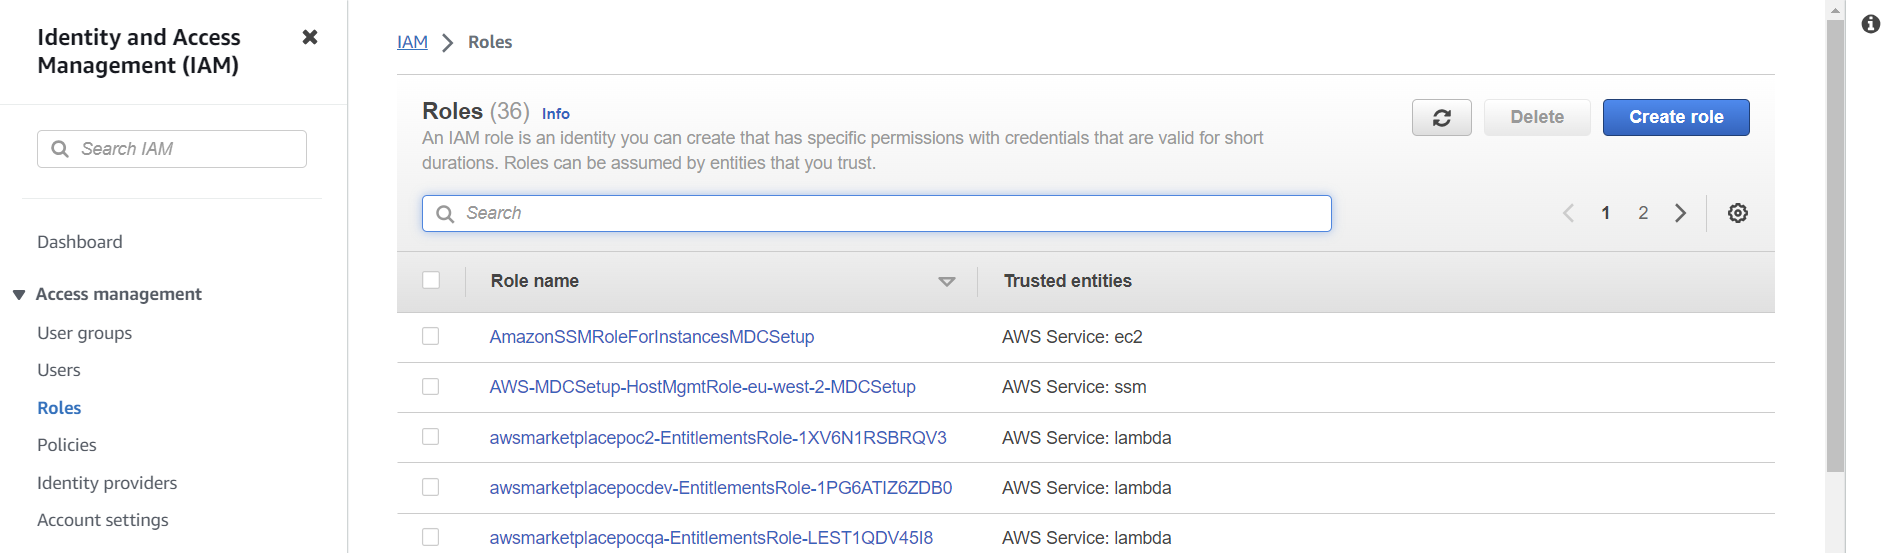
Access the IAM Dashboard (IAM > Dashboard). Then, select Roles from the Access management drop-down menu on the left hand side of the screen. The Roles page is displayed.
-
Here, you can create a new role to enable the Guardian scan user that was set up in Creating the Guardian Scan User – In the Root Account to scan CloudFormation StackSets. First, click to Create Role. The Selected trust entity page of the Create Role process is displayed.
-
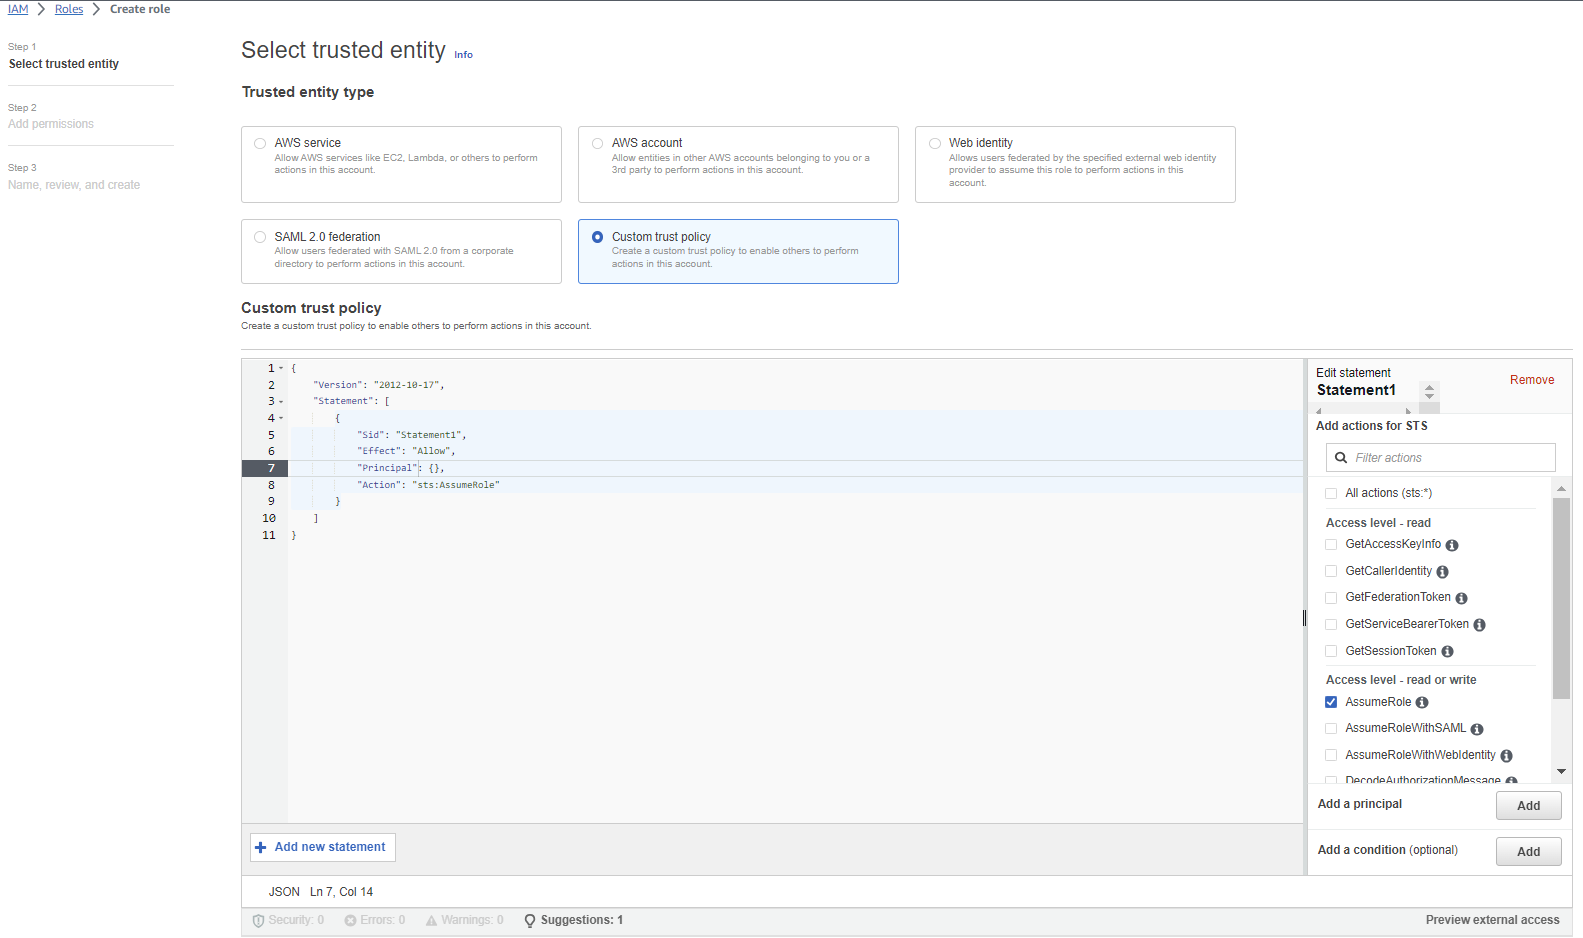
Select the Custom trust policy toggle from the ‘Trusted Entity type’ section. The Custom trust policy window is displayed.
-
To set the correct trust entities for this policy, use the JSON template below:
-
Copy the content within the JSON file and paste it into the Custom trust policy window, replacing the ‘AWS’ principle with the ARN of the Guardian scan user.
-
The ARN of the Guardian scan user can be located in the Users view of AWS IAM service. This is the scan user that was created above.
-
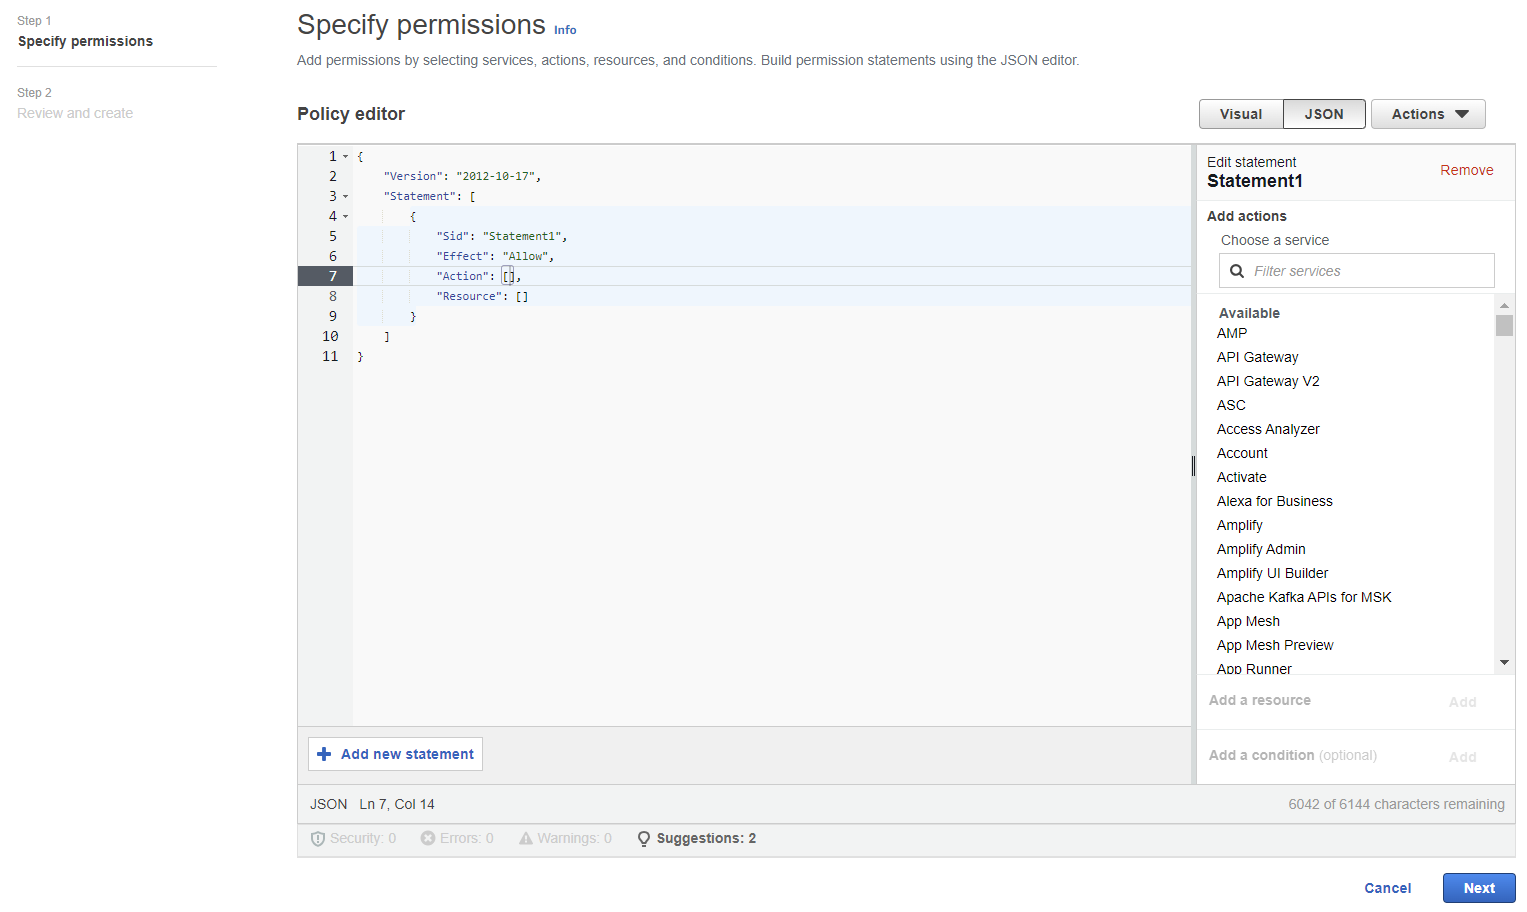
Once completed, click Next. The Add permissions page is displayed. Click the Create policy button. The Specify permissions page is displayed in a new tab.
-
Click the JSON button. The JSON Policy editor window is displayed.
-
To set the correct permissions for this policy, use the JSON template below:
-
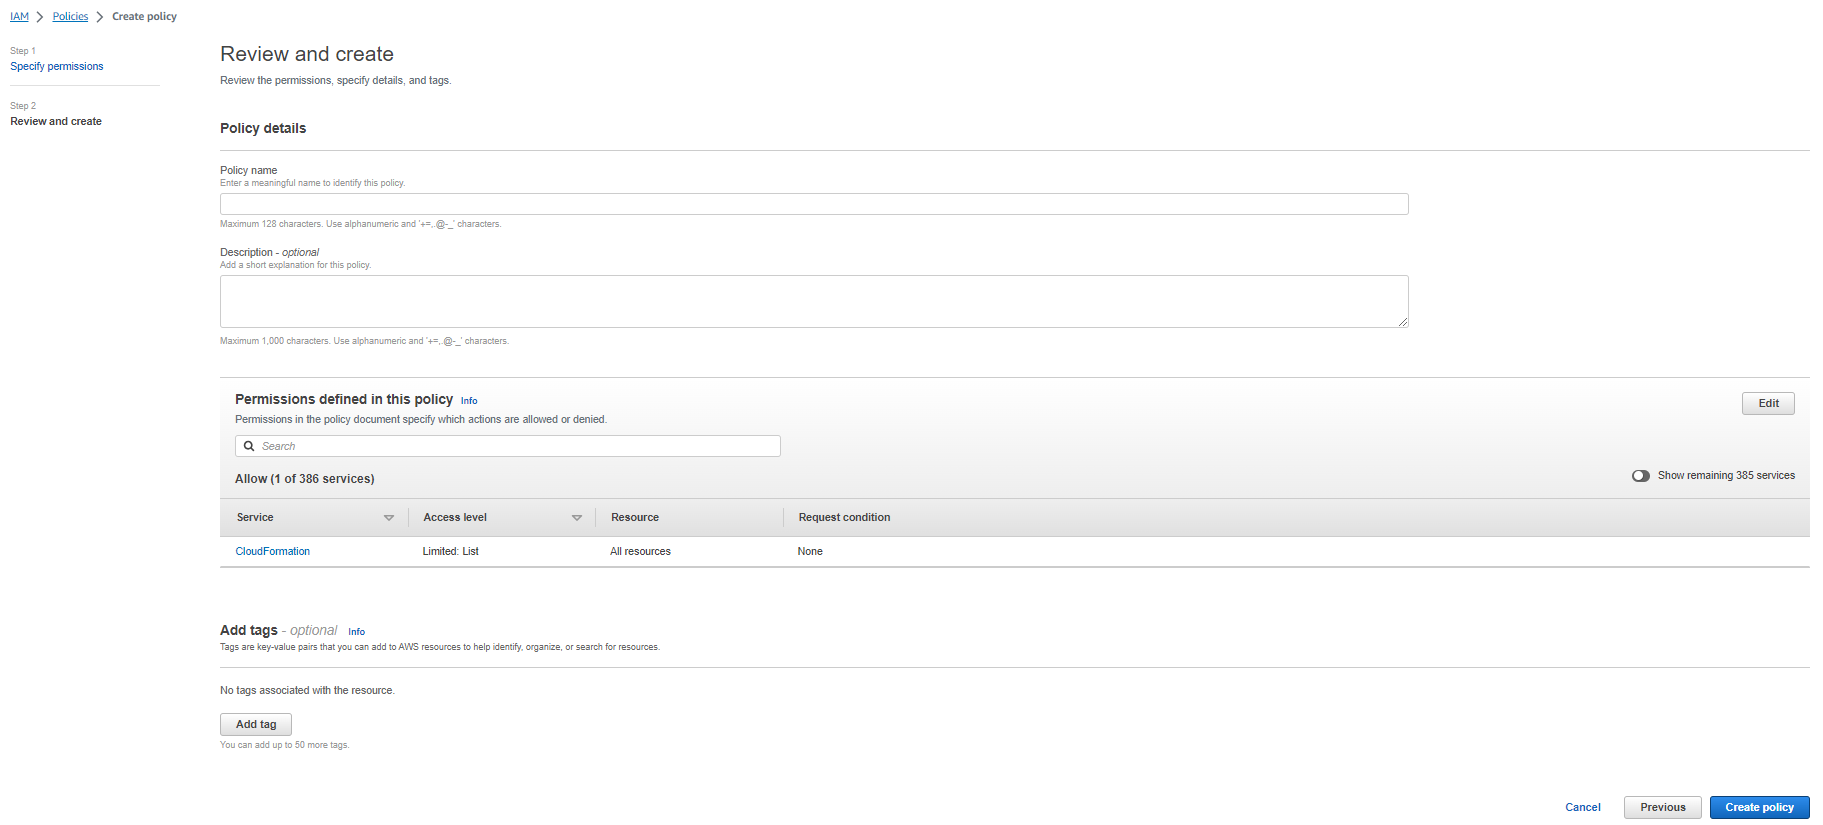
Once completed, click Next. The Review and create page is displayed.
Note: Check that the spacing is correct when pasting the above code snippet into the Policy editor window.
-
Check the information you have provided is correct; make any adjustments as needed. Then, click Create policy.
-
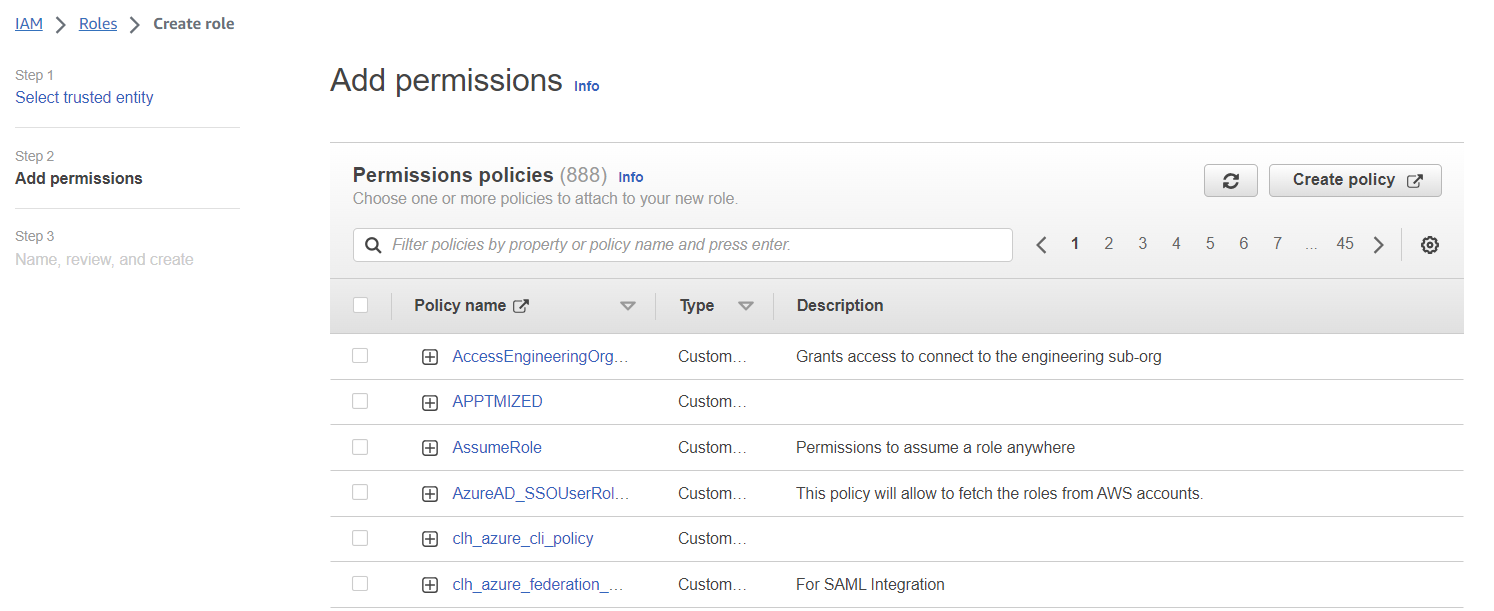
The confirmation message ‘Policy [Name] created’ is displayed. Close this window and return to the Add Permissions page that is displayed in the original Create role process window.
-
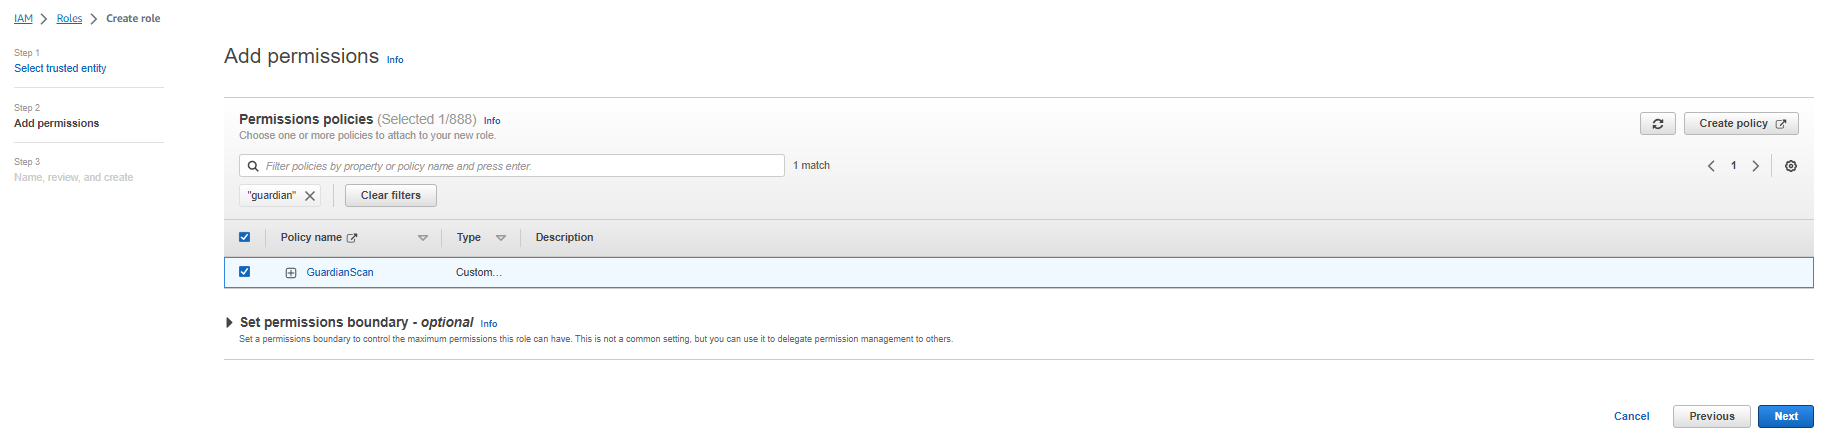
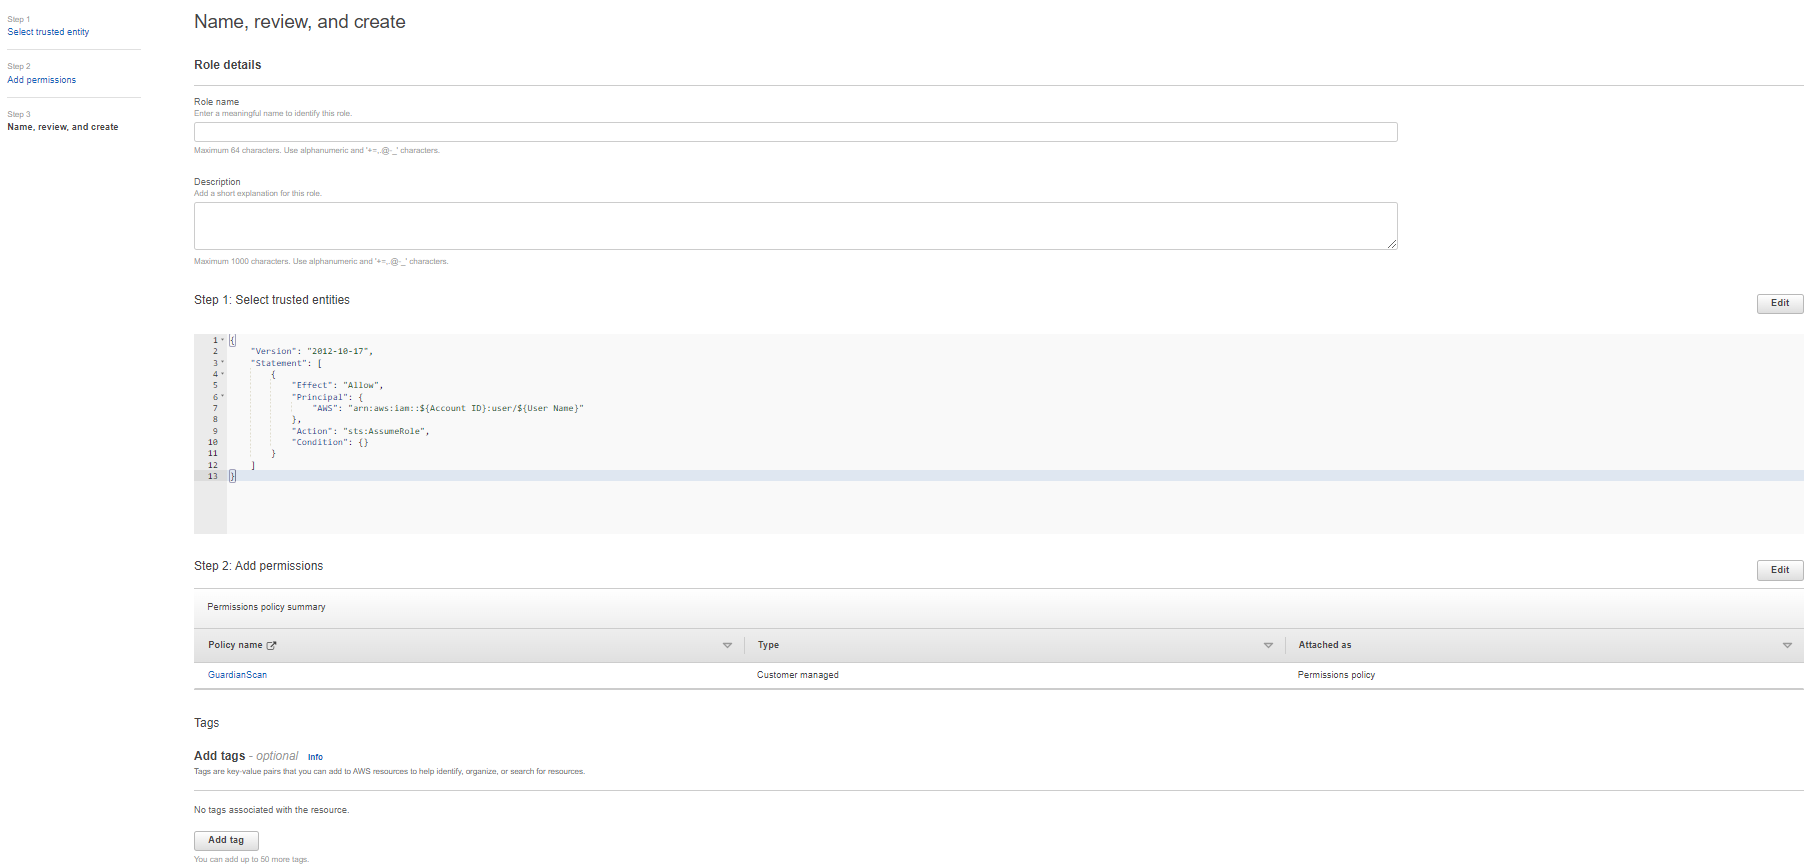
On the Create role page, search for the permissions policy you just created. Then, select the checkbox for that permissions policy and click Next. The Name, review, and create page is displayed.
-
Check the information you have provided is correct; make any adjustments as needed. Then, click to Create role.
Creating a New CloudFormation StackSet
Once you have finished creating a new role with the correct permissions, you can create a new StackSet using the template provided by Cloudhouse to deploy the scanning role for Guardian to assume.
Note: For more information on the template, contact your Cloudhouse support.
Alternatively, if you already have a StackSet deploying a scanning role, you can modify the deployed role to allow the Guardian scan user to assume it.
To create a new StackSet template, follow the process described below.
-
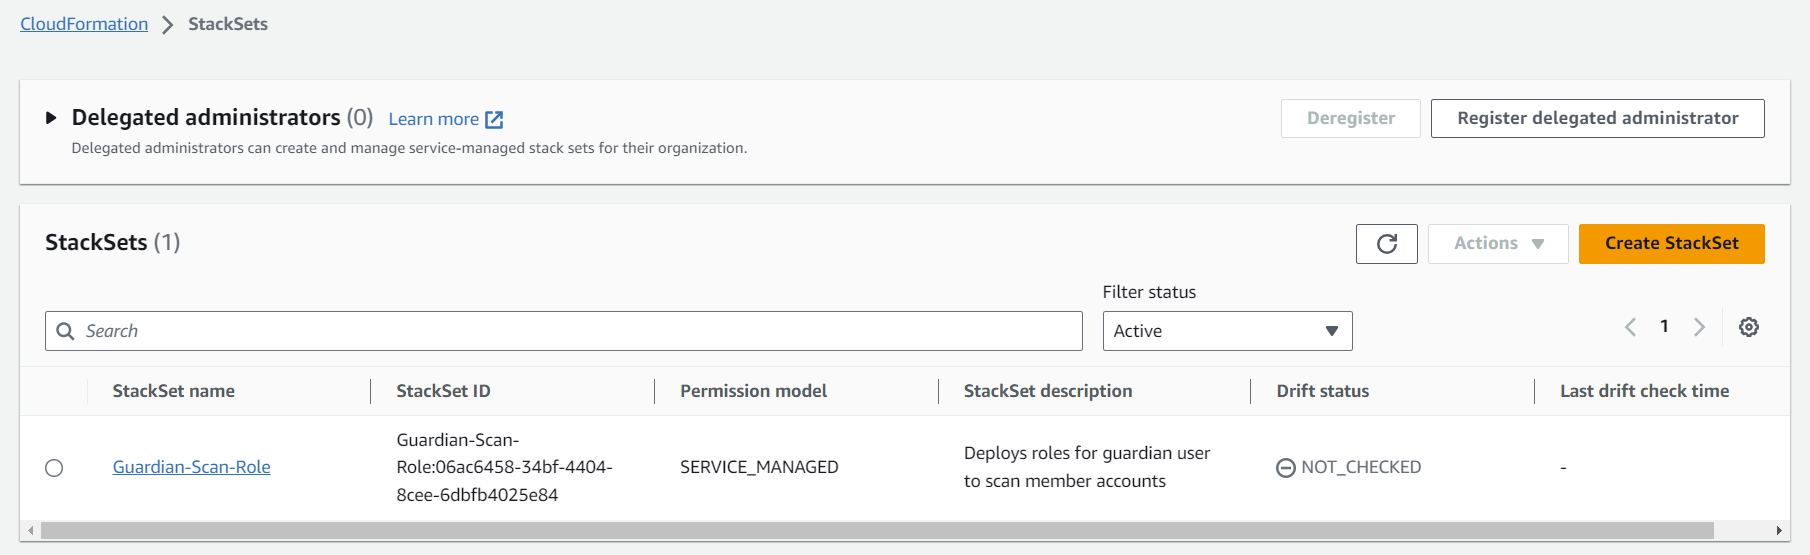
Access the CloudFormation service. Then, select StackSets from the menu on the left hand side of the screen. The StackSets page is displayed.

-
Click to Create StackSet. The Choose a template page of the Create StackSet process is displayed.
-
Before uploading the provided template, ensure the principal in the template is set to the correct scan user account created above.
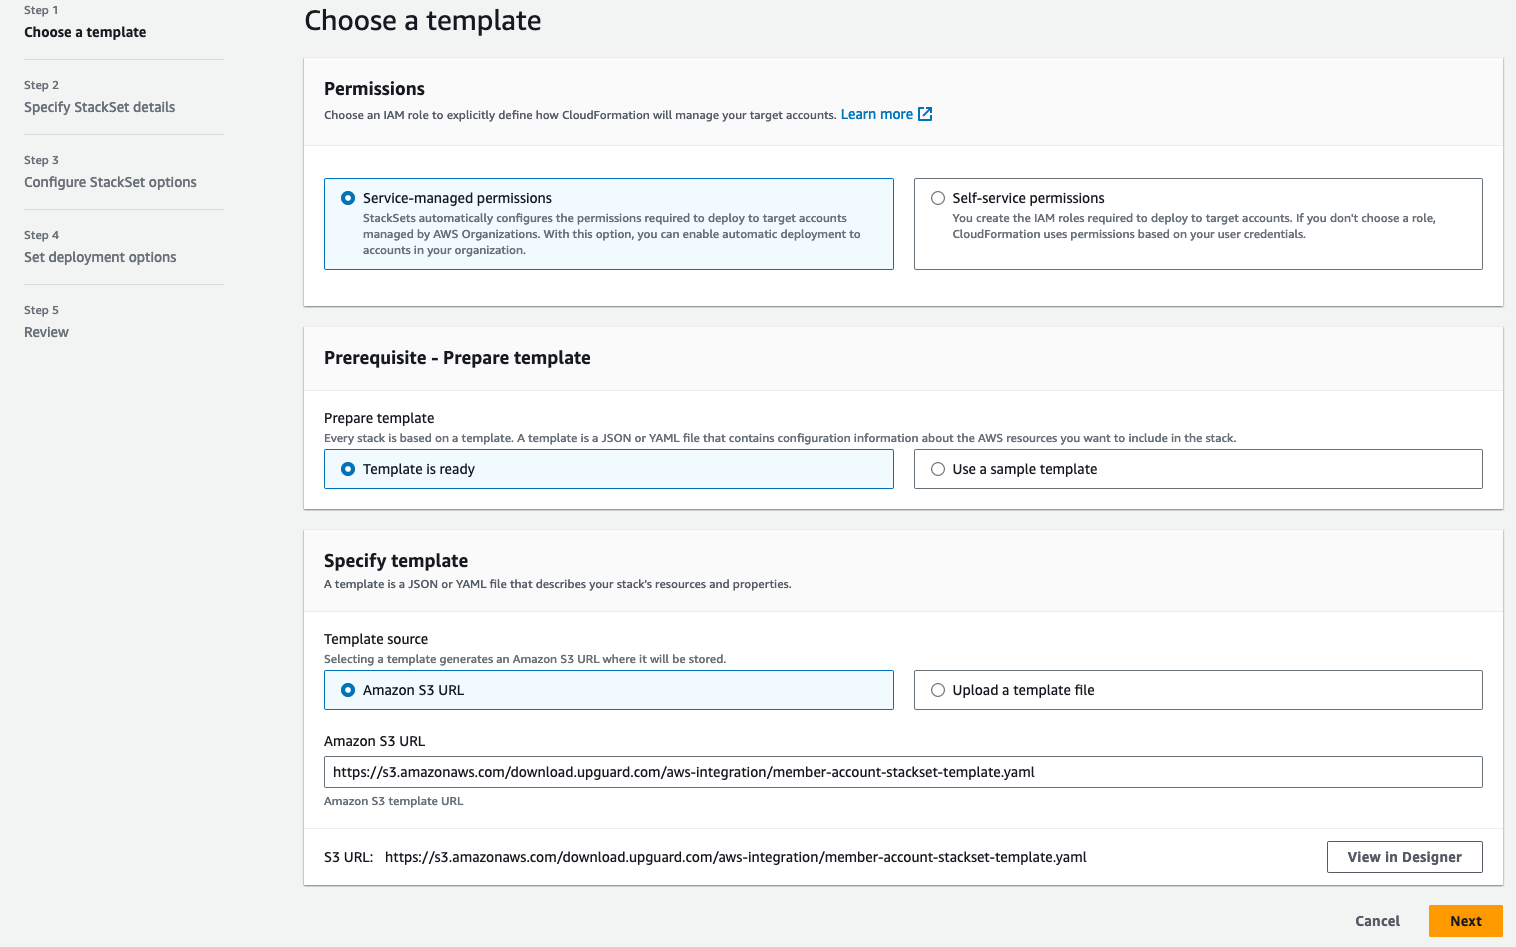
Select the following toggles:
-
Service-managed permissions.
-
Template is ready.
-
Upload a template file.
-
-
Upload the provided template.
-
Once the correct values have been entered, click Next.
-
The Specify StackSet details page is displayed.
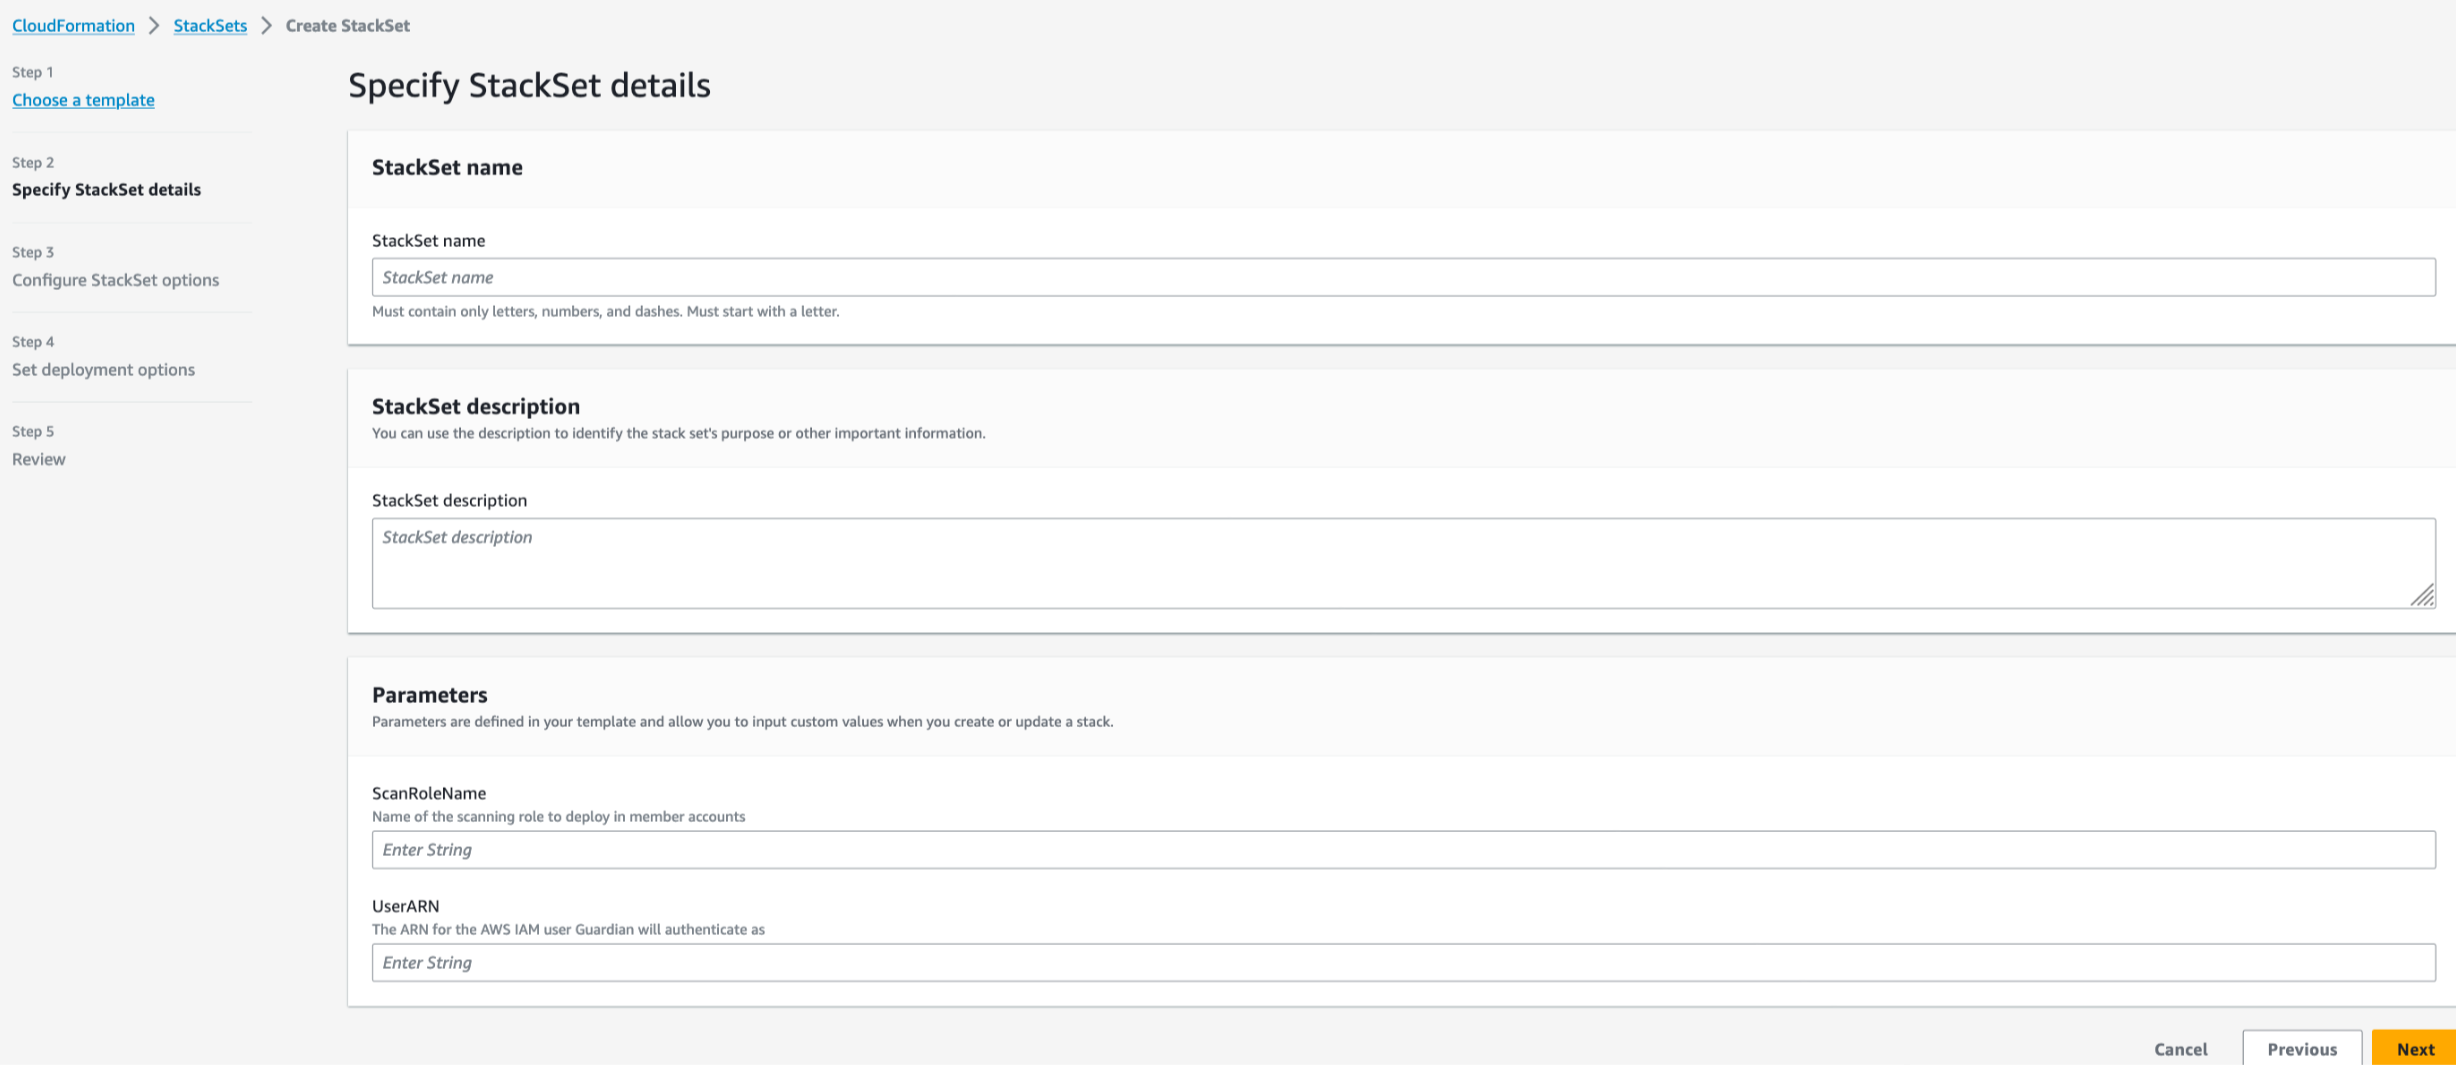
The following fields are displayed:
-
StackSet name – Enter the display name of the StackSet.
-
StackSet description – This is an optional field.
-
-
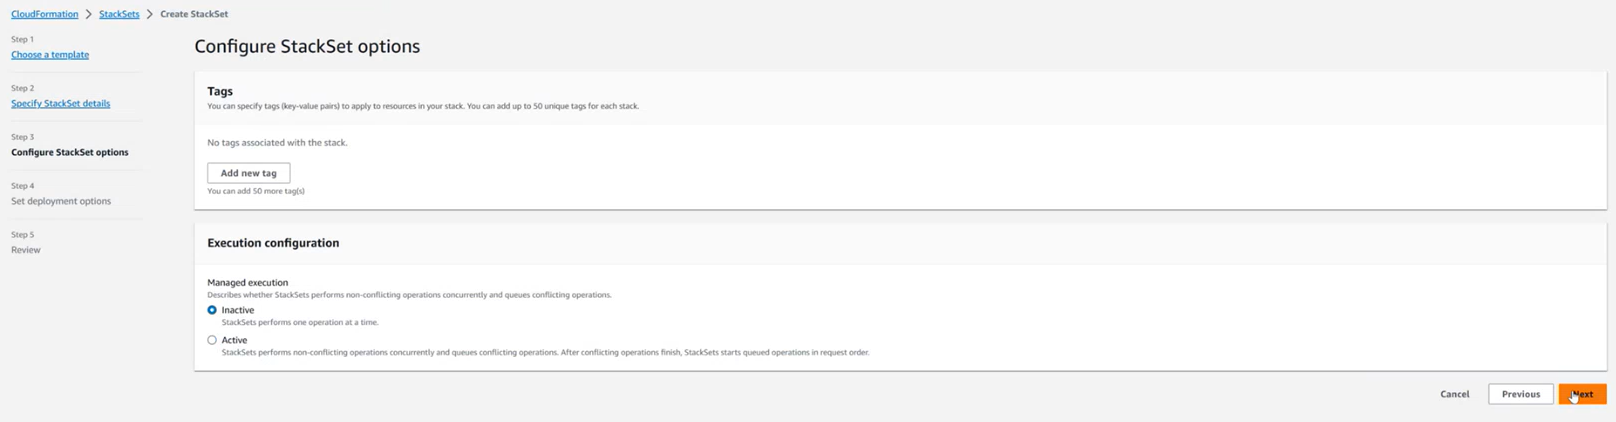
Once the correct values have been entered, click Next. The Configure StackSet options page is displayed.
-
Set the ‘Execution configuration’ toggle to Active. Then, click Next.
-
The Set deployment options page is displayed.
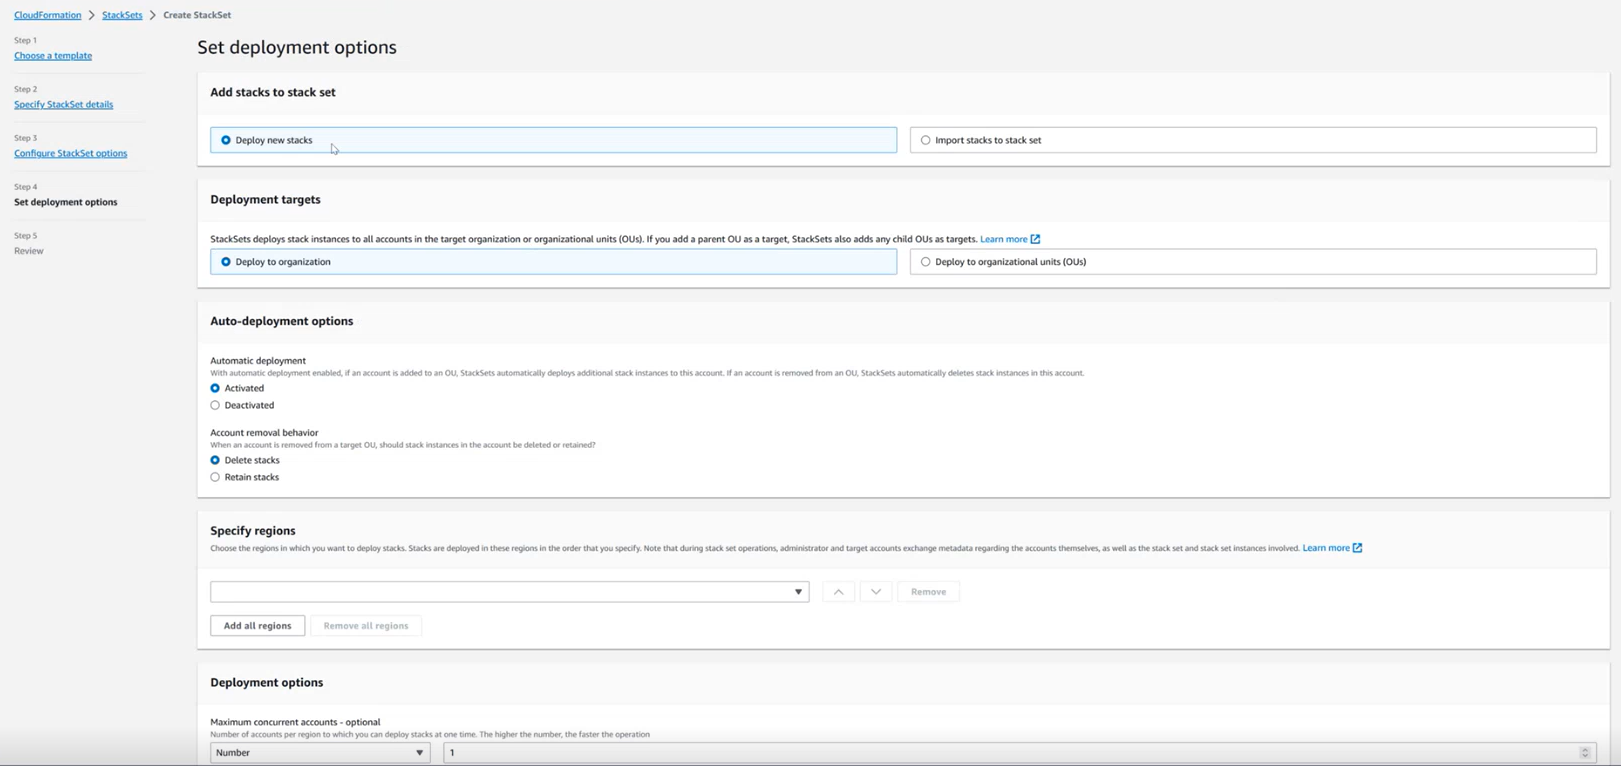
Here, the following options are displayed:
-
Add stacks to stack set:
-
Deploy new stacks toggle – Select this toggle.
-
-
Deployment targets:
-
Deploy to organization toggle – Select if you wish to deploy to your entire organization.
-
Deploy to organizational units (OUs) toggle – Select if you wish to target a subset of your organization.
-
-
Auto-deployment options:
-
Activated toggle – Select this toggle.
-
Delete stacks toggle – Select this toggle.
-
-
Specify regions drop-down menu – Deploy to one region. For example, ‘us-west-1’.
-
Deployment options (optional) – Set to the required values.
-
Region currency:
-
Parallel – Select this toggle.
-
-
-
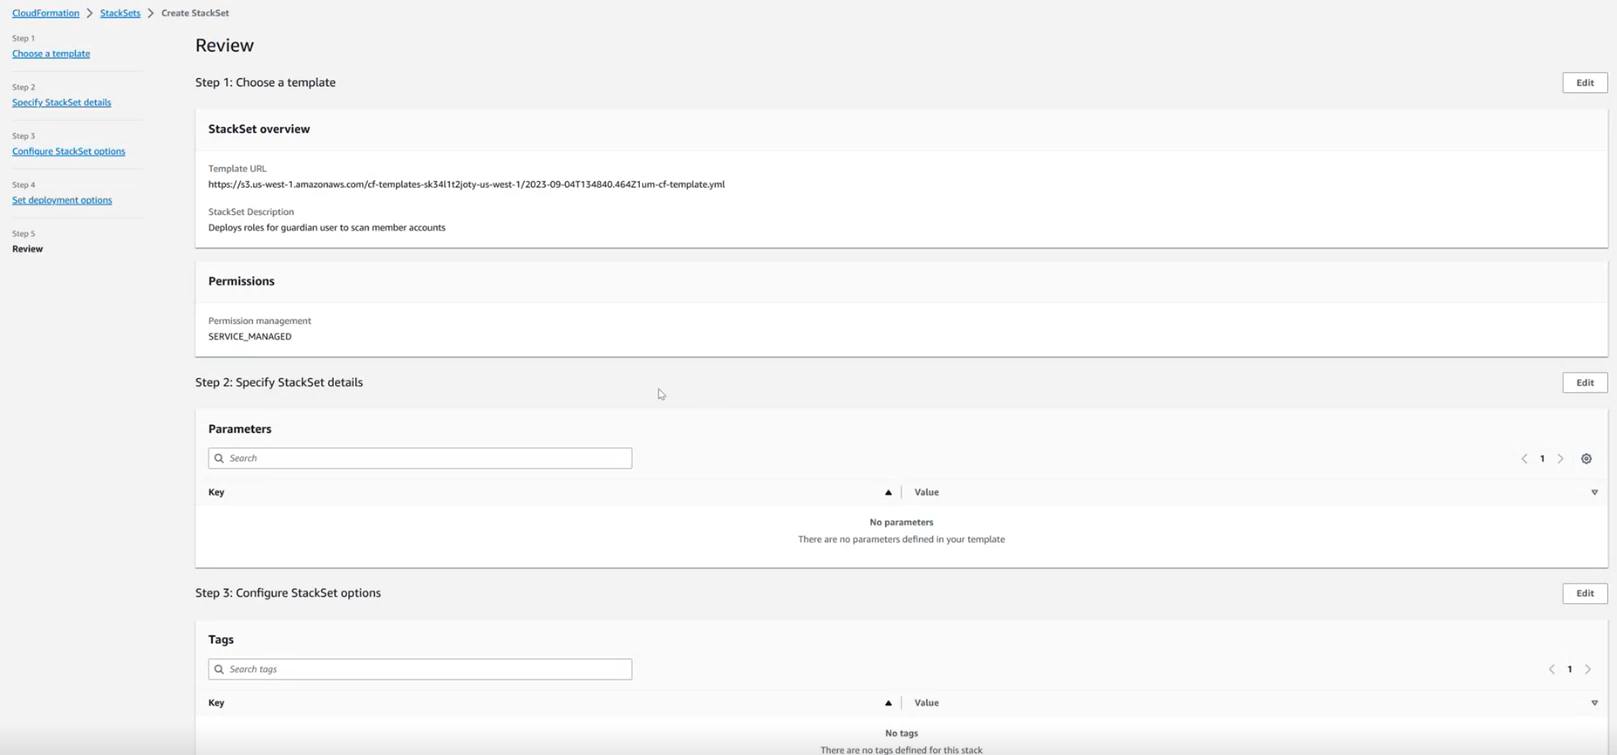
Once you have set the correct value for each of the options described above, click Next. The Review page is displayed.
-
Check the information you have provided is correct; make any adjustments as needed.
-
Then, once you have confirmed the information is correct, select the I acknowledge that AWS CloudFormation might create IAM resources with custom names check box and click Submit.
Once complete, your StackSet is deployed and the StackSet details page (CloudFormation > StackSets > Click [Role Name] > Stack Instances tab) is displayed, with the Status set to ‘RUNNING’. If the StackSet is working correctly, the Status should update to ‘SUCCEEDED’.

Note: For Guardian to assume the roles, you must wait for the Status of all deployments to be ‘SUCCEEDED’ before the integration can access that account.
Adding the AWS Integration in Guardian
Once the StackSet has been successfully deployed, a new Guardian AWS Integration can be created via the usual process, as described below. Depending on what method you chose, the information required for the integration form will need to be sourced differently.
Note: If you integrated via the CloudFormation template, you can find the values required to set up the AWS integration on the Outputs tab of your Stack Details page (CloudFormation > Stacks > Click [Stack Name] > Outputs tab). For more information, see Creating a New CloudFormation StackSet.
-
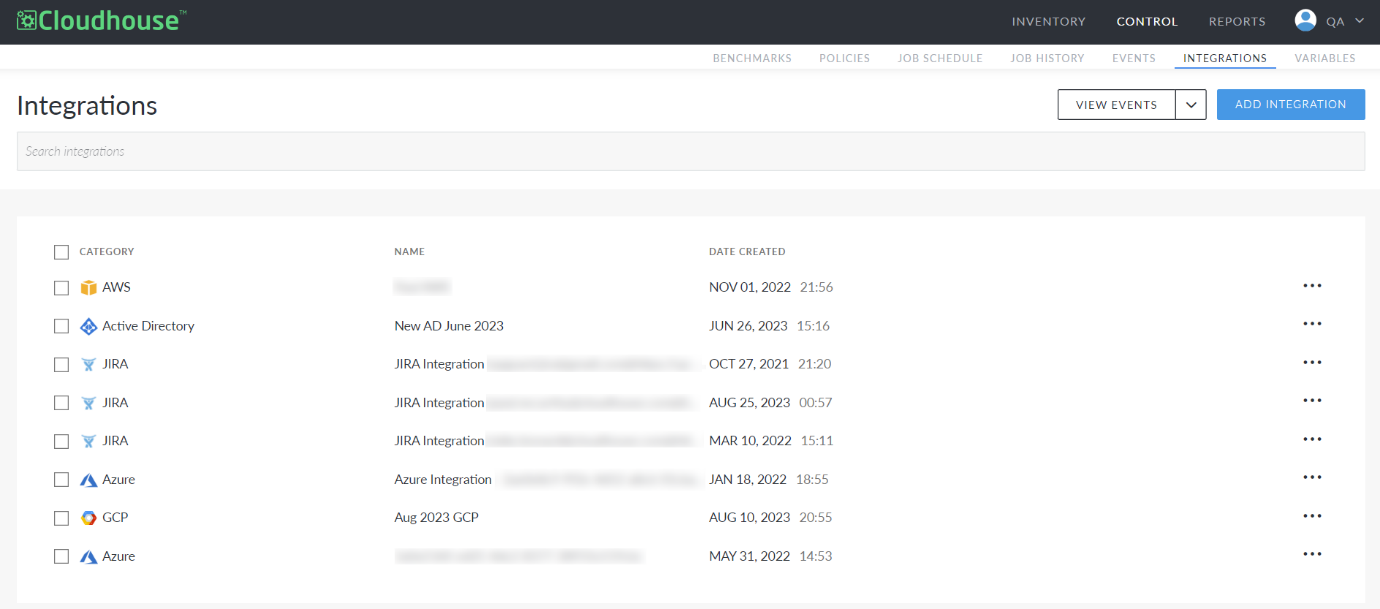
On the Guardian Web Interface, navigate to the Integrations page (Control > Integrations). Then, click the Add Integration button. The Add Integration page is displayed.
-
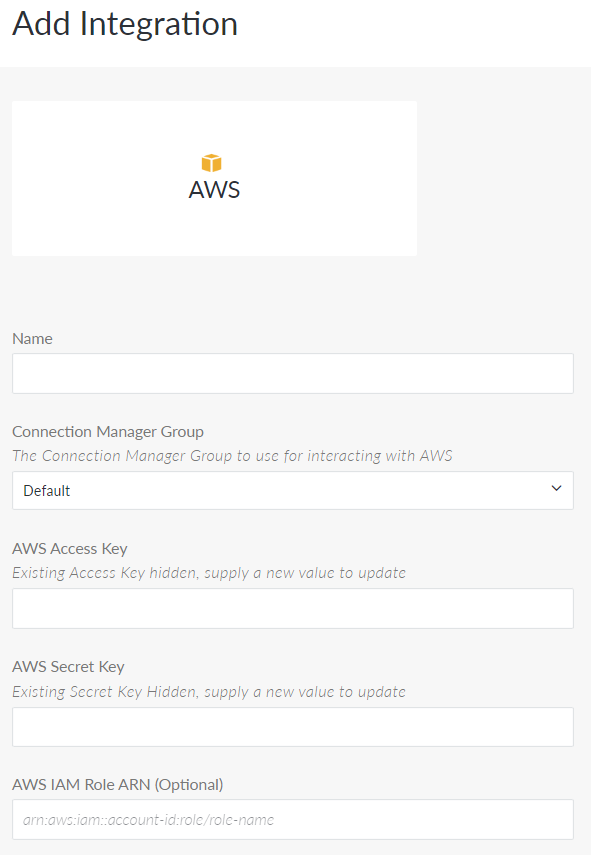
Click the AWS button. The Add AWS Integration page is displayed.

-
Here, the following values are displayed:
-
Name – Enter the desired name of the integration.
-
Connection Manager Group drop-down menu – Select a connection manager group from the drop-down menu. This group will be used to interact with AWS when scanning the nodes.
-
AWS Access Key – Enter the AWS access key of the Guardian scan user that will be used to scan the nodes.
-
If you integrated via the AWS console, this key was created in Creating the Guardian Scan User’s Access Key – In Root Account.
-
-
AWS Secret Key – Enter the secret key associated with the above AWS access key.
-
If you integrated via the AWS console, this key was created in Creating the Guardian Scan User’s Access Key – In Root Account.
-
-
AWS IAM Role ARN (Optional) – This is an optional field. Leave this field blank for Multi-Account Detection.
-
AWS Regions (Optional) – This is an optional field. Leave this field blank for Multi-Account Detection.
-
Enable Multi-Account Detection check box – Select this check box to display the following fields:
-
CloudFormation Management Account Role – Enter the ARN of the CloudFormation Management account role (note this is the full ARN not just the name).
-
If you integrated via the AWS console, this role was created in Creating a CloudFormation Management Account Role – In the Root Account.
-
-
StackSet Name – Enter the StackSet ID of the StackSet that deploys the new assumable role.
-
This is often in the form of
<name:uuid>. For example,StackSet123:12345678-abab-abab-1212-1234567890ab.-
If you integrated via the AWS console, this StackSet was created in Creating a New CloudFormation StackSet.
-
-
-
CloudFormation Member Account Role Name – Enter the name of the role to be assumed by the Guardian scan user. This was created by the StackSet.
-
If the provided template wasn’t changed, the field should be set to GuardianIntegrationMemberRole.
-
-
-
Check Things You Want To Detect check boxes (as displayed) – Select the AWS services you want to be detected and scanned using the list of check boxes provided.
-
For each selected resource type, options to ignore or remove nodes are available by selecting the appropriate checkbox and providing one or more tags. The Negate checkbox may also be checked to reverse the tags’ condition. Meaning, nodes NOT containing the provided tags will be ignore/removed.
Note: The format for the supplied tags is a regex of key=value and separated by '\', Ie:
<regex-key1>=<regex-value1> \, <regex-key2>=<regex-value2>
-
-
Automatically start monitoring and scanning newly detected nodes check box – Cloudhouse advise selecting this checkbox.
-
-
Once you have entered the correct value in each of the fields above, click Done.
If the correct values have been entered in each of the fields, a confirmation message is displayed and your AWS integration is successfully completed.
Warning: The CloudFormation Member Account Role Name field is incorrectly labelled. The name implies an ARN field is required. However, only the name of the Guardian scan user is required.