Windows nodes are scanned Agentlessly using WinRM. Cloudhouse Guardian (Guardian) also has the option of being able to scan Windows nodes Agentlessly via SSH.
Overview
By default, Windows nodes are scanned Agentlessly via WinRM. This is used as both the connection and authentication mechanism. You can optionally also connect to Windows nodes via SSH using either a password or public/private key pair. This guide outlines how to configure Windows nodes to be scannable via SSH.
Prerequisites
You will need to have OpenSSH Server installed on your windows nodes and configured to accept SSH connections. You can confirm this outside of Guardian by attempting to remotely log into your Windows machine using the ssh command.
You will also need your Technical Account Manager to enable Windows SSH scanning from a feature toggle. This feature is toggled off by default and only available in a Beta version from v2.88 onwards.
Add a New Node
Navigate to the Add Nodes tab (Inventory > Add Nodes) and then select a Windows operating system type. Click Agentless as the connection method. You will be prompted to choose your Connection Method, which should off WinRM and SSH as options.
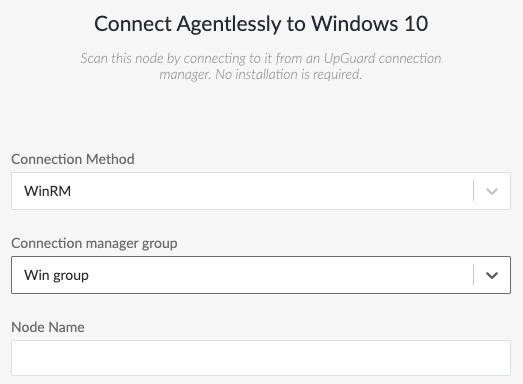
Changing Connection Method will then offer a different Connection Manager Group and also connection settings like hostname and authentication method. If you chose to authenticate using a public key, the Command-Line steps are shown on how and where to place the public key value. For more information, see Network Device Node.
Edit an Existing Node
If you want to change the connection and authentication mechanism of an existing node, then you can edit the node as normal and select a different Connection Method and therefore Connection Manager Group.
You can also edit a node via the API. Use the Node Update endpoint to change the node's connection_manager_group_id=1 and medium_type=3. This should set the node to SSH connectivity using the Default Connection Manager Group.
Note: When changing the connection_manager_group of a node you may be required to provide the connection password again. This is because a node's password is stored encrypted with it's associated Connection Manager Group's public key. The associated private key is stored solely with the Connection Managers themselves and are therefore the only components able to decrypt an encrypted password under our security model.
Benefits to Using SSH Over WinRM
There are quite a few "hoops" you need to jump through to connect to a machine via WinRM, from enabling a remote login service, to allowing Group Policy settings.
Within Guardian, Windows scanning via WinRM requires a satellite Windows Connection Manager to be installed into it's own Connection Manager Group. Windows SSH scanning can be handled directly from the in-built Default Connection Manager group, so it is "out of the box".
Troubleshooting
Username/Password authentication is fairly simple and you can troubleshoot it outside of Guardian by attempting to connect to the node using PuTTy or the command line ssh command.
For SSH public keys, Guardian attempts to assist with the placing of this value as best as possible, but care should be taken. For non-Admin users, the SSH public key value can be stored in the user's "Home" directory. That is, you should store the public key value on it's own line inside a file located at:
%USERPROFILE%\.ssh\authorized_keysUnder some OpenSSH installations, if the user being used to run the scan is an Administrator then you should instead save the public key on it's own line in a file at this location:
%PROGRAMDATA%\ssh\administrator_authorized_keysSplitting the non-Admin from Admin authorized keys file location is default for most OpenSSH installations. If you want to consistently use just the %USERPROFILE% location you can navigate to the configuration file at %PROGRAMDATA%\ssh\sshd_config and comment out the following line with a #:
AuthorizedKeysFile __PROGRAMDATA__/ssh/administrators_authorized_keys