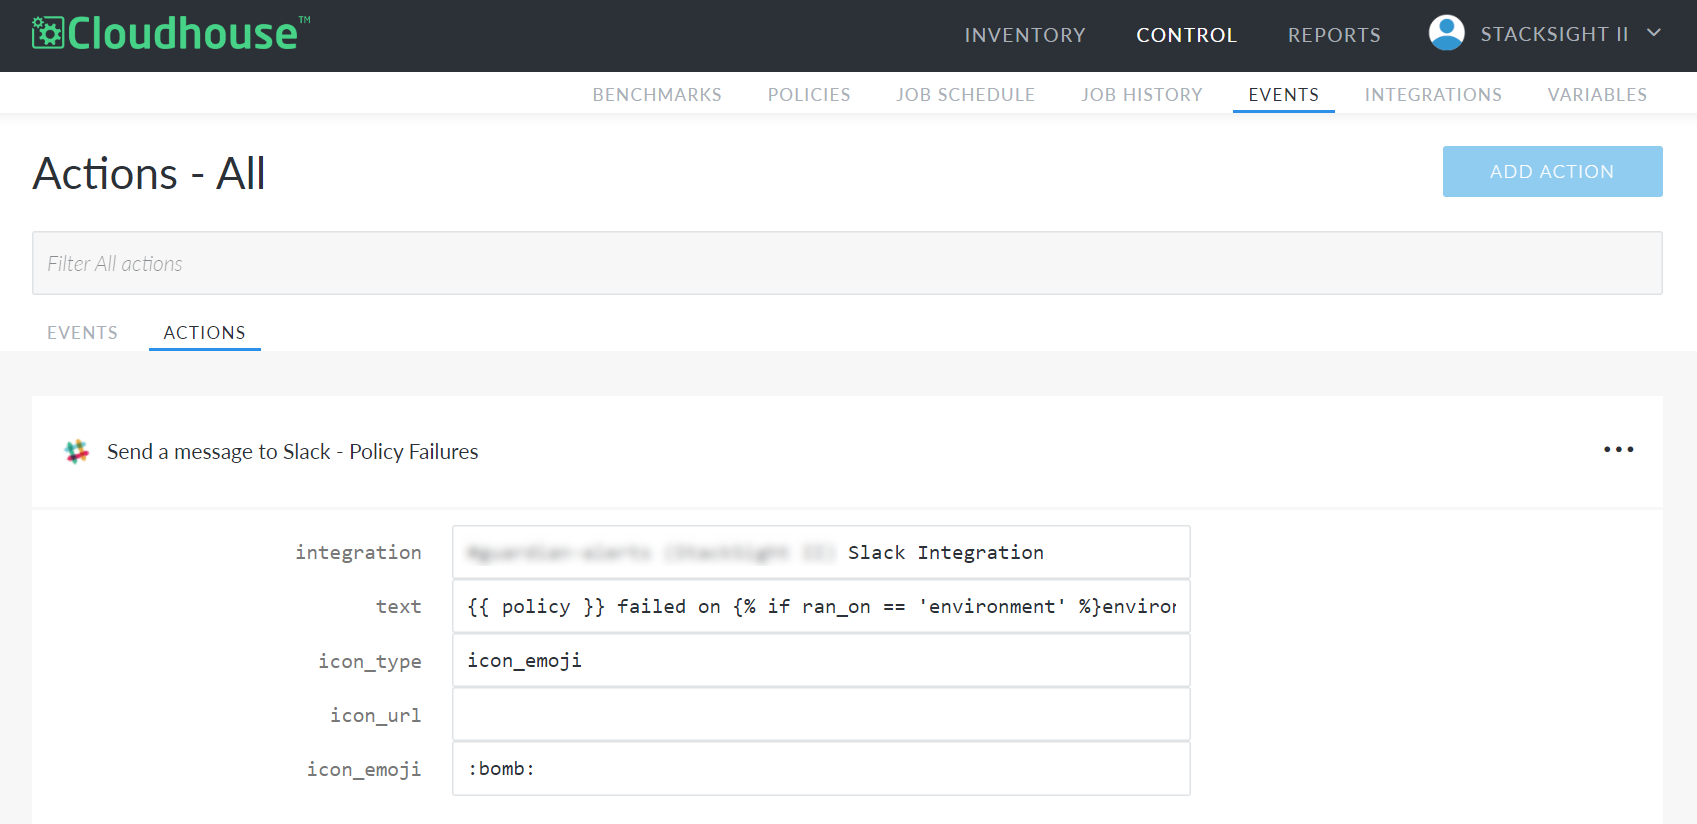
Actions
The Actions tab (
By default, the Actions tab lists all actions currently configured in your organization. However, you can filter the list using the search box at the top of the page. For example, to view all Slack-related actions, enter 'Slack' into the search bar. You can also access all actions configured for a specific event by clicking the Actions tab from a saved view on the Events tab. For more information, see Saved Views.

Action Types
Guardian offers a variety of action types that let you send messages via various services, communicate with platforms such as JIRA and PagerDuty, and more.
Note: The actions available in your Guardian instance depend on which integrations you have enabled. For example, in order to configure a Slack action, you must first configure the Slack integration. For more information, see Slack Integration.
You can find more details on each action type in the following topics:
View Action Details
To view the details of a specific action, click the action on the Actions tab to display relevant fields. The fields for each action depend on the action type. For example, a Write to Log action only displays a single field (Message). More complex actions, particularly those that rely on integrations like Slack and JIRA, have fields relevant to the action being taken. For more information on the different action types available in Guardian, see Action Types above.
To access options for an action, click the Ellipsis ( ).
).
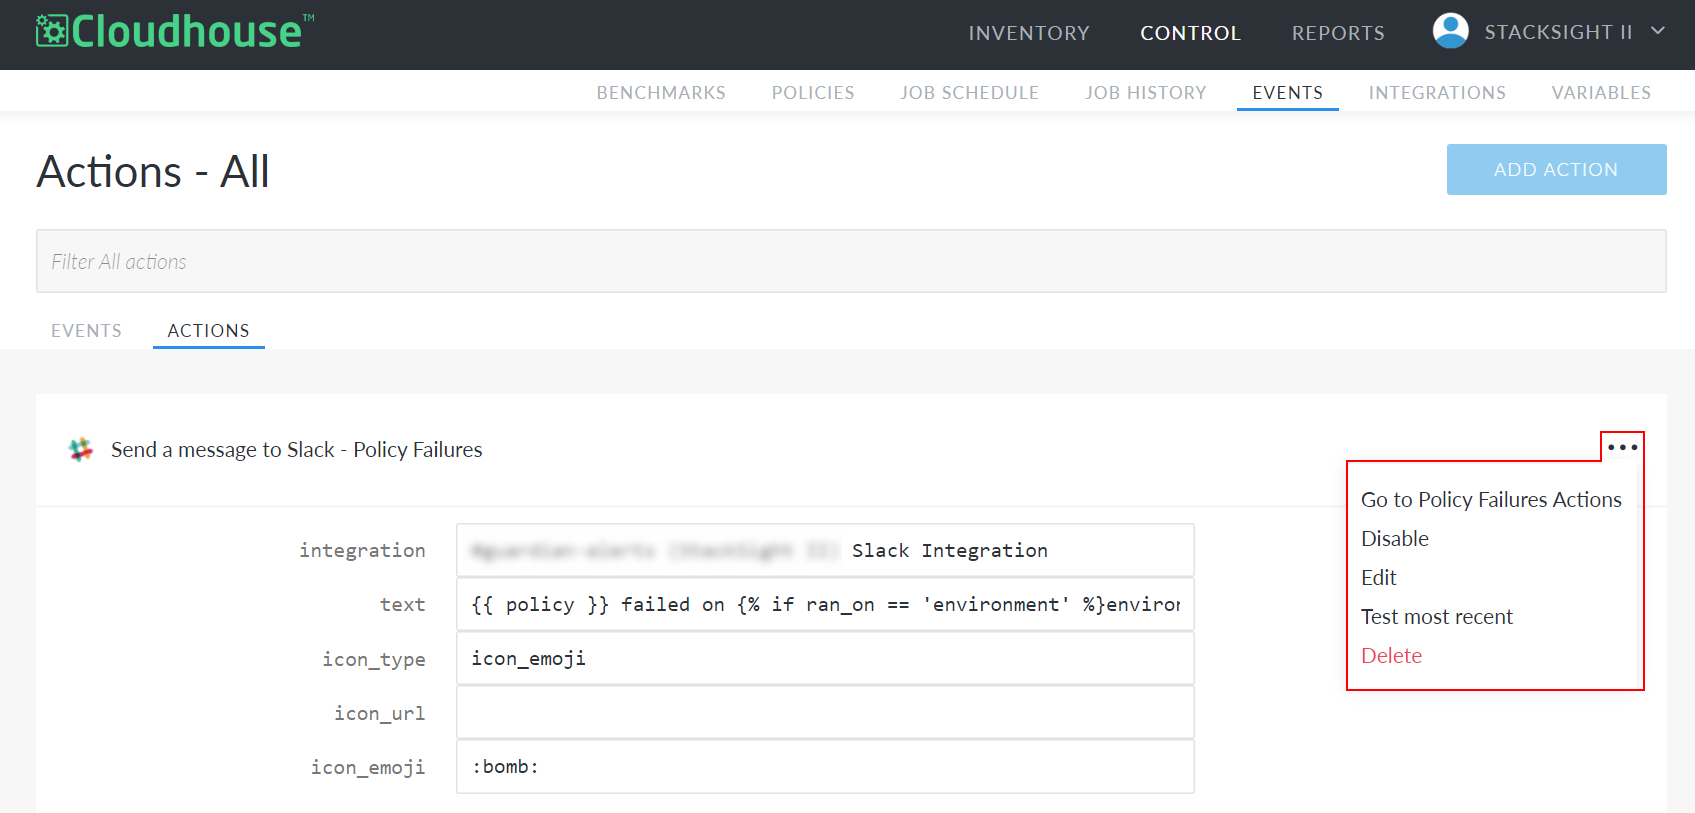
Here, the following options are displayed:
| Option | Description |
|---|---|
| Go to [event] Actions | Displays only actions configured for this specific event. For example, selecting this option for a 'Policy Failures' action displays all the actions that have been configured to occur upon a policy's failure. |
| Enable/Disable |
Toggles the action on or off. If enabled, the action is triggered every time the associated event occurs. If disabled, the action is not triggered, regardless of whether the event occurs. Disabled actions are still displayed on the Actions tab. However, they are grayed out. |
| Edit | Takes you to the Edit Action page for the selected action. Here, you can update the necessary fields for the action. For more information on configuring a specific action, refer to the links provided in the Action Types section. |
| Test Most Recent | Triggers the action using data from the most recent corresponding event. For example, if the action is configured to run when a scan fails, Guardian will use the data from the most recent failed scan to trigger the selected action. |
| Delete |
Removes the selected action from your Guardian organization. Warning: Deleting an action cannot be undone. If you want to restore a deleted action, you will need to add it again like new. For more information on adding a new action, see Add an Action below. |
Add an Action
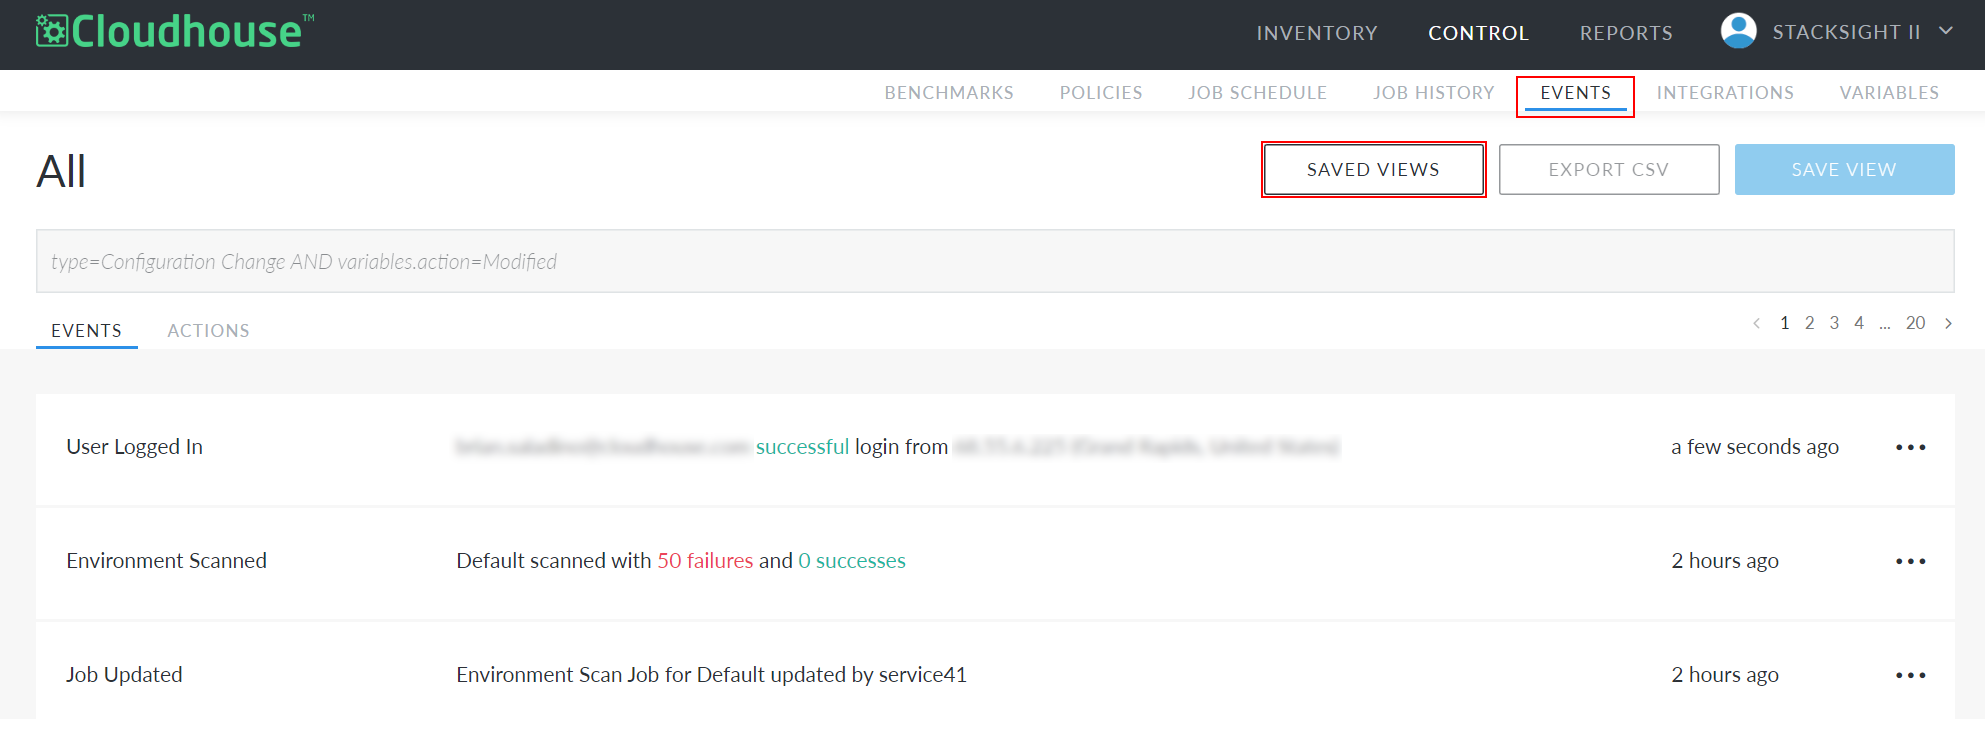
In order to add a new action, you must first define the event that will trigger the action. For example, if you want to send a Slack message each time a node scan fails, a failed node scan is the event that triggers the action. So, you must first create a Saved View for Failed Scan events. Once you have created a Saved View for your triggering event, you can add a corresponding action. For more information on how to create Saved Views, see Saved Views.
To add an action:
-
Navigate to the Events tab (Control > Events).
-
Click the Saved Views button at the top of the page. The Saved Views side panel is displayed.
-
Select the event you want to trigger your new action. The saved view for that event is displayed.
Note: Saved Views are split across three category tabs depending on how they were initially configured: Global Views, Organization Views, and My Views. If you don't see the Saved View you're looking for, check under the other tabs.
-
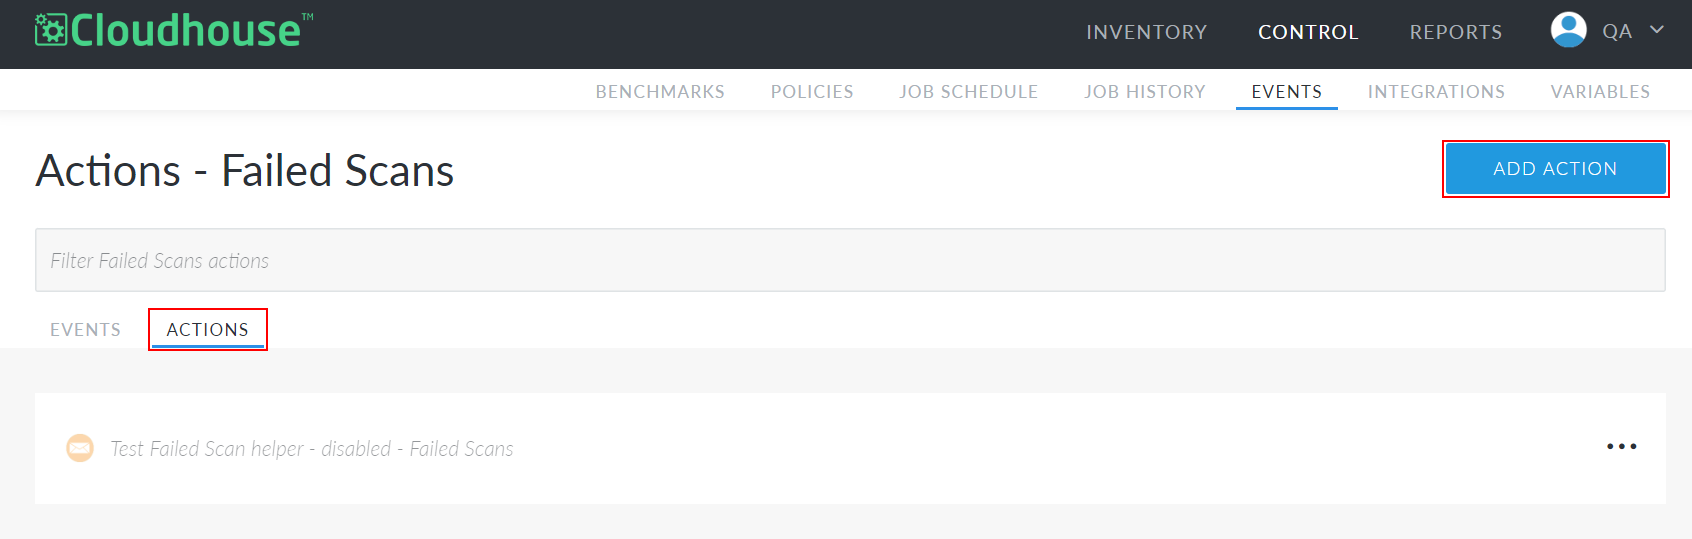
Click the Actions. The Actions tab opens, displaying all existing actions configured for this event.
-
Click the Add Action button. The Add New Action page opens.
-
Select an action to add.

-
Complete the provided fields.
Note: Each action type requires its own set of data to function properly. For information on configuring a specific action type, refer to links provided in the Action Types section.
-
Click Done.
Now, a confirmation dialog is displayed indicating that your new action has been created. You can see the new action listed on the Actions tab.