Synchronize Nodes – Job Type
With Cloudhouse Guardian (Guardian), you can schedule a node synchronization job to run according to a specified cycle. Using an existing integration, this job type synchronizes the nodes present within that target source to your Guardian instance. For example, you could configure a sync job to run every two hours in AWS, Azure, ServiceNow, or any integration that has node detection capabilities. For more information, see Integrations. The following topic describes how to add a scheduled 'Synchronize Nodes' job.
Note: This feature was introduced in V4.3.47.2 of Guardian. For more information, see August 2024 Monthly Release.
Add a Synchronize Nodes Job
A Scheduled Job using an integrated source with Guardian lets you define a node synchronization job to run at a specified time or interval, helping maintain synchronization. This section describes how you can add a scheduled job integrated with AWS, Azure, or GCP.
Note: For more information on how to add a synchronize nodes job integrated with ServiceNow or Freshservice, see Add a Freshservice/ServiceNow Synchronize Nodes Job.
To add an AWS, Azure, or GCP scheduled Synchronize Nodes job, complete the following:
-
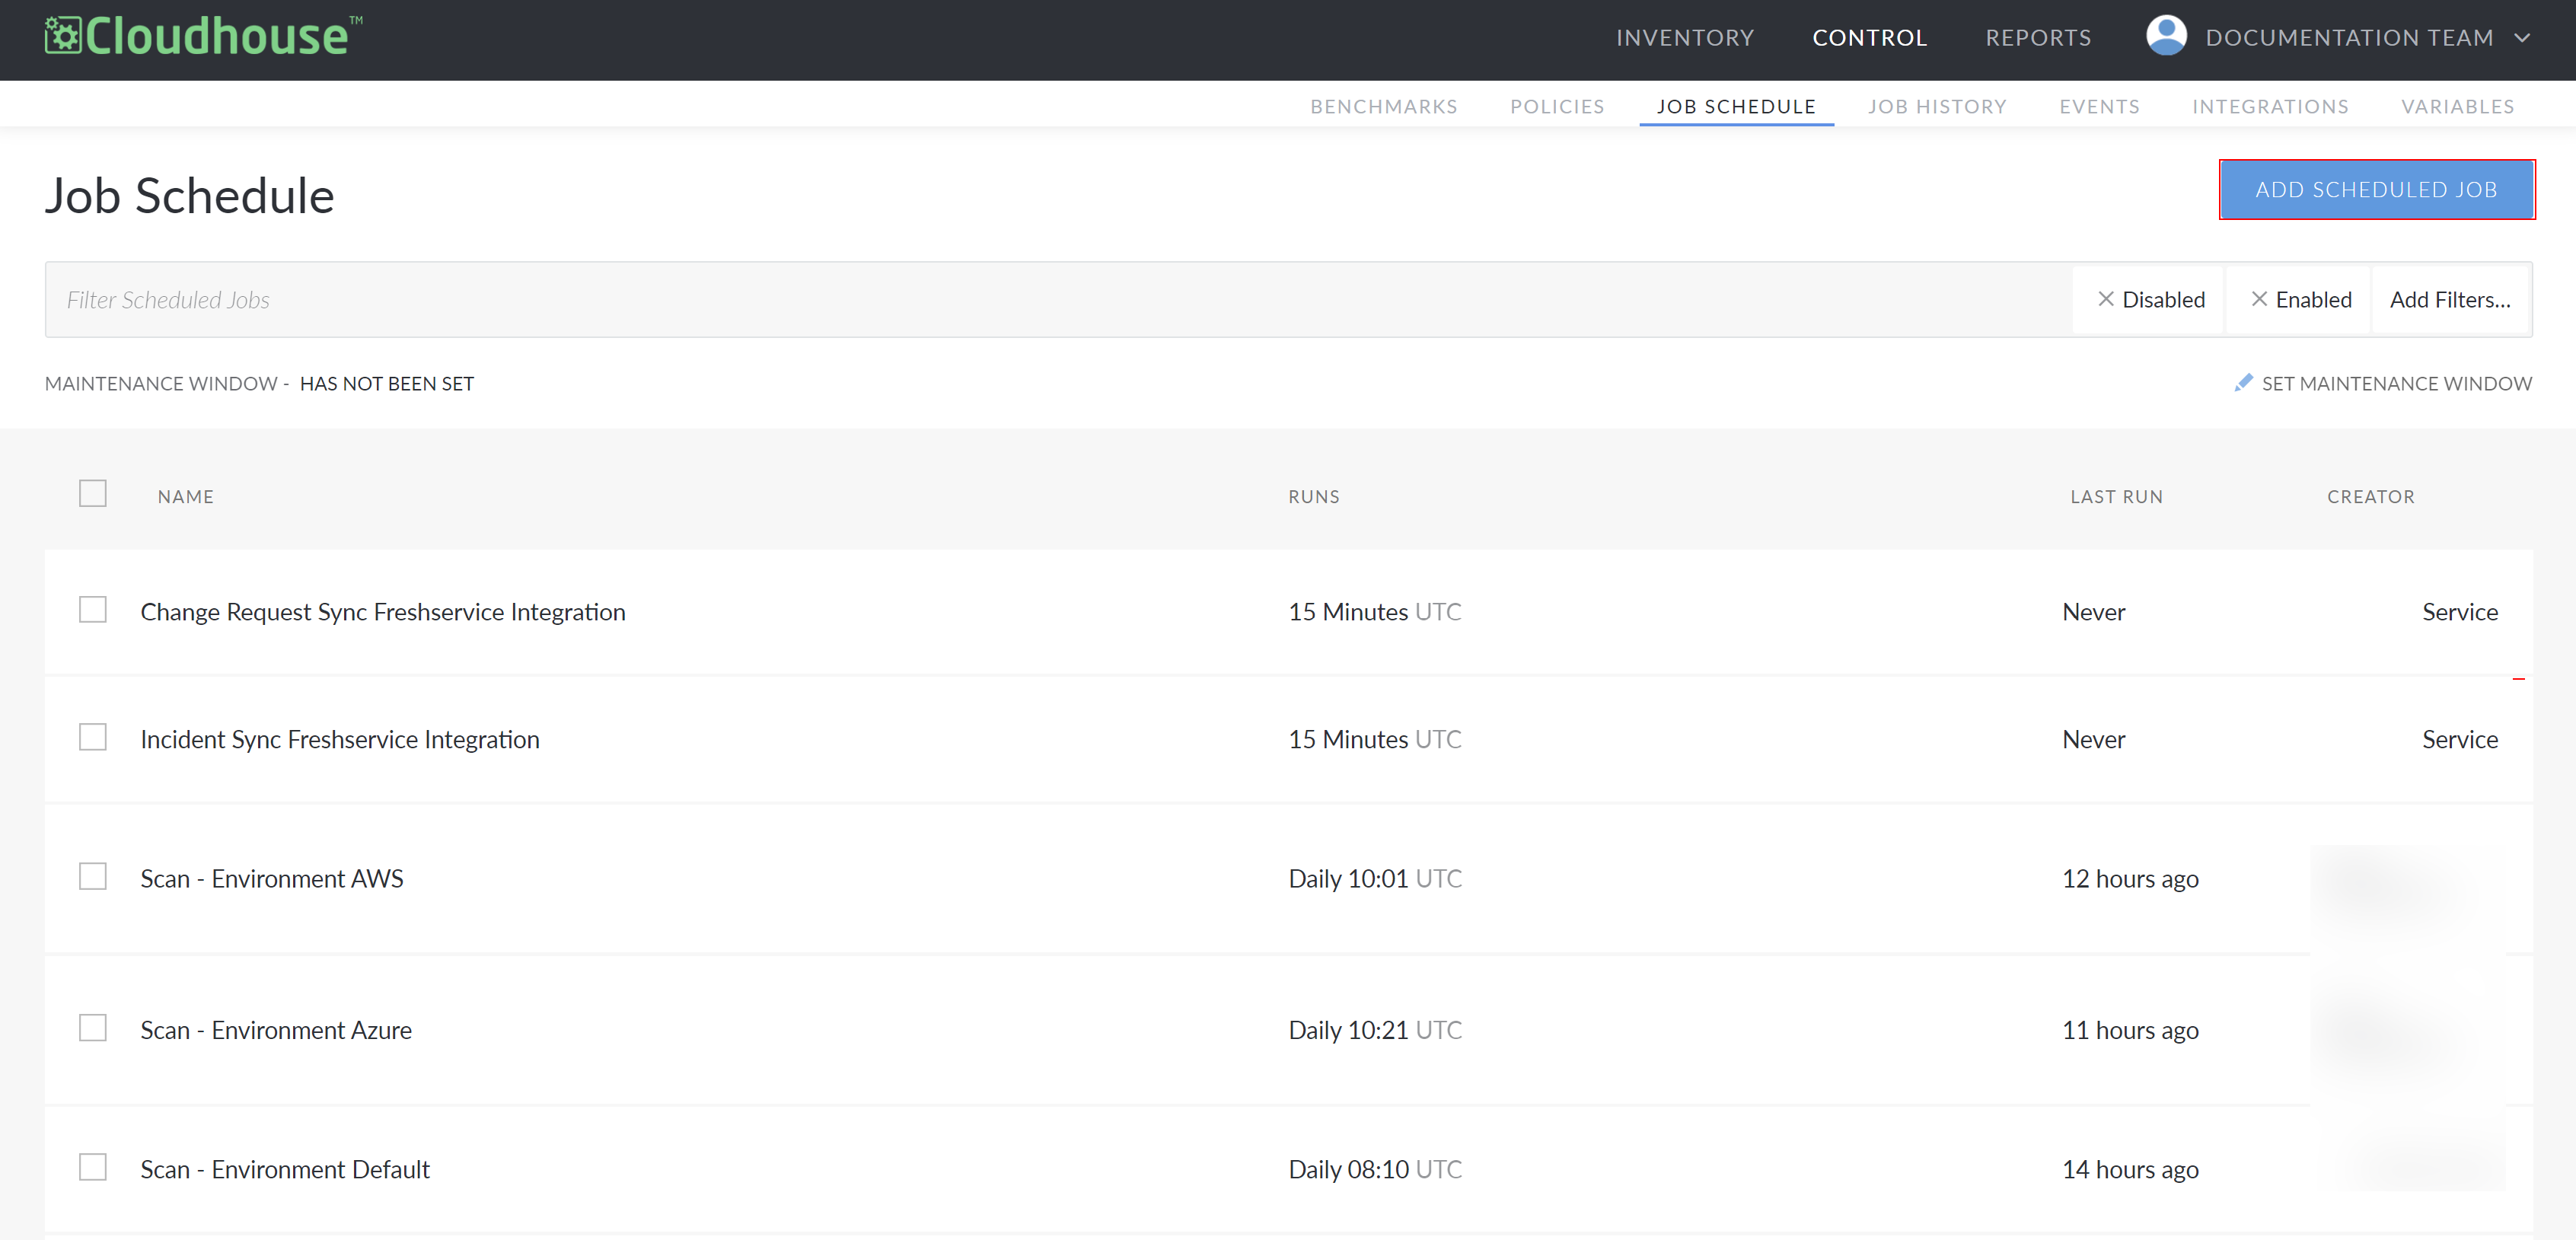
In the Job Schedule tab (
-
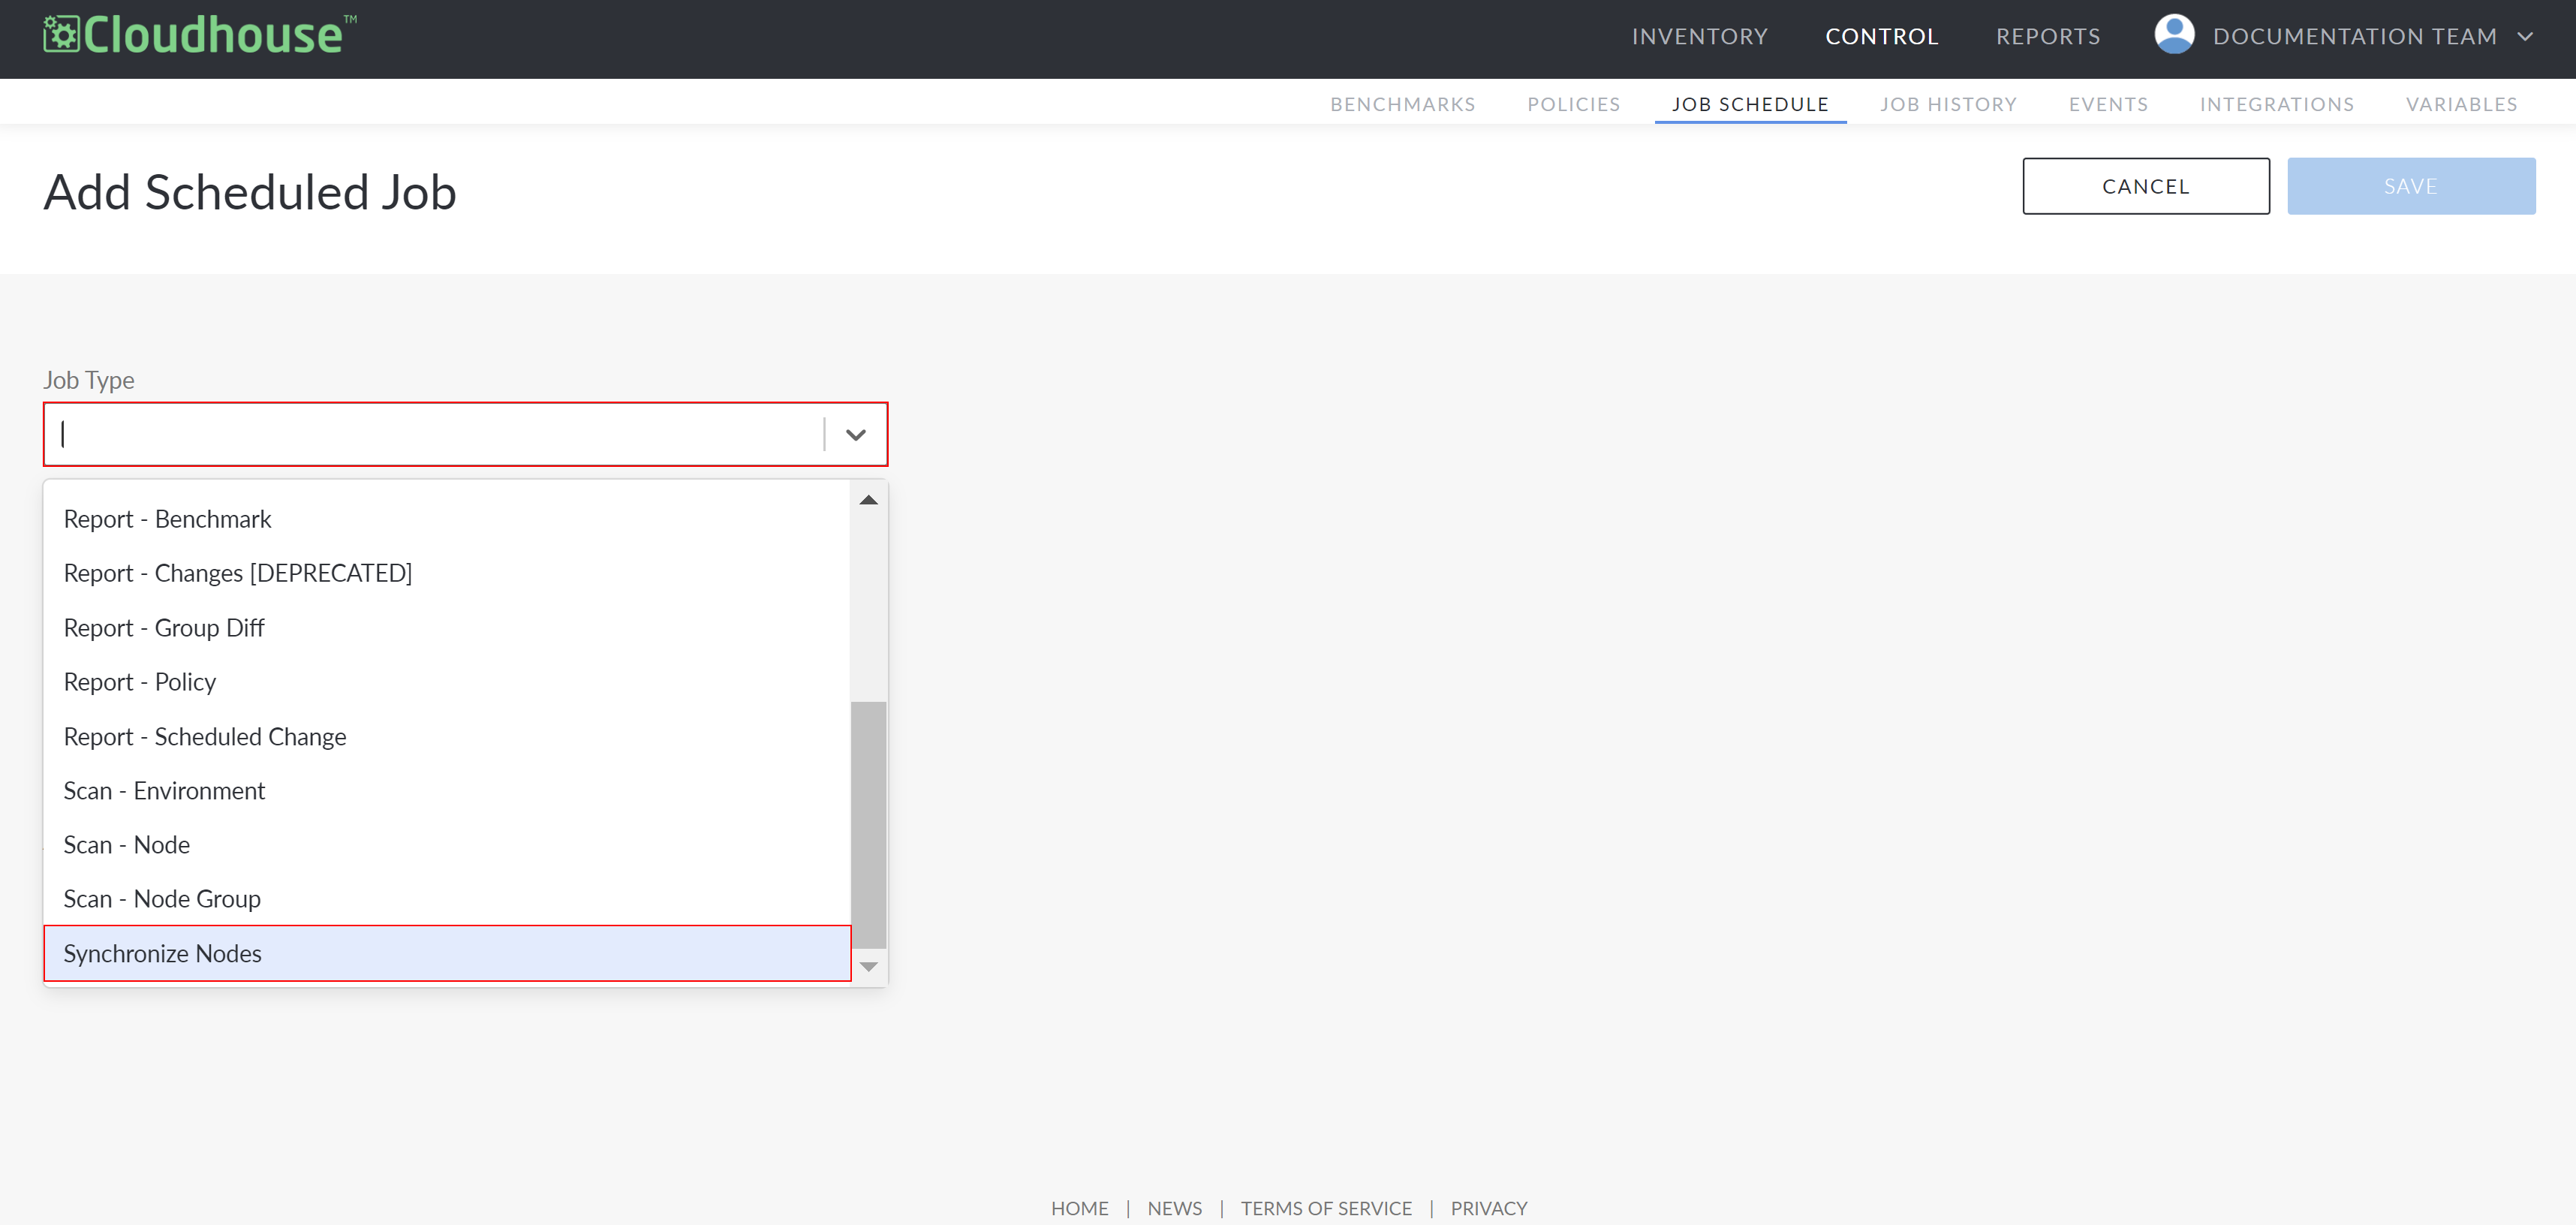
In the Job Type drop-down list, select the 'Synchronize Nodes' option.
-
Once selected, complete the following options to add a synchronize job.
Option
Description
Runs Every drop-down list How often the job will be scheduled to run. Select a value from the drop-down list. If you select a schedule equal or higher than 24 hours, additional fields are displayed for you to configure the start time and time zone.
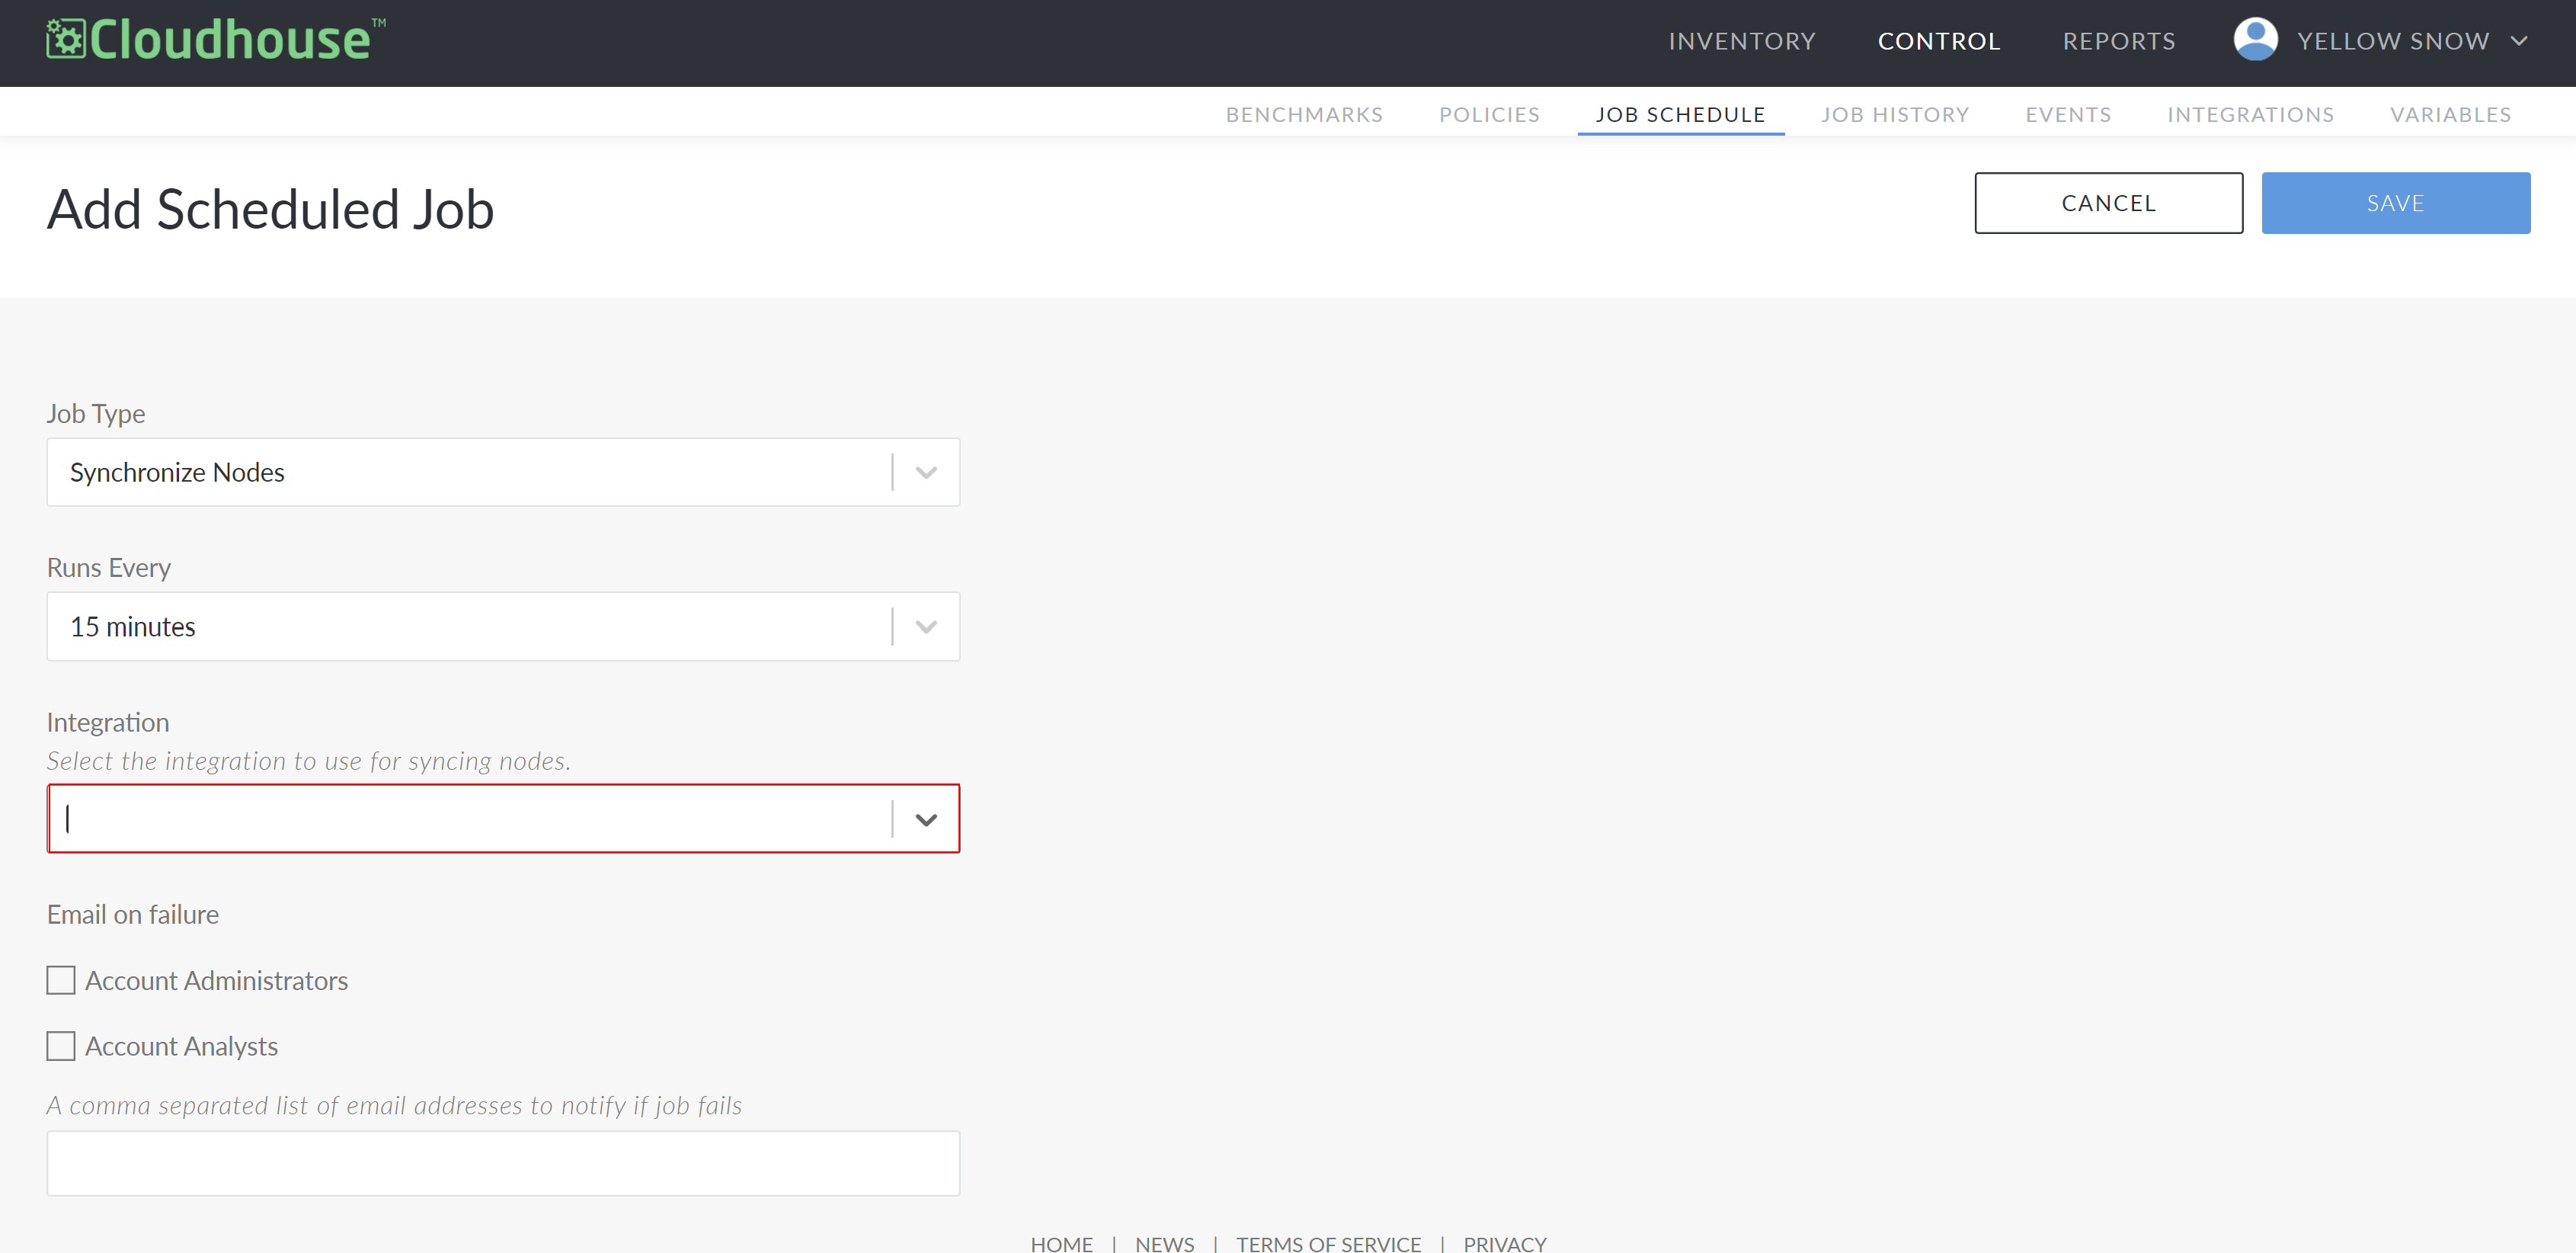
Integration drop-down list The integration you want to use for syncing nodes. Select an option from the drop-down list.
Email on failure checkboxes Option to notify accounts via email if the job schedule fails. Select one or all options below, if required:
-
Account Administrators checkbox – Select to notify account administrators.
-
Account Analysts checkbox – Select to notify account analysts.
For more information on the above account roles, see Users (Account > Manage Accounts > Users).
A comma separated list of email addresses to notify if job fails field Enter a list of email addresses to notify if the job schedule fails, each separated by a comma.
-
-
Once you have completed each field, click to Save the scheduled job.
If successful, a confirmation message is displayed and the job is added to the Job Schedule tab. The job will automatically run according to the schedule you set.
Note: Once the job is run, the results are displayed as a 'Synchronize Nodes Job' event in the Events tab. For more information, see Events.
Add a Freshservice/ServiceNow Synchronize Nodes Job
If you've added a Freshservice or ServiceNow integration to Guardian, you can define a node synchronization job to run at a specified time or interval using those integrations. With this job you can set rules about which environment and node groups the nodes should be placed in.
To add a Freshservice or ServiceNow Synchronize Nodes job, complete the following:
-
In the Job Schedule tab, click Add Scheduled Job. The Add Scheduled Job page is displayed.
-
In the Job Type drop-down list, select 'Synchronize Nodes'.
-
In the Runs Every drop-down list, select a value for how often you want the job to run.
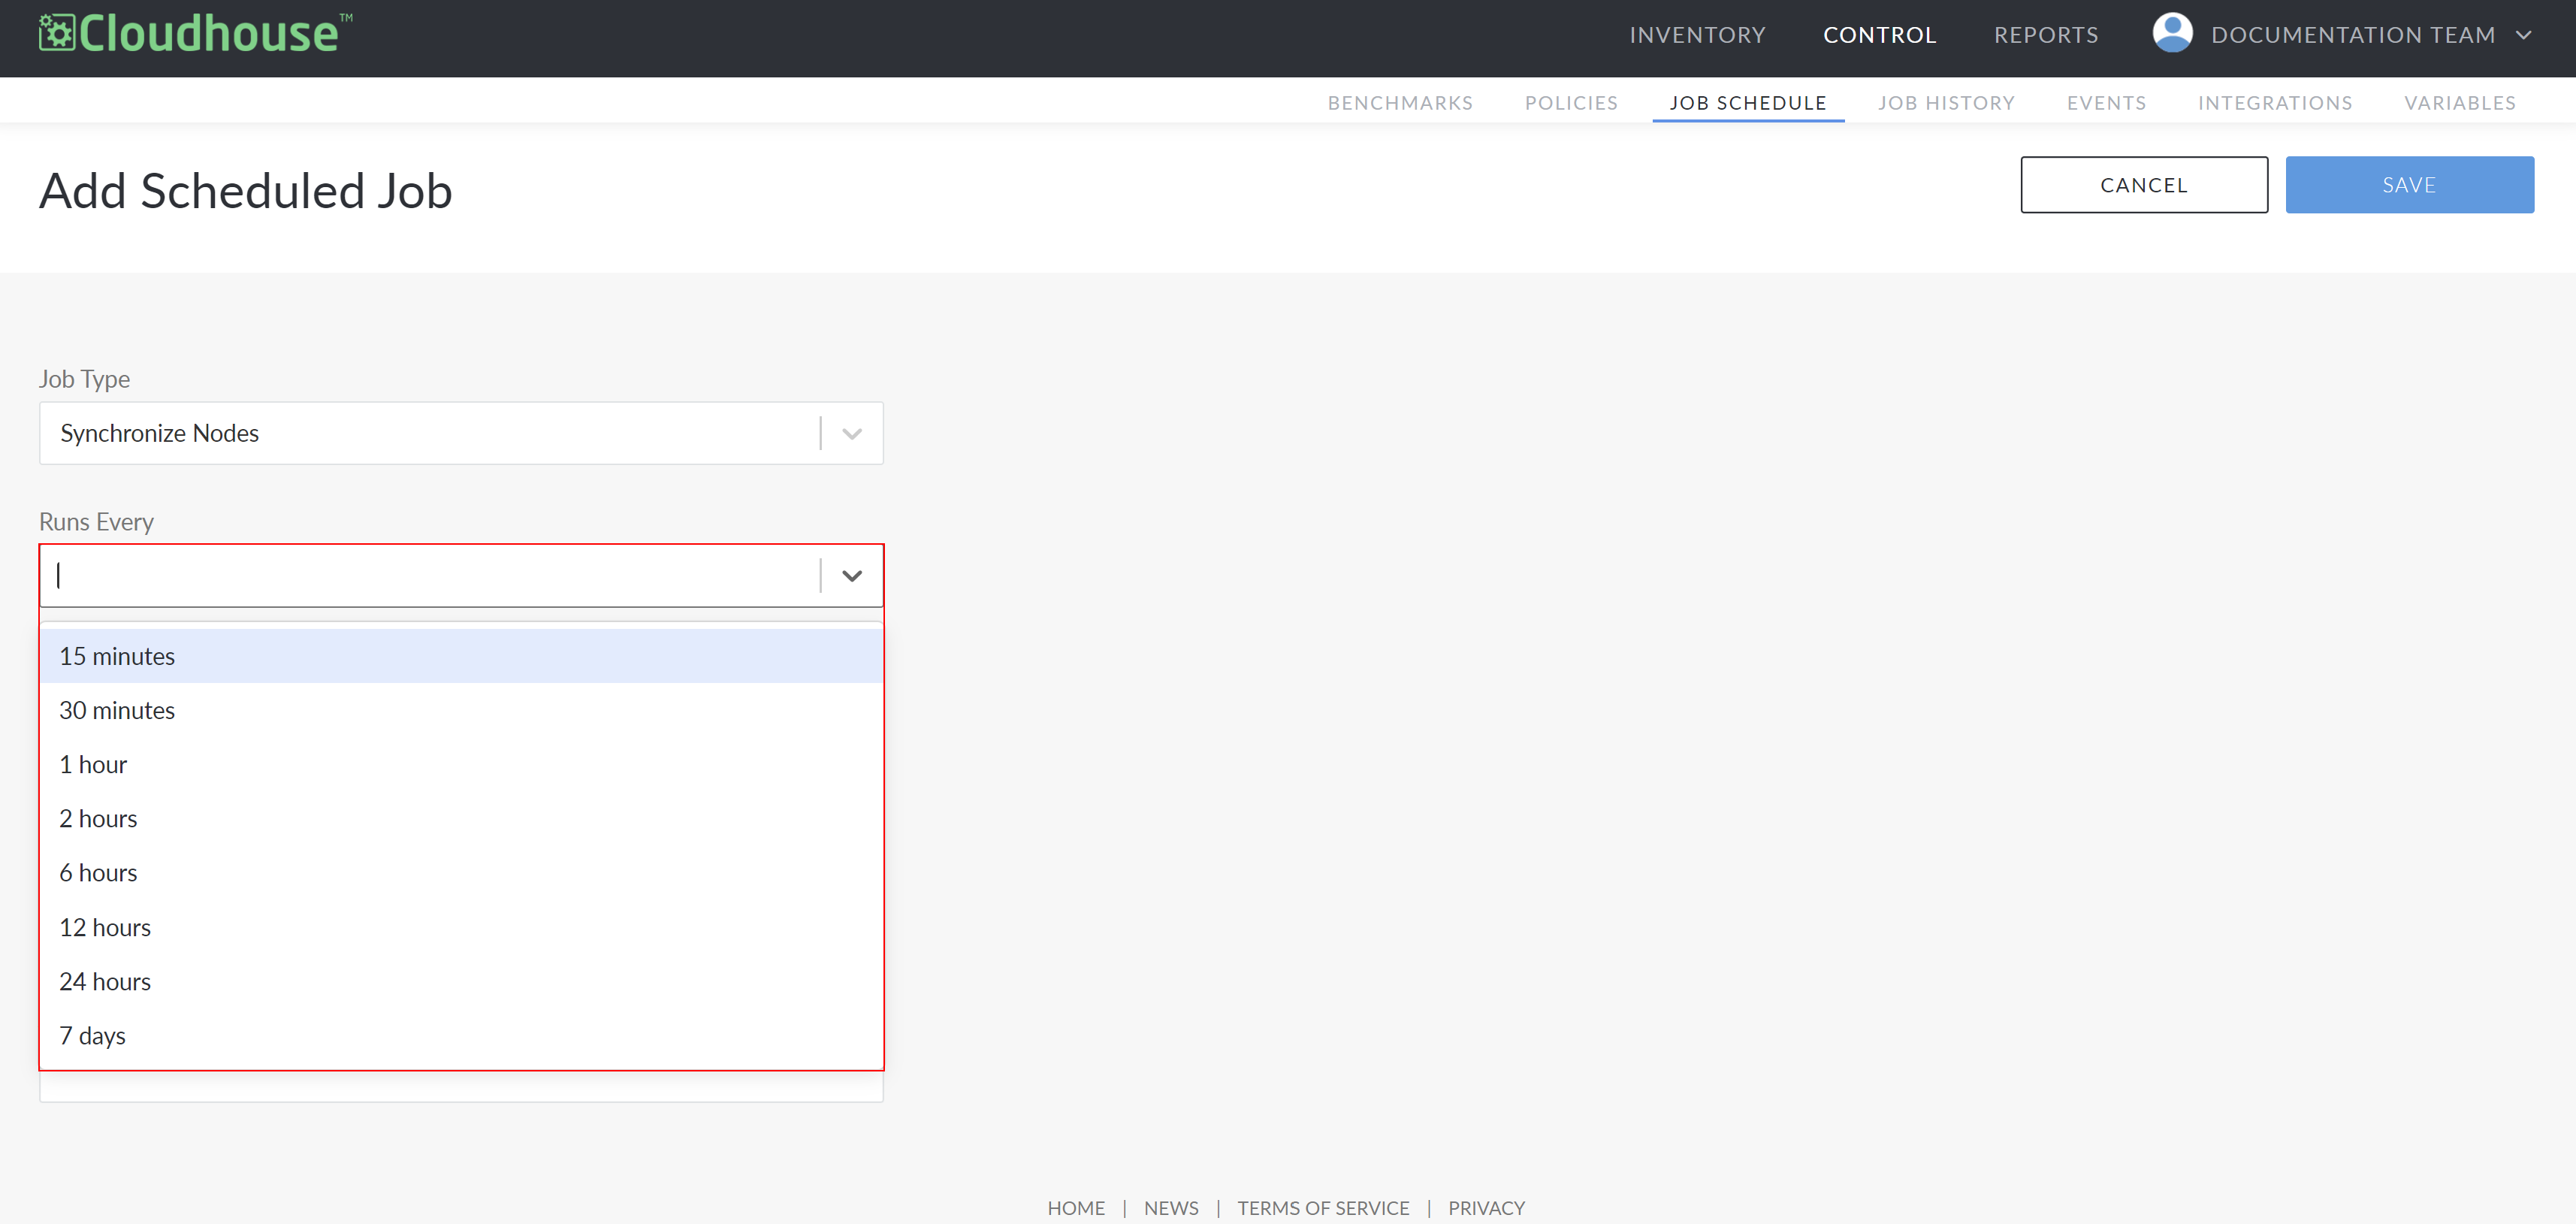
Note: If you select a schedule equal to or higher than 24 hours, additional fields are displayed for you to configure the exact day and time.
-
Select the integration you want to use for syncing nodes from the Integration drop-down list.
-
Once selected, complete the following options to add a synchronize job.
Option
Description
Label field (optional) A unique name for the synchronize nodes job. This field allows you to assign a unique and descriptive name to the job. This name is how you will identify this job among all others configured in your Guardian instance.
Note: This field is optional. If you don’t enter a label, Guardian will automatically use the value of the Filter field as the label. If no filter is specified, the label will default to the Integration name.
Tip: This feature was introduced in V4.3.50.0 of Guardian. For more information, see December 2024 Monthly Release.
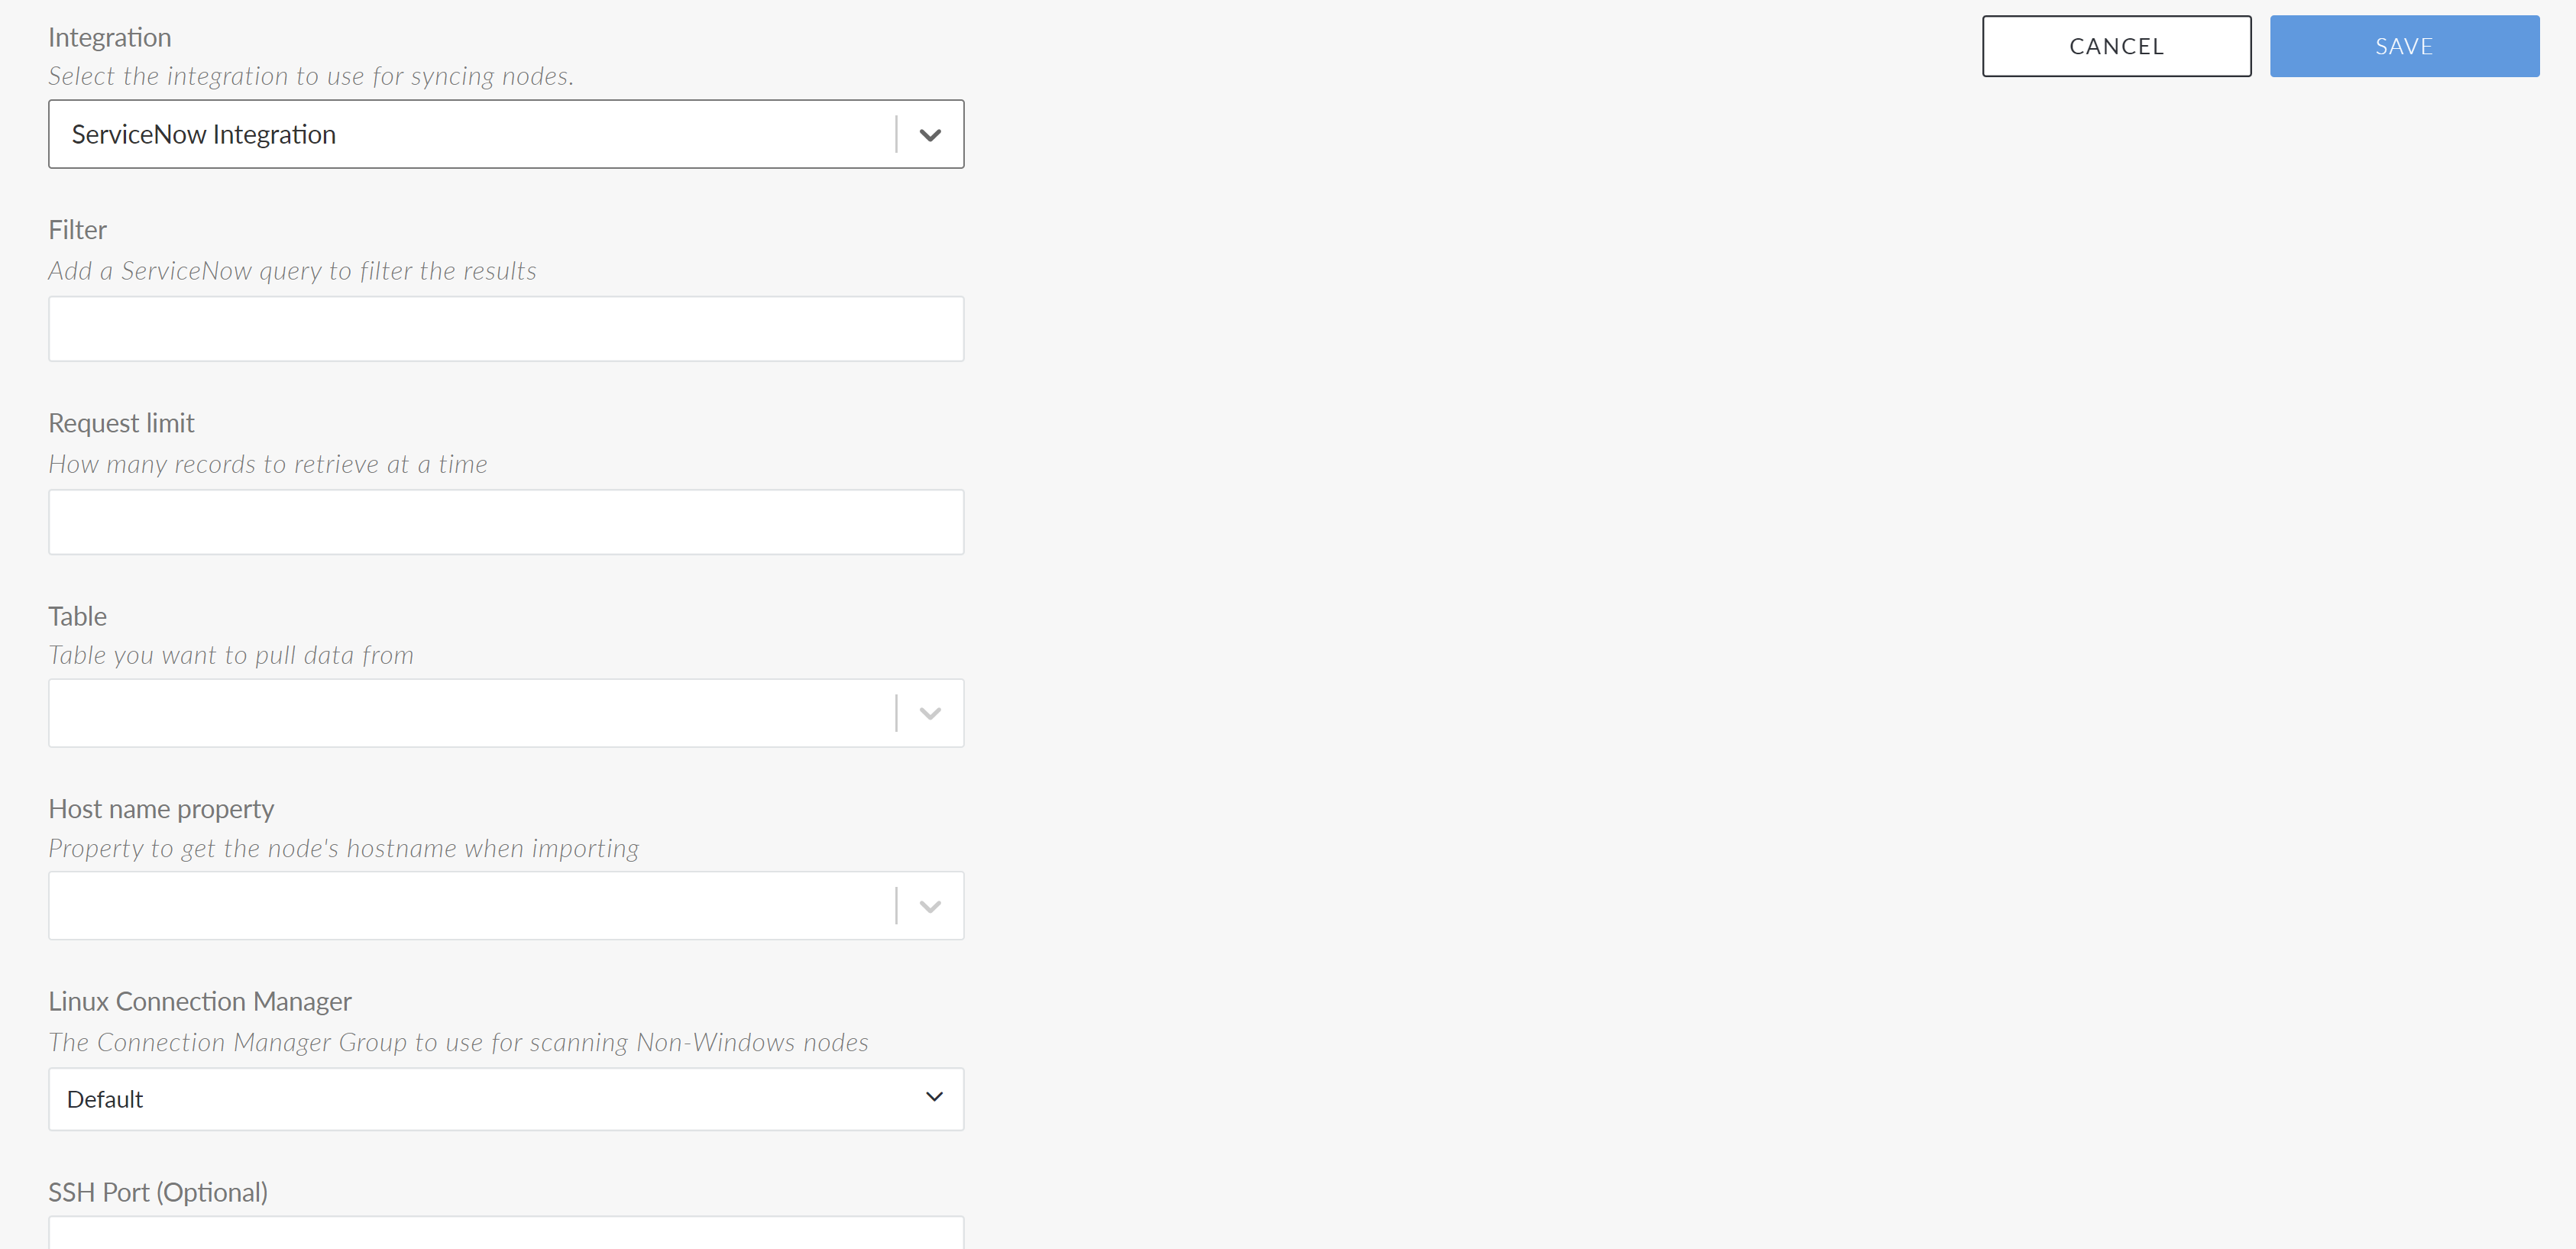
Filter field
Option to filter nodes via a Freshservice or ServiceNow query. Enter the filter query to filter the results, if desired.
Request limit field
The maximum number of records you want to retrieve at a time. Enter a value in the field, by default this limit is set to '500'.
Table field
The table you want to pull data from via a ServiceNow query. Enter a table name in the field, for example,
cmdb_ci_server.Warning: This option is only available if you selected a ServiceNow integration.
Tip: Previously this was a drop-down list. The field was introduced in V4.3.50.0 of Guardian. For more information, see December 2024 Monthly Release.
Host name property drop-down list
The name of the Freshservice or ServiceNow property that you want to import the nodes from. Select an option from the drop-down list.
Operating system family drop-down list (optional) Option to assign an operating system (OS) family to nodes that are imported during the synchronization job. For example, you can select 'Linux' or 'Windows' as the OS family. Select an option from the drop-down list to group nodes without OS information into an appropriate OS family for monitoring.
Warning: This option is only available if you selected a ServiceNow integration.
Tip: This feature was introduced in V4.3.50.0 of Guardian. For more information, see December 2024 Monthly Release.
Target operating system drop-down list (optional) Option to assign a specific OS to nodes that are imported during the synchronization job. For example, you can select 'Ubuntu 22.04' or 'Windows 10' as the specific OS. Select an option from the drop-down list to ensure nodes without OS information are assigned a specific OS for monitoring.
Warning: This option is only available if you selected a ServiceNow integration.
Tip: This feature was introduced in V4.3.50.0 of Guardian. For more information, see December 2024 Monthly Release.
Linux Credentials drop-down
When synchronizing Linux nodes, provide your Linux credentials according to the following:
-
Linux Connection Manager drop-down list - The Connection Manager group that is responsible for scanning any non-Windows node(s) once they have been added to Guardian. Select a Connection Manager group from the drop-down list.
-
SSH Port (Optional) field - The Secure Shell (SSH) port number that the Linux Connection Manager uses to communicate with the target nodes for scanning. If you selected a Linux Connection Manager from the drop-down list above, enter the port number you are using. If no value is provided, Guardian will default to port 22.
Note: If you enter a port number that is different to the default (port 22), make sure that it matches the port number that the administrator of the target node is using to run their SSH server.
-
Linux Credentials drop-down - Option to use a stored credential. Select an option from the Credentials drop-down list. Additionally, you can select 'Add New Credential' to display the Create Credential dialog if you anticipate using these same credentials for other nodes or integrations. For more information, see Create Credential.
Note: This option is only available if you have the Credentials feature enabled. If you don't, you'll be prompted to enter a Username and Password for authentication.
-
Username and Password fields - The username and password of the account configured to use SSH.
Note: This option is only displayed if the Credentials feature is not enabled.
Windows Credentials drop-down
When synchronizing Windows nodes, provide your Windows credentials according to the following:
-
Windows Connection Manager drop-down list – The Connection Manager group that is responsible for scanning any Windows node(s) once they have been added to Guardian. Select a group from the drop-down list.
-
WinRM Port field – The default port for WinRM. Enter 5985 for HTTP-based connections, or 5986 for HTTPS/cert-based connections. If you are using non-standard ports for WinRM, enter them here.
-
Windows Credentials drop-down list – Option to use a stored credential. Select an option from the drop-down list. Additionally, you can select 'Add New Credential' to display the Create Credential dialog. For more information, see Create Credential.
Note: This option is only displayed if you have the Credentials feature enabled. If you don't, the Username and Password fields are displayed instead. For more information, see below.
-
Username and Password fields - The username and password of the account configured to use WinRM.
Note: This option is only displayed if the Credentials feature is not enabled.
Guardian Credentials Vault radio button Option to use credentials stored in the Guardian vault to authenticate your access. Select the radio button to display the Credentials drop-down list and select a stored credential.
Note: This option was added in V3.60.0 of the Guardian web application. For more information, see October 2025 Quarterly Release.
For more information on the Guardian credentials vault, see Credentials.
Secret Server radio button Option to use credentials stored in Secret Server to authenticate your access. Select the radio button to display the Secret Server Items drop-down list and select a stored credential.
Note: This option was added in V3.60.0 of the Guardian web application. For more information, see October 2025 Quarterly Release.
For more information on Secret Server credentials in Guardian, see Secret Server Integration.
Environment drop-down list The environment that you want any detected nodes to be added to. Select an environment from the drop-down list.
Node Groups drop-down list The node groups that you want any detected nodes to be added to. Select the group(s) from the drop-down list.
Incremental Sync checkbox Option to define what nodes are retrieved by the synchronization job. If selected, Guardian only detects new nodes and/or nodes that have been updated since the job run's previous scan. If not selected, Guardian detects all nodes that are present within the target source.
Tip: This option should only be selected once you're confident that you've gotten everything you want from the initial setup. This feature was introduced in V4.3.52.0 of Guardian. For more information, see February 2025 Monthly Release.
Automatically add to Monitored checkbox Option to automatically start monitoring and scanning your nodes once this scheduled job has run. If selected, any detected nodes are automatically added to the Monitored tab (Inventory > Monitored) for regular scanning. Here, you can apply policies, create node groups, and schedule regular scans. For more information, see Monitored Nodes.
If not selected, the nodes are added to the Detected tab (Inventory > Detected) for processing. To monitor the detected nodes, you must move them to the Monitored tab. For more information, see Nodes.
Email on failure checkboxes Option to notify accounts via email if the job schedule fails. Select one or all options below:
-
Account Administrators checkbox – Select to notify account administrators.
-
Account Analysts checkbox – Select to notify account analysts.
For more information on the above account roles, see Users.
A comma separated list of email addresses to notify if job fails field Enter a list of email addresses to notify if the job schedule fails, each separated by a comma.
-
-
Once you have completed each field, click to Save the scheduled job.
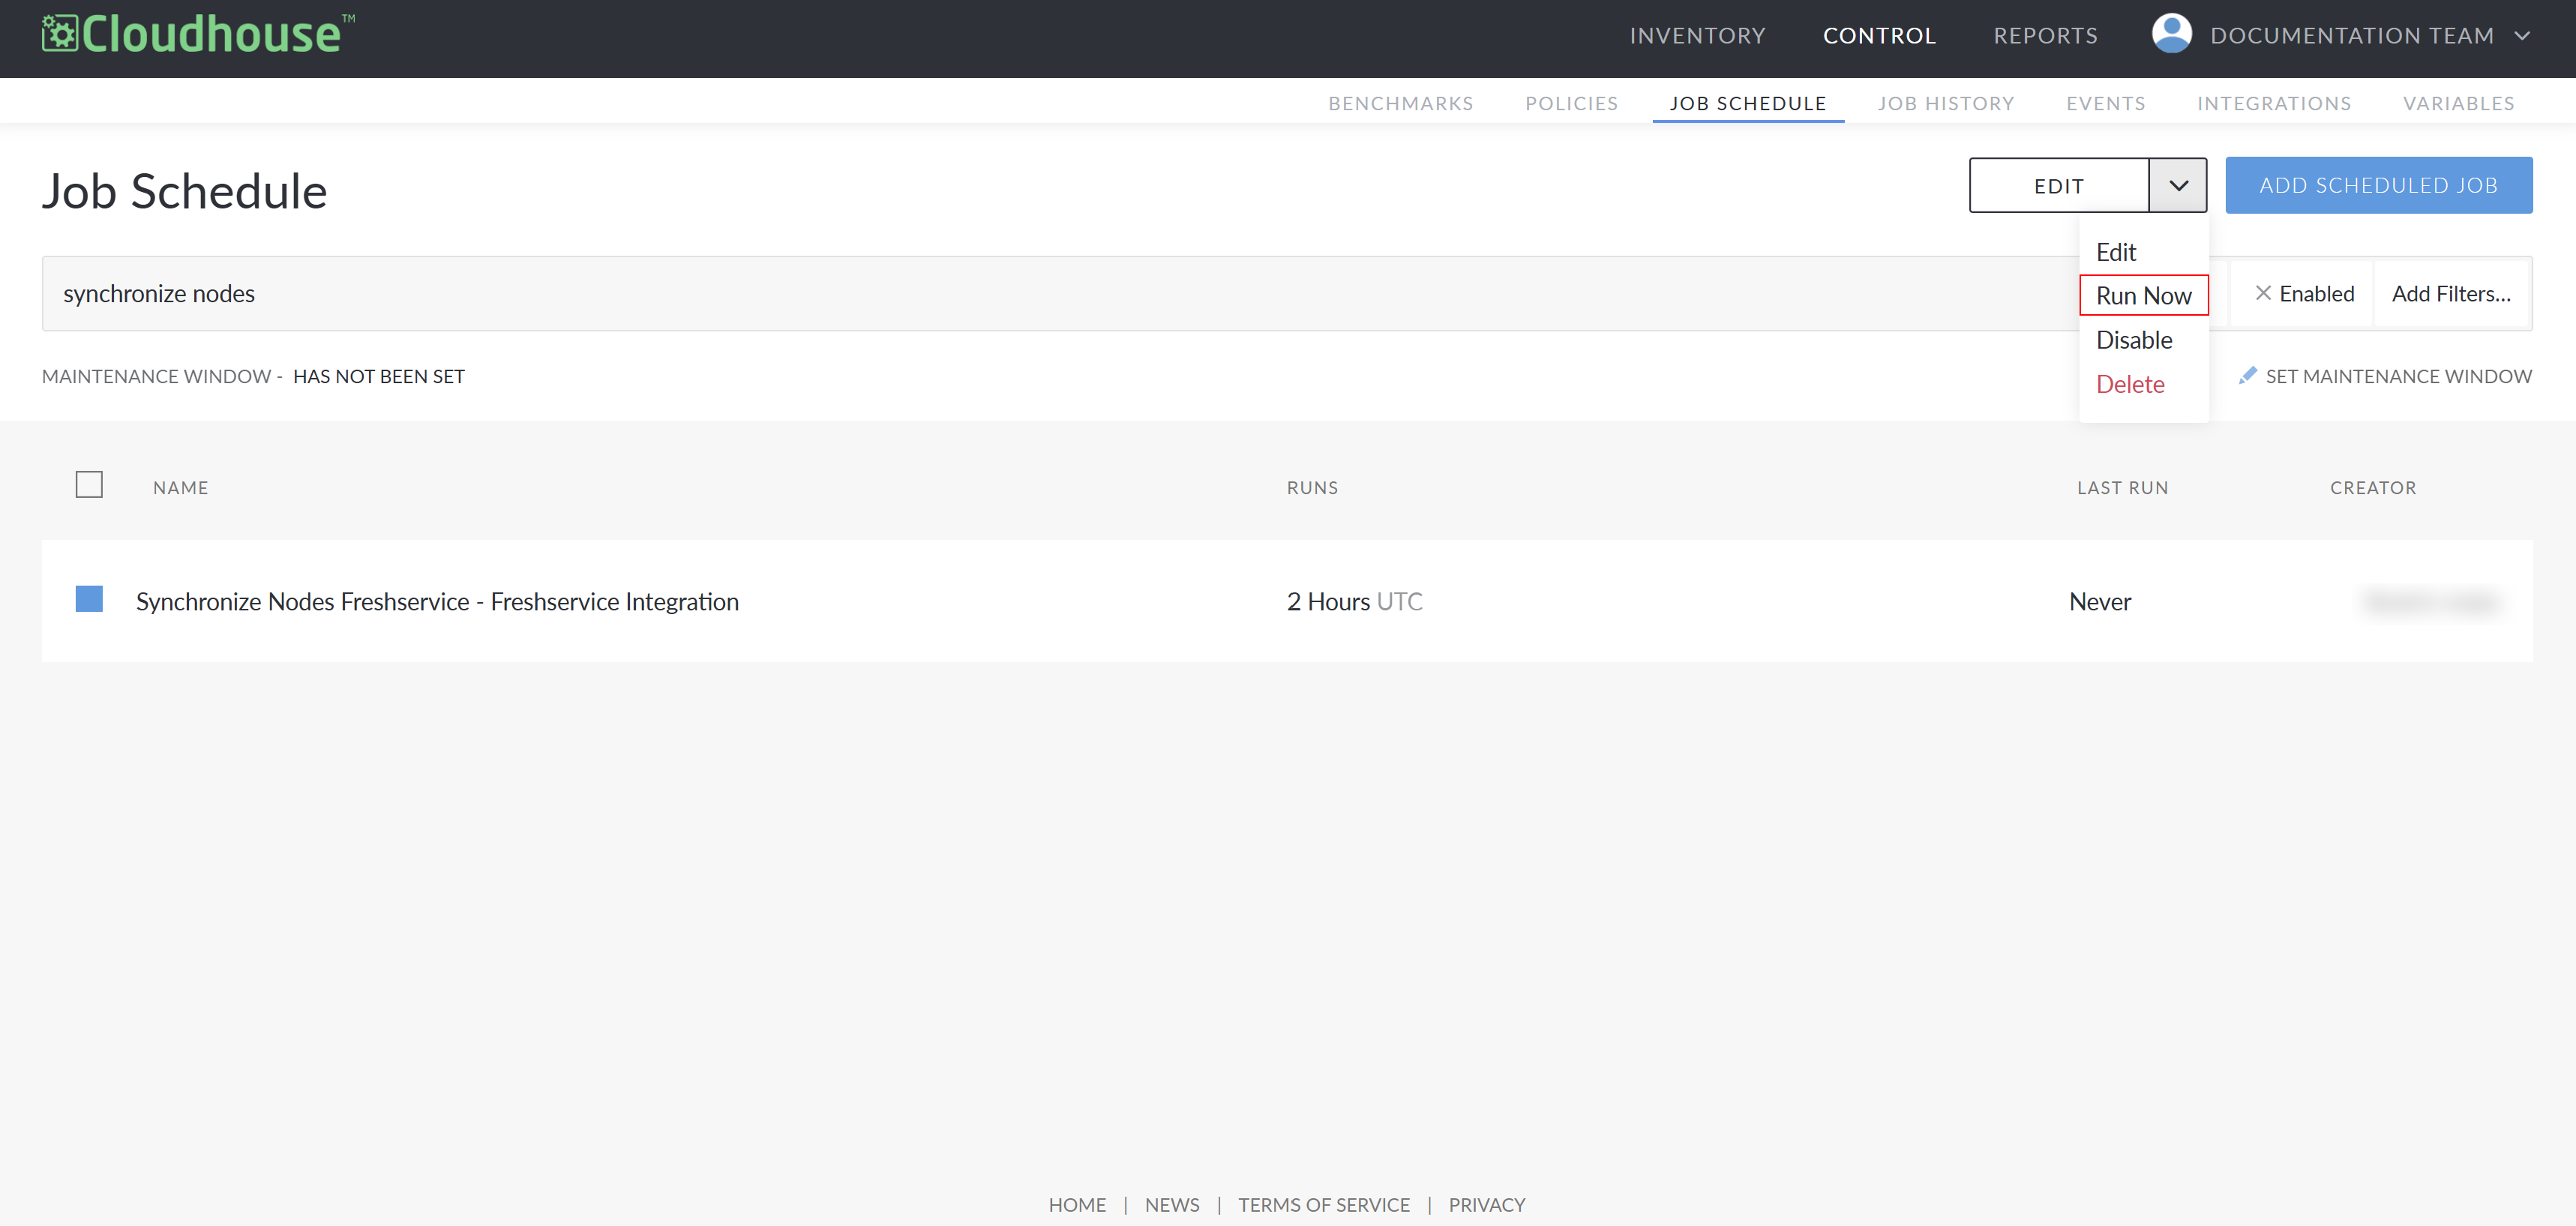
Once you've scheduled this job, a confirmation message is displayed and the job is added to the Job Schedule tab. Guardian will then automatically run the job at the next interval of your designated schedule. So, if you set the job to run every two hours, for example, the job will run for the first time two hours after you add it. However, you can manually run the job yourself by selecting the job on the Job Schedule page, clicking the Edit drop-down menu in the top right corner, and selecting Run Now.
Note: Once the job is run, the results are displayed as a 'Synchronize Nodes Job' event in the Events tab. For more information, see Events.