IBM Node
Once a Connection Manager has been set up, you can add nodes for Agentless scanning and monitoring. Cloudhouse Guardian (Guardian) supports four types of IBM nodes: XVI, SVC, Z/OS, and WebSphere. The following topic describes how to add an IBM node to your instance for monitoring.
Add an IBM XIV, SVC, or Z/OS Node
Adding an IBM XIV, SVC, or Z/OS node to your Guardian instance lets you monitor and track the configuration of a storage or computing device. This enables you to oversee performance metrics, identify potential issues, and ensure that the device passes your organization's security and operational policies.
To add an IBM XIV, SVC, or Z/OS node for Agentless scanning, complete the following steps:
-
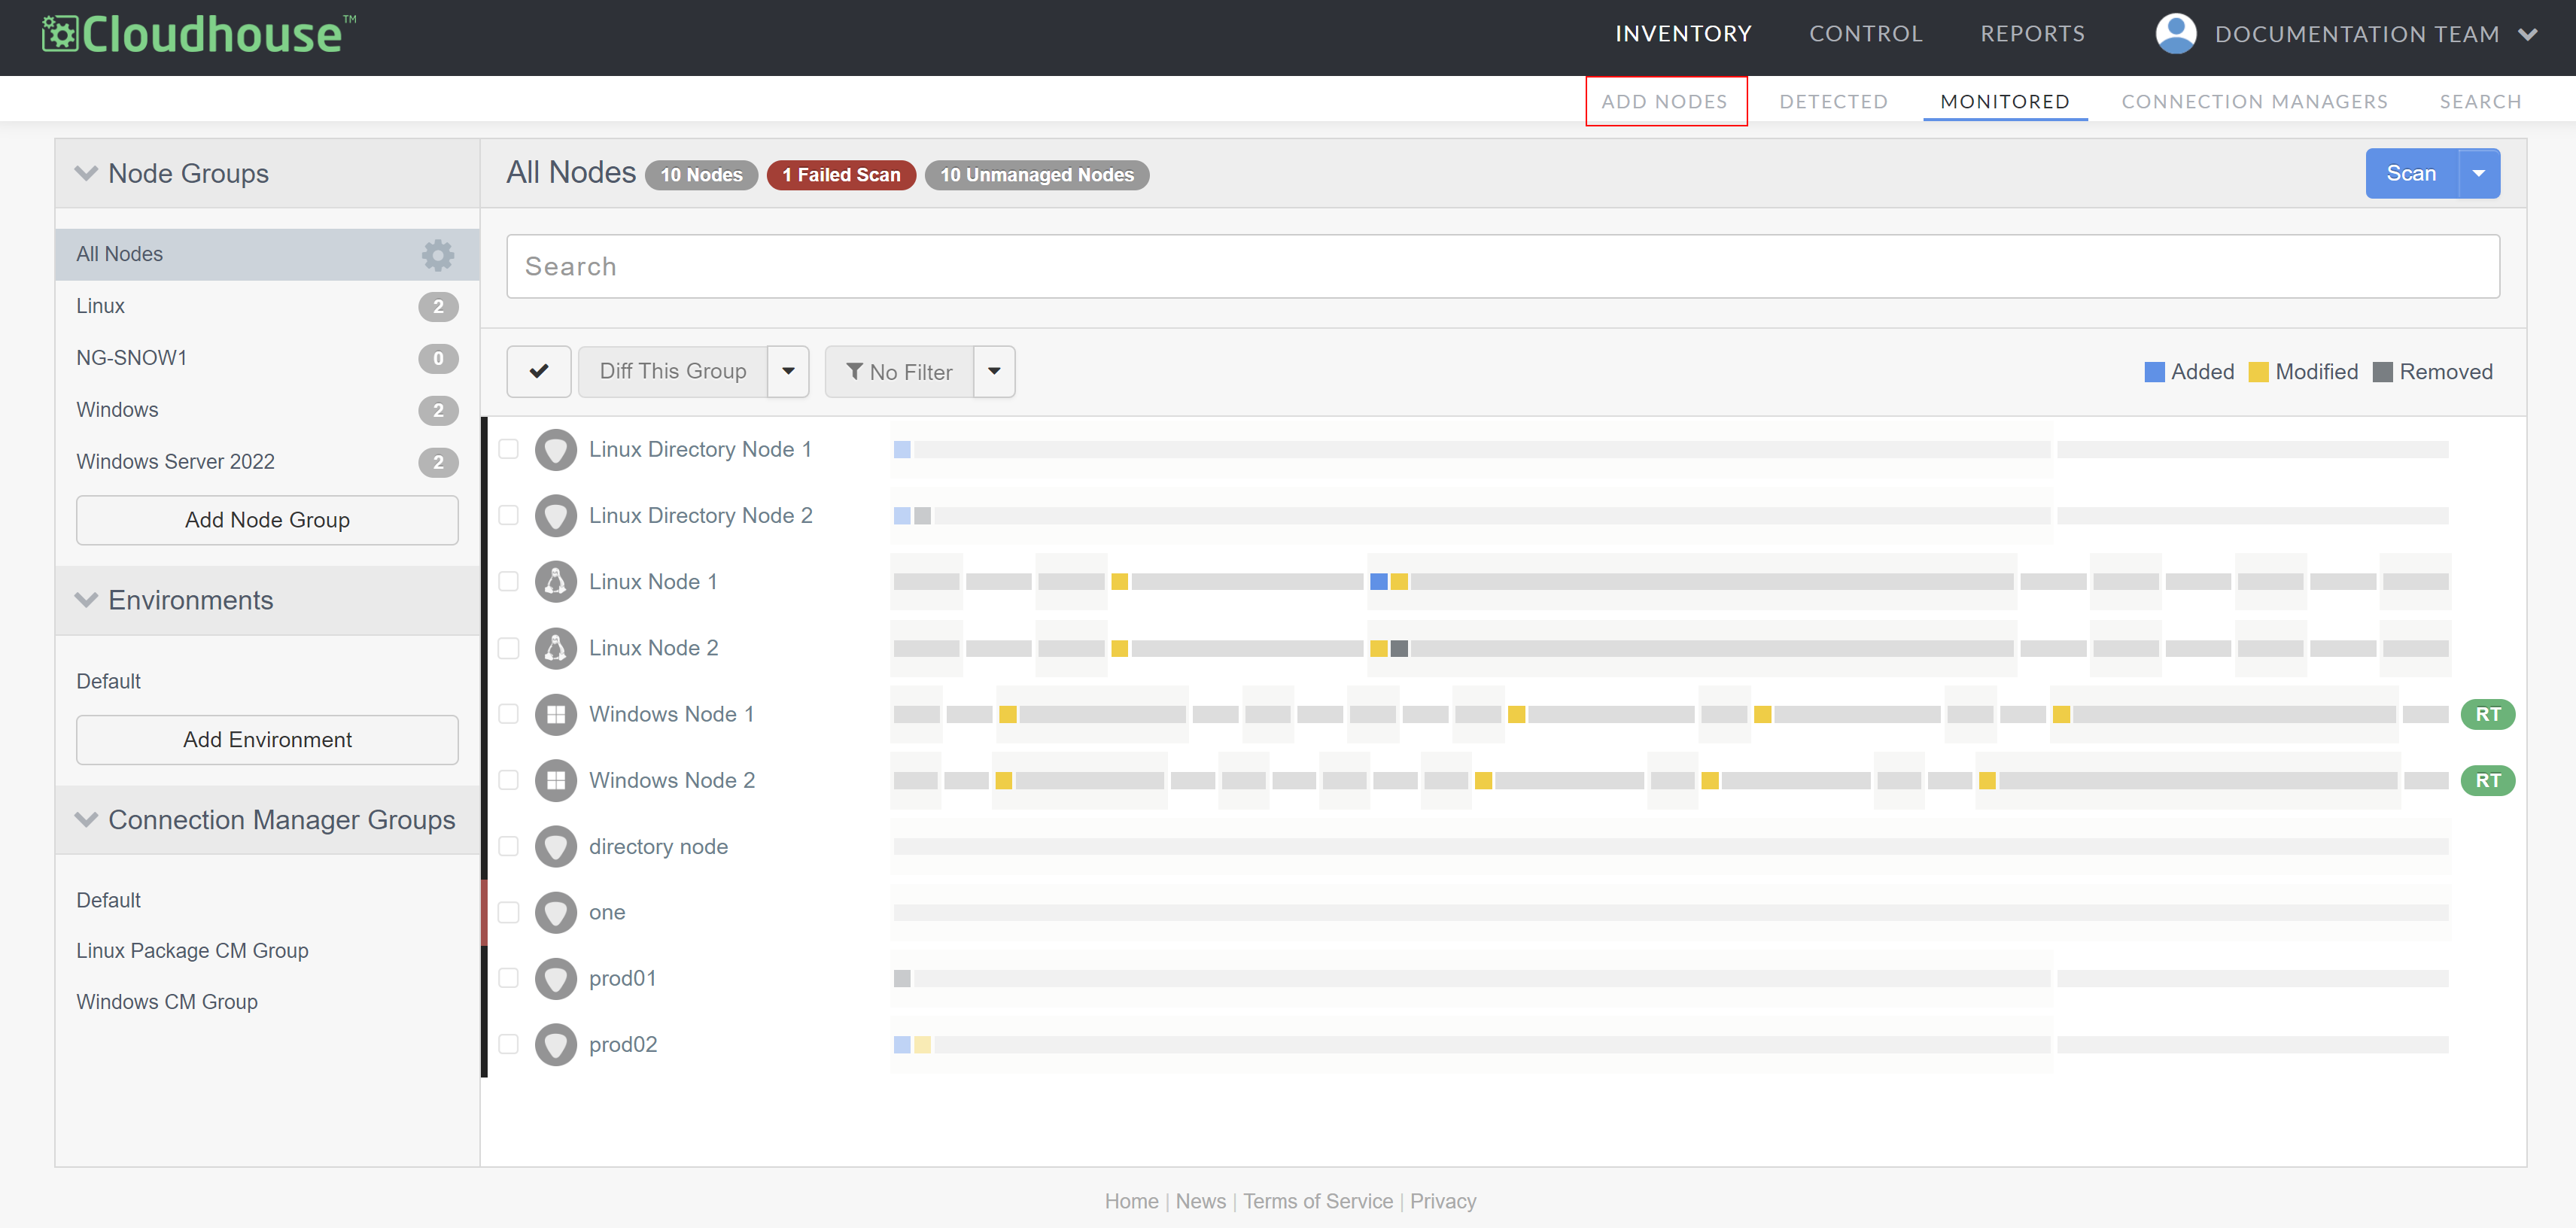
In the Guardian web application, navigate to the Add Nodes tab (Inventory > Add Nodes). The Add Nodes page is displayed.
-
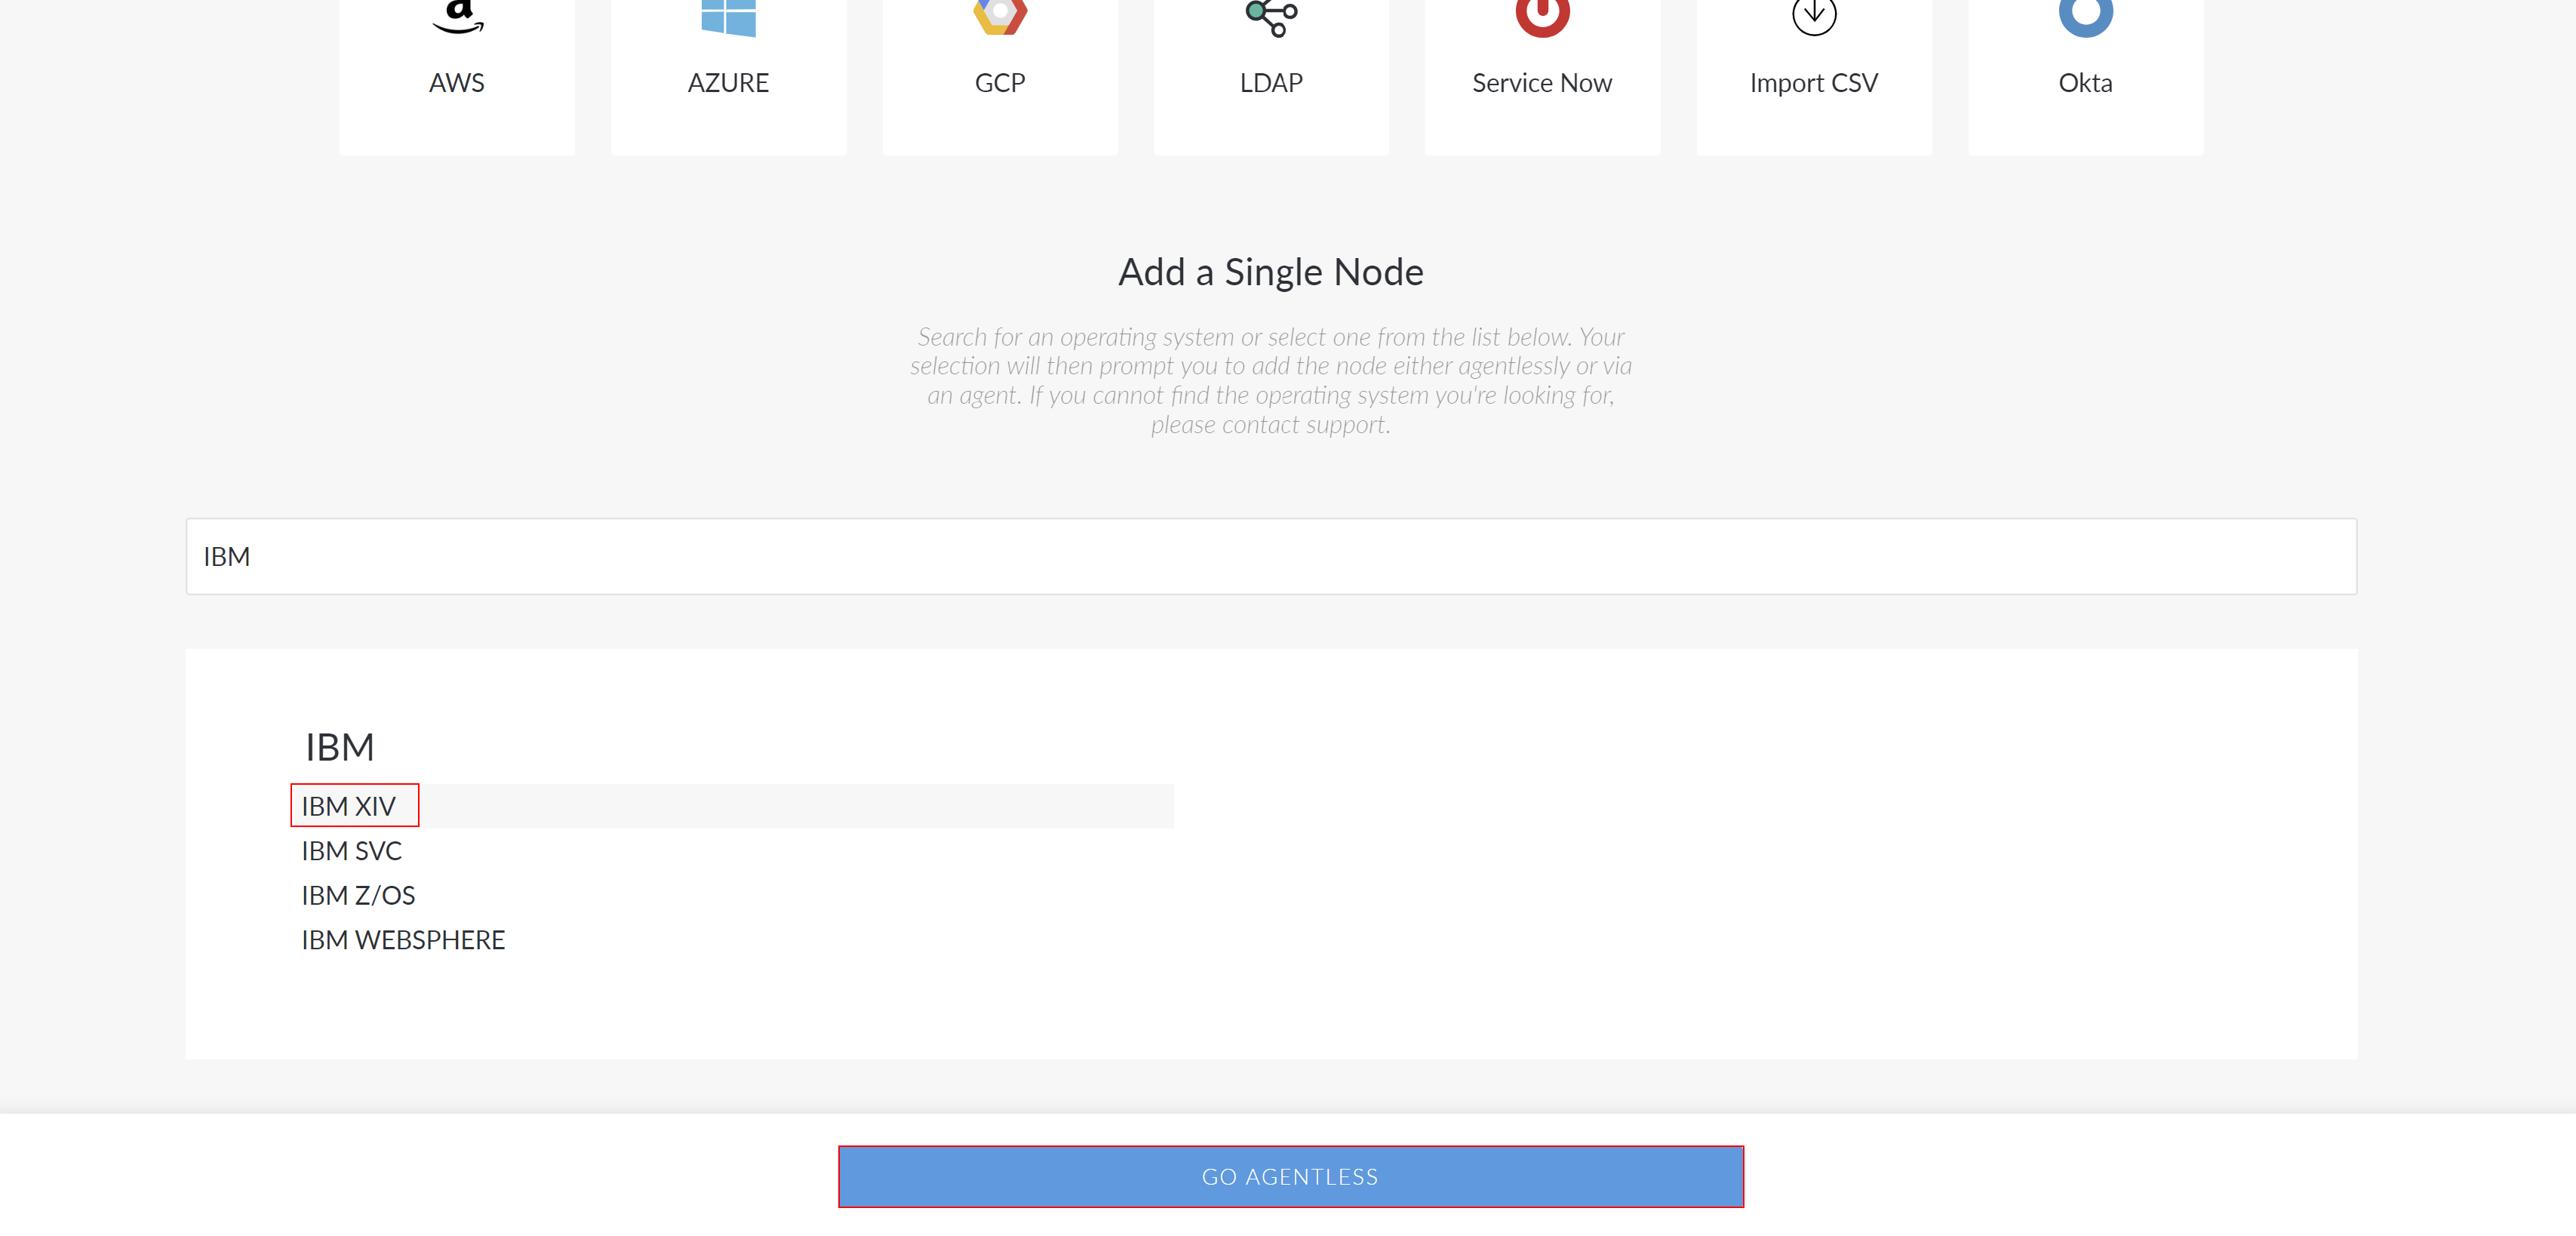
Type 'IBM' in the search bar.
-
Select the 'IBM' node type you want to add and click the Go Agentless button to proceed. The Connect Agentlessly to [Node Type] page is displayed.
-
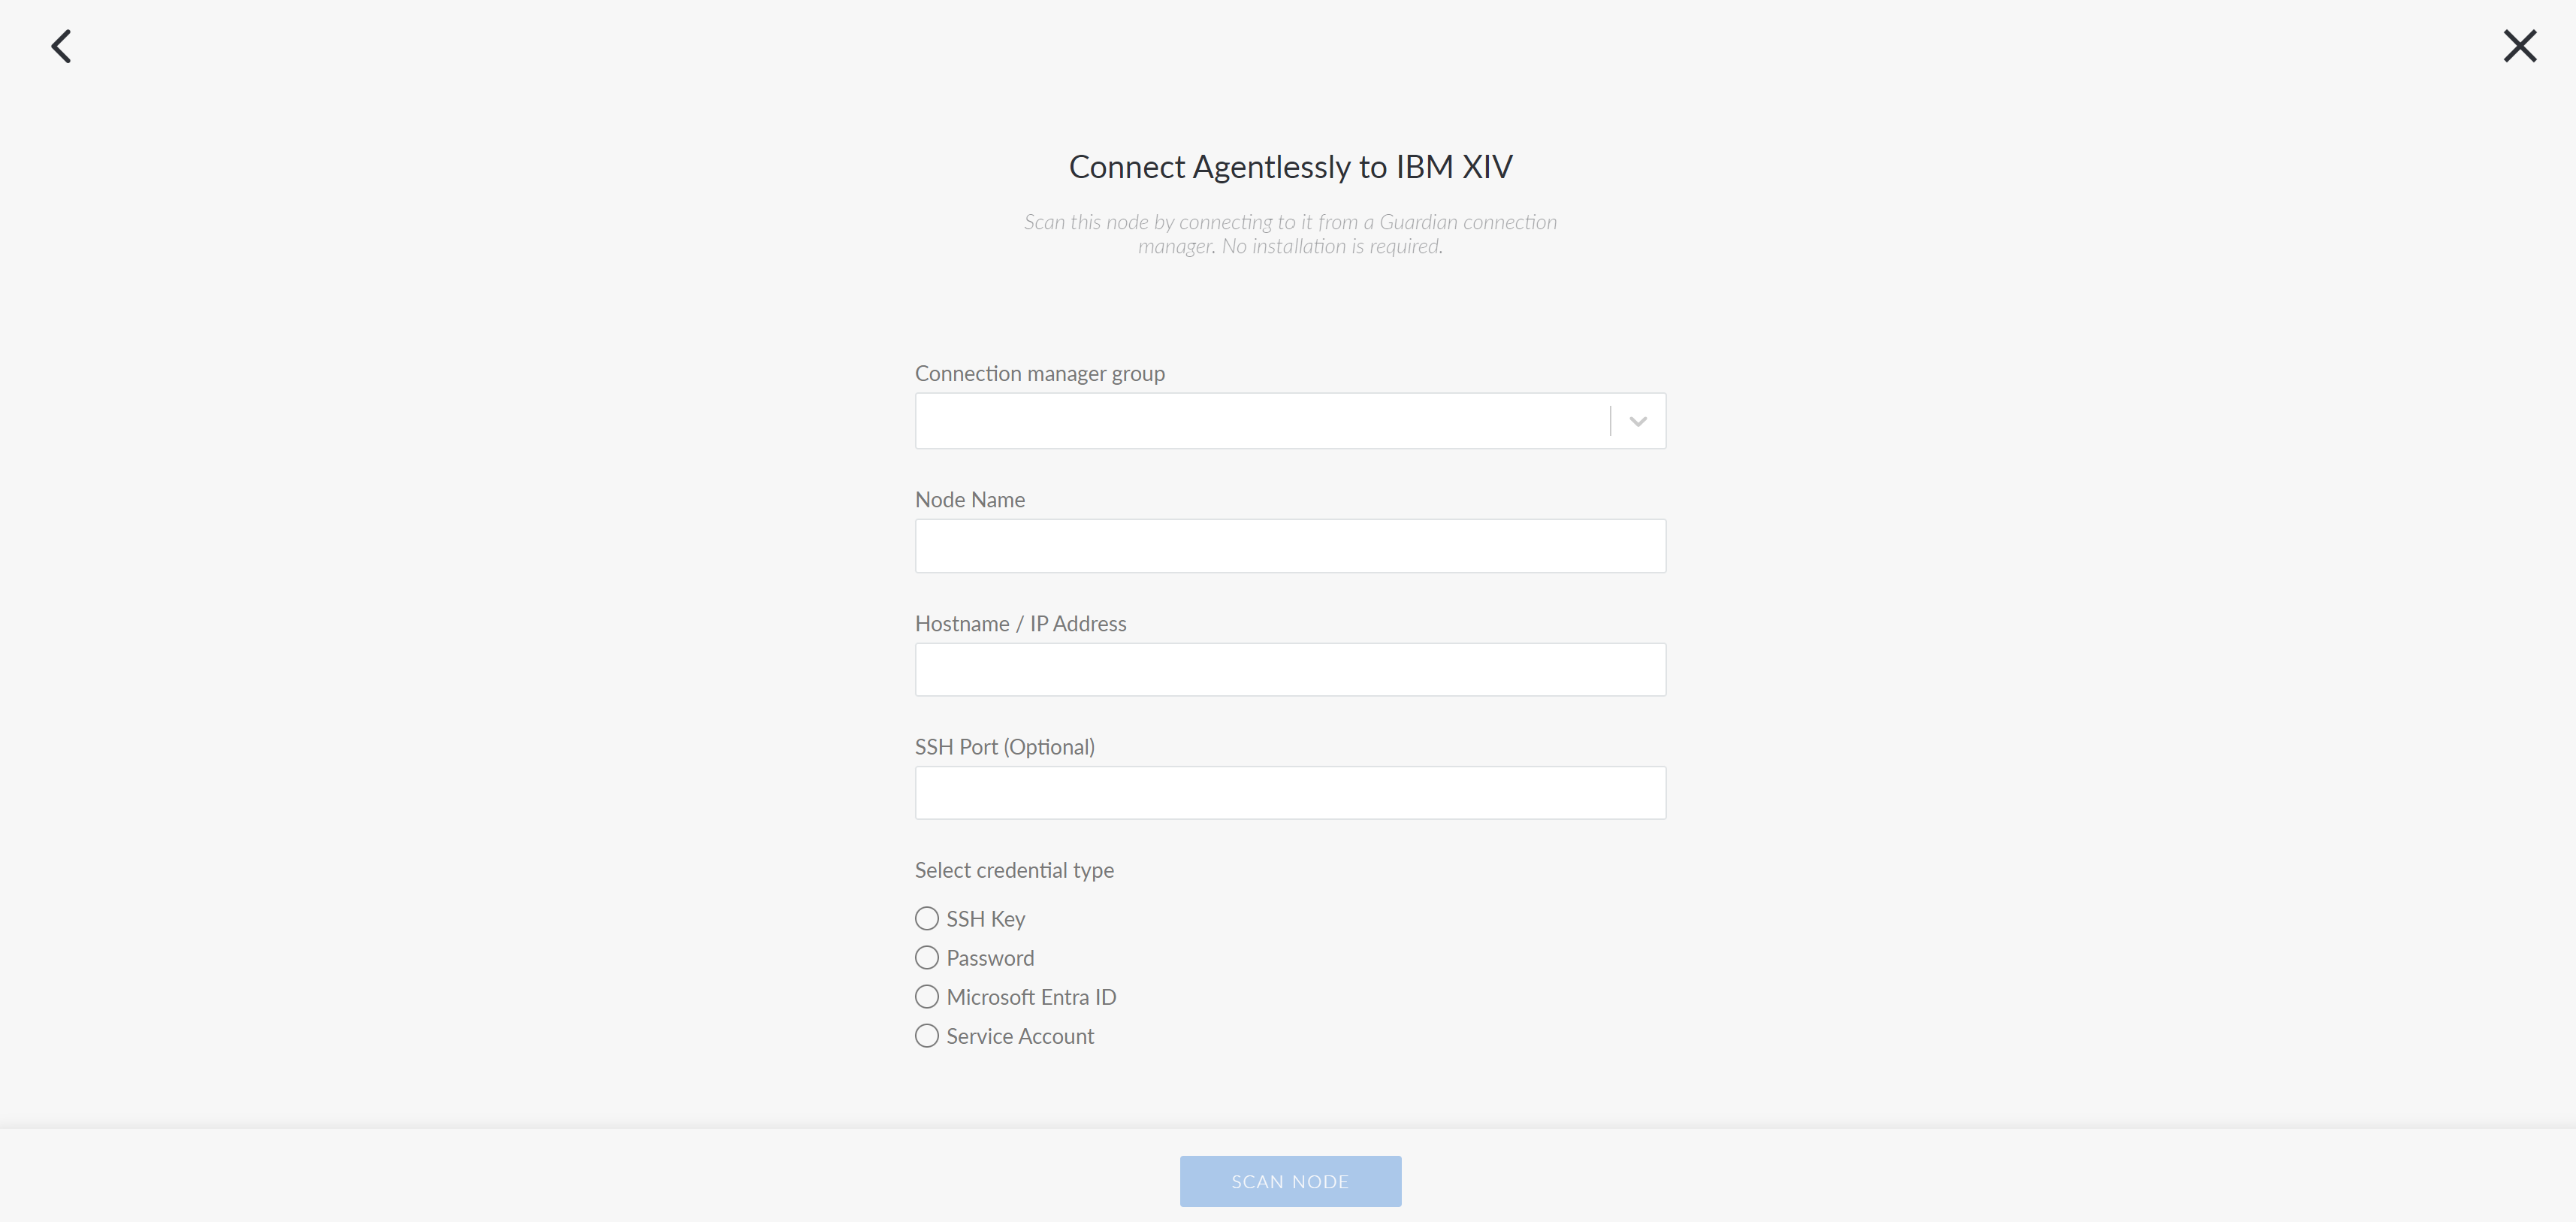
Here, complete the following options:
| Option | Description |
|---|---|
|
Connection Manager group drop-down list |
The Connection Manager group that is responsible for scanning your IBM node. Select a Connection Manager group from the drop-down list. |
|
Node Name field |
The name of the node. The value you enter here will be used as the display name in Guardian. |
|
Hostname / IP Address field |
The hostname or IP address of your node. Note: Typically, this is the fully qualified domain name (FQDN). However, it could also be the IP address. |
|
SSH Port (Optional) field |
The Secure Shell (SSH) port number that the Connection Manager uses to communicate with the target nodes for scanning. If no value is provided, Guardian will default to port 22. Note: If you enter a port number that is different to the default (port 22), make sure that it matches the port number that the administrator of the target node is using to run their SSH server. |
|
Select credential type radio buttons |
The credentials to be used when authenticating Guardian's access to the node. The following options are available:
|
- Once you've completed the above options click Scan Node to add the IBM node to your Guardian instance.
Now, Guardian performs an initial scan of the node. You can wait on this page for the scan to finish, at which point you will see a View Scan button. To view the results of this initial scan, click View Scan. However, you can also navigate elsewhere while Guardian performs its initial scan of the node. You can then view the status of the scan on the Job History page (Inventory > Job History). For more information on what to do next after adding a node, see below.
Add an IBM WebSphere Node
Adding an IBM WebSphere node to your Guardian instance lets you monitor and track the configuration of an application server. This enables you to oversee performance metrics, manage deployments, monitor application health, and ensure that the WebSphere environment passes your organization's security and operational policies.
To add an IBM WebSphere node for Agentless scanning, complete the following steps:
-
In the Guardian web application, navigate to the Add Nodes tab (Inventory > Add Nodes). The Add Nodes page is displayed.
-
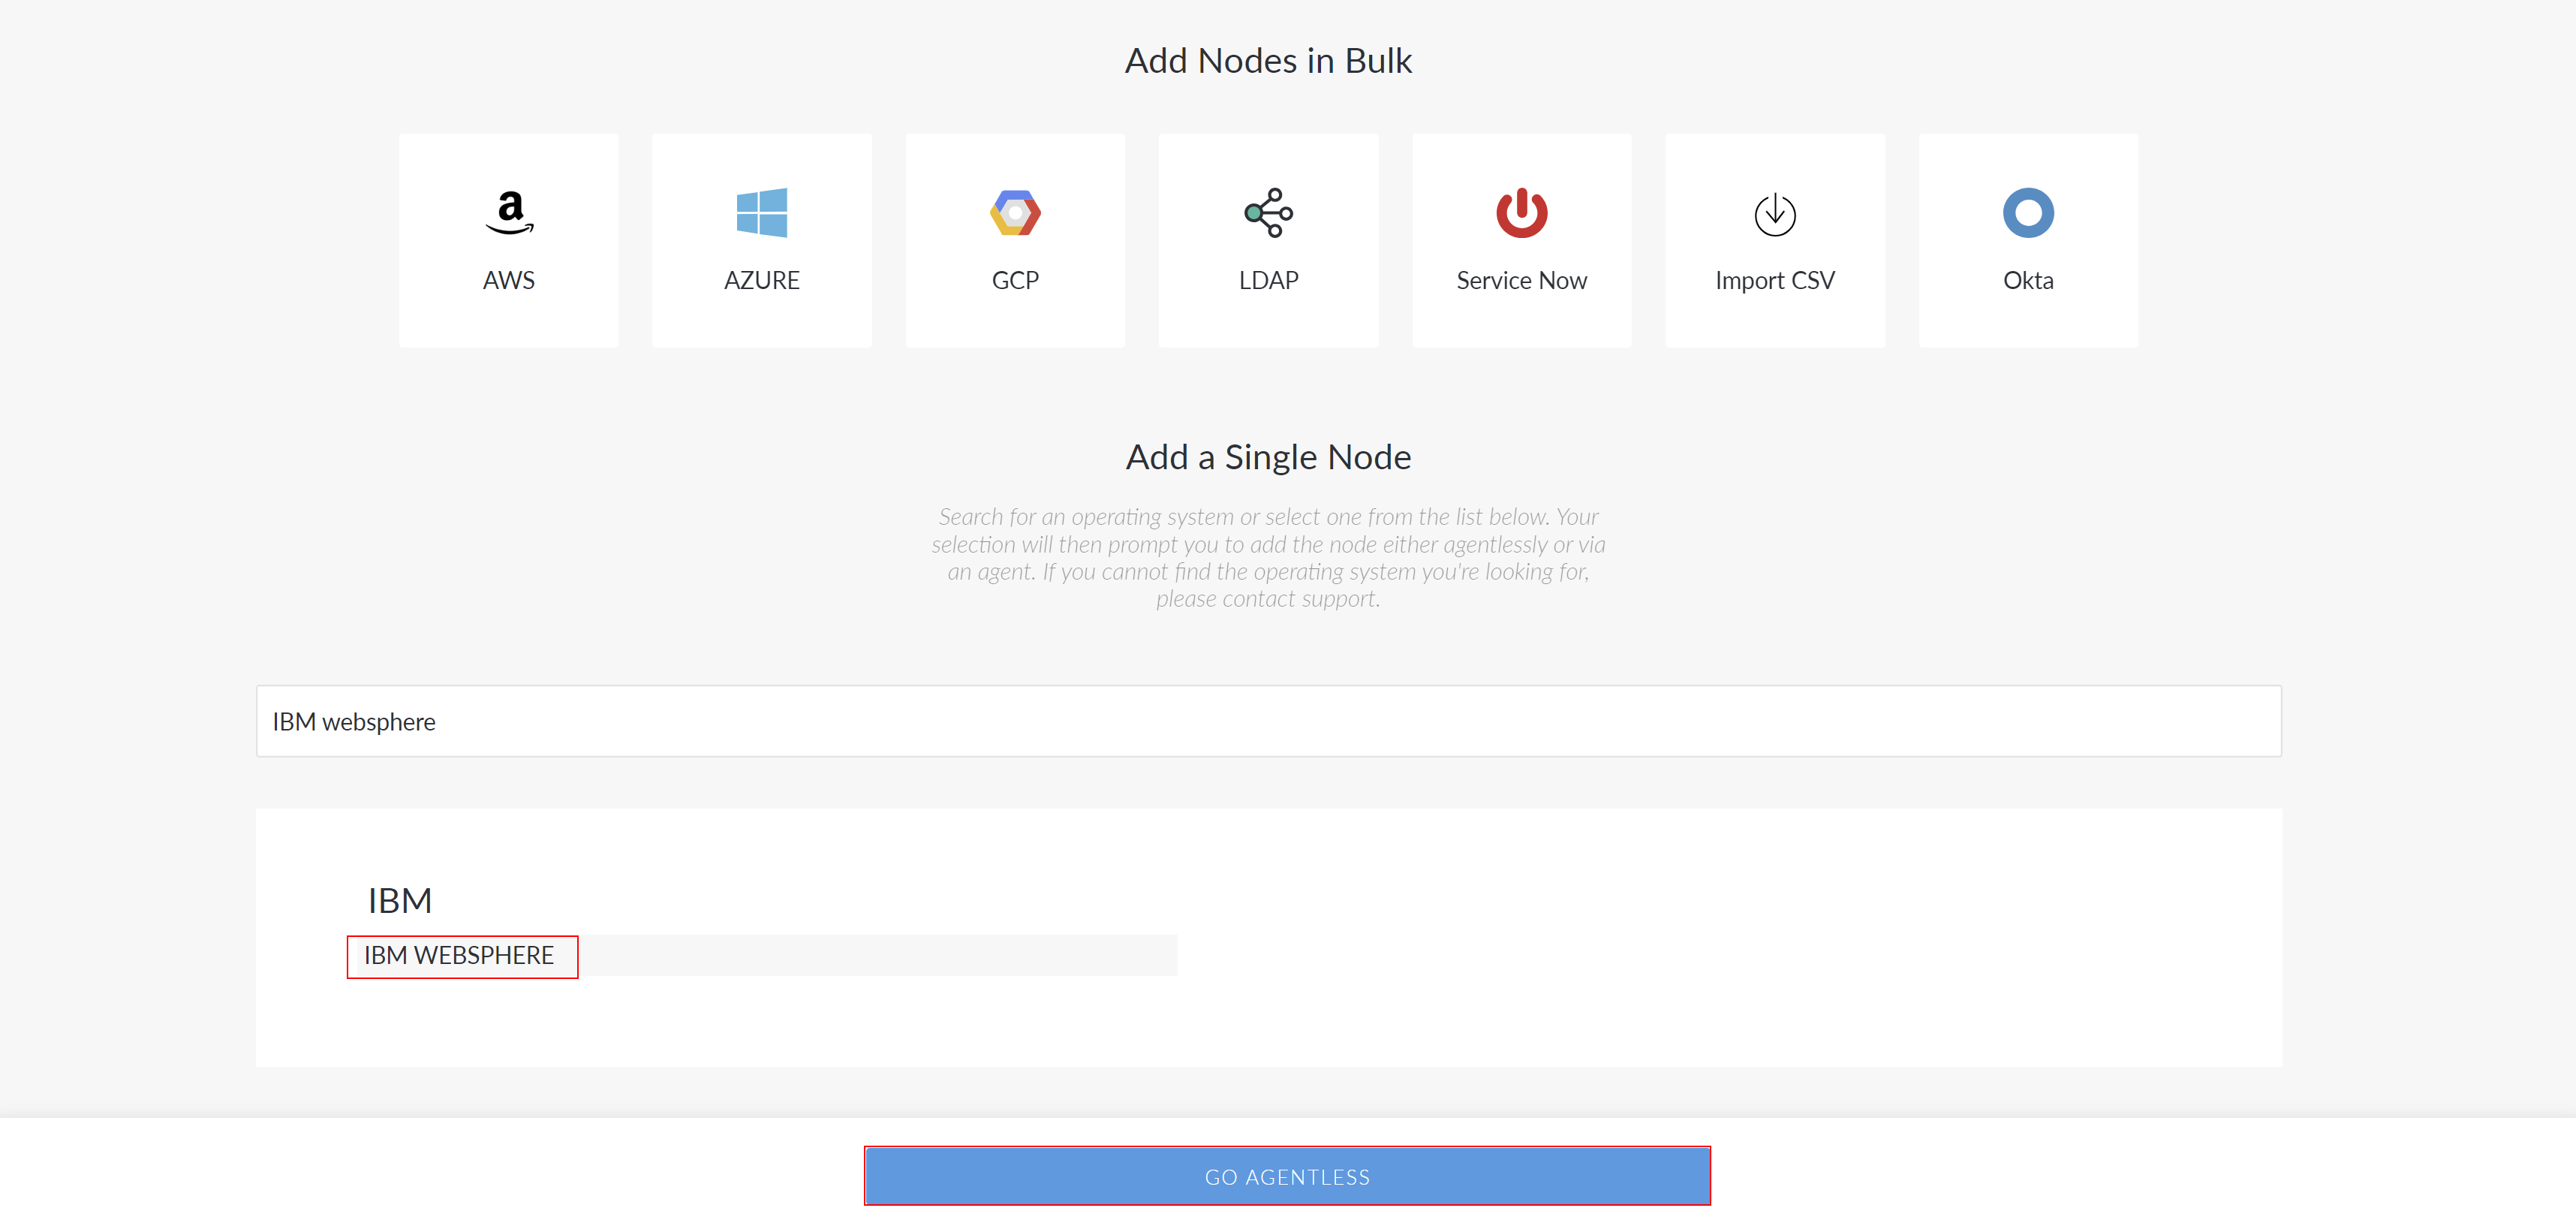
Type 'IBM WebSphere' in the search bar.
-
Select 'IBM WebSphere' and click the Go Agentless button to proceed. The Connect Agentlessly to IBM WebSphere page is displayed.
-
Here, complete the following options:
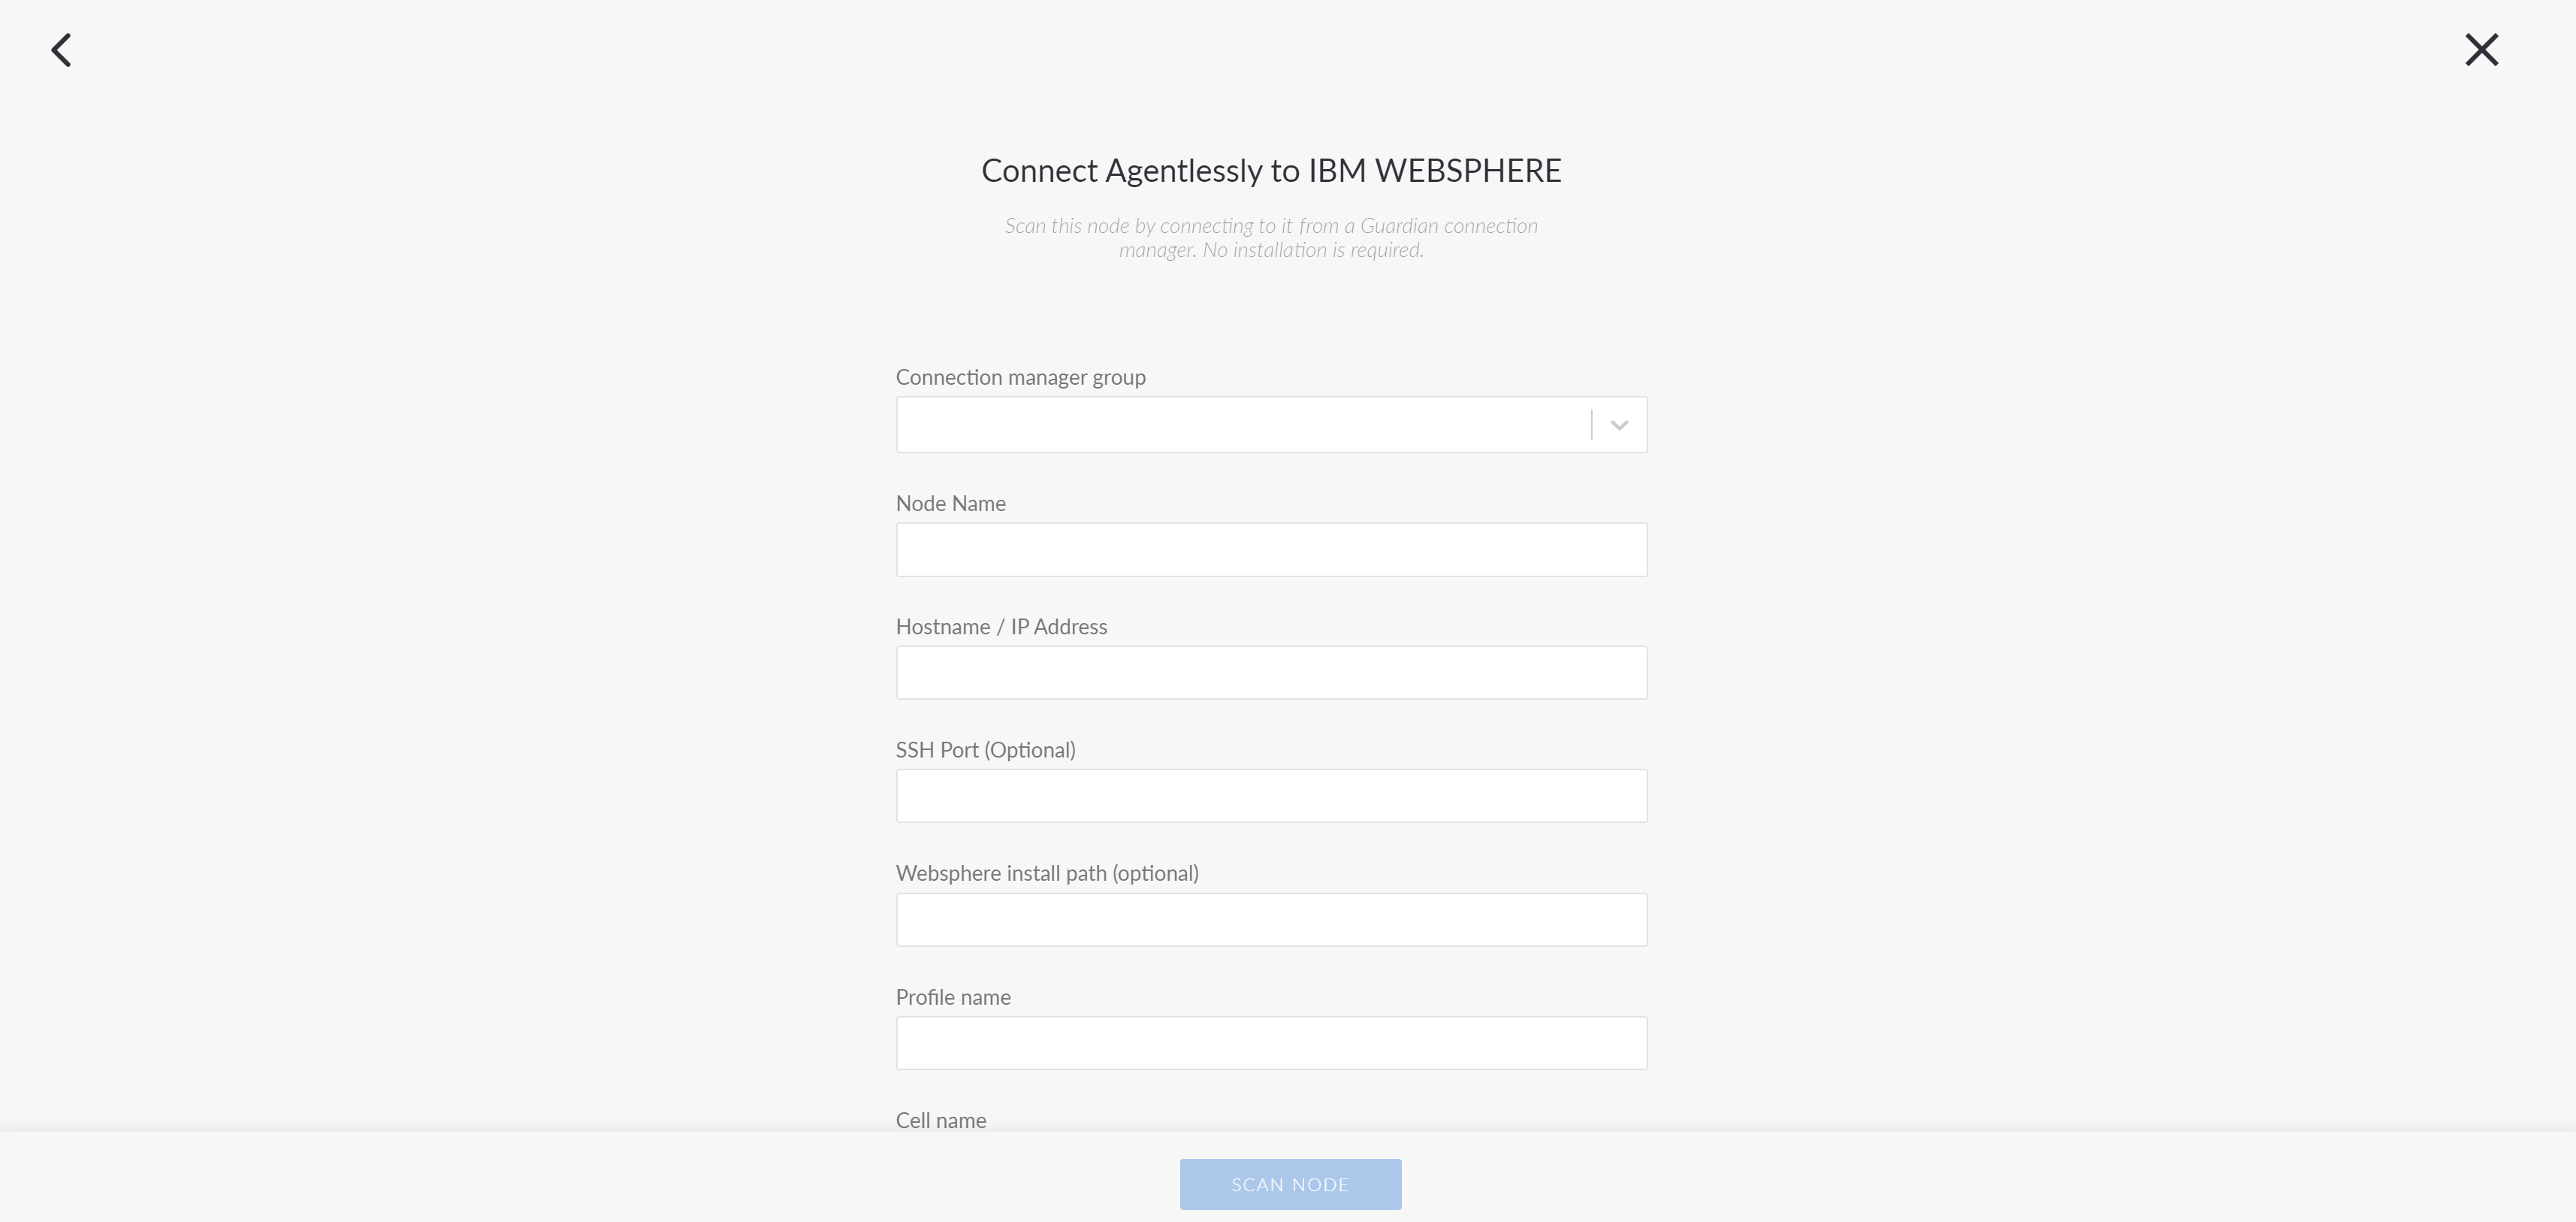
| Option | Description |
|---|---|
|
Connection Manager group drop-down list |
The Connection Manager group that is responsible for scanning your IBM Websphere node. Select a Connection Manager group from the drop-down list. |
|
Node Name field |
The name of the node. The value you enter here will be used as the display name in Guardian. |
|
Hostname / IP Address field |
The hostname or IP address of your node. Note: Typically, this is the fully qualified domain name (FQDN). However, it could also be the IP address. |
|
SSH Port (Optional) field |
The Secure Shell (SSH) port number that the Connection Manager uses to communicate with the target nodes for scanning. If no value is provided, Guardian will default to port 22. Note: If you enter a port number that is different to the default (port 22), make sure that it matches the port number that the administrator of the target node is using to run their SSH server. |
|
Websphere install path (Optional) field |
The folder, relative to your domain name's document root folder. For example, |
|
Profile name field |
The profile name of the machine. |
|
Cell name field |
The name of the administrative domain, managed by a WebSphere Deployment Manager. |
|
WEBSPHERE node name field |
The logical groupings of application servers on the machine. |
|
JVM name field |
The Java Virtual Machine (JVM) name. |
|
Select credential type radio buttons |
The credentials to be used when authenticating Guardian's access to the node. The following options are available:
|
- Once you've completed the above options click Scan Node to add the IBM WebSphere node to your Guardian instance.
Now, Guardian performs an initial scan of the node. You can wait on this page for the scan to finish, at which point you will see a View Scan button. To view the results of this initial scan, click View Scan. However, you can also navigate elsewhere while Guardian performs its initial scan of the node. You can then view the status of the scan on the Job History page (Inventory > Job History). For more information on what to do next after adding a node, see below.
Next Steps
Once you've added nodes to Guardian, there are a few next steps you can take to get the most out of Guardian and the data it collects. Refer to the topics below for more information on where to go from here.
- Node Scan Results – View and filter the data collected by Guardian every time a node is scanned.
- Node Groups – Group nodes together based on similar properties like node type, location, and more.
- Scan Options – Customize what is scanned on a given node during a node scan.
- Configuration Differencing – View differences between two nodes, a group of nodes, two scans of the same node, and more.
- Policies – Define expected configuration states and apply them to nodes or node groups.
- Integrations – Bring together different systems, applications, or components to work as a unified view and perform different tasks.