Network Device Node
Once a Connection Manager has been set up, you can add nodes for Agentless scanning and monitoring. Cloudhouse Guardian (Guardian) supports multiple network device node types. For example, you can add A10 nodes, Citrix nodes, Dell nodes, and more. The following topic describes how to add a network device node using Secure Shell (SSH) to your instance for monitoring.
Note: If you are experiencing issues when adding an Agentless node via SSH, see Troubleshoot SSH for more information on potential solutions.
Node Types
The instructions in this topic apply to adding the following node types using SSH:
- A10.
- Arista.
- Aruba.
- Brocade.
- BSD.
- Cisco.
- Citrix.
- Dell.
- HP.
- Juniper.
- Mac OS.
- NetApp.
- Palo Alto.
- Riverbed.
- Unix.
Add a Node via SSH
Adding a network device node using SSH to your Guardian instance lets you monitor and track the configuration of a network device.
Warning: The following process assumes that you already have a Linux Connection Manager configured within your Guardian instance. For more information, see Linux Connection Manager.
To add a network device node using SSH for Agentless scanning, complete the following steps:
-
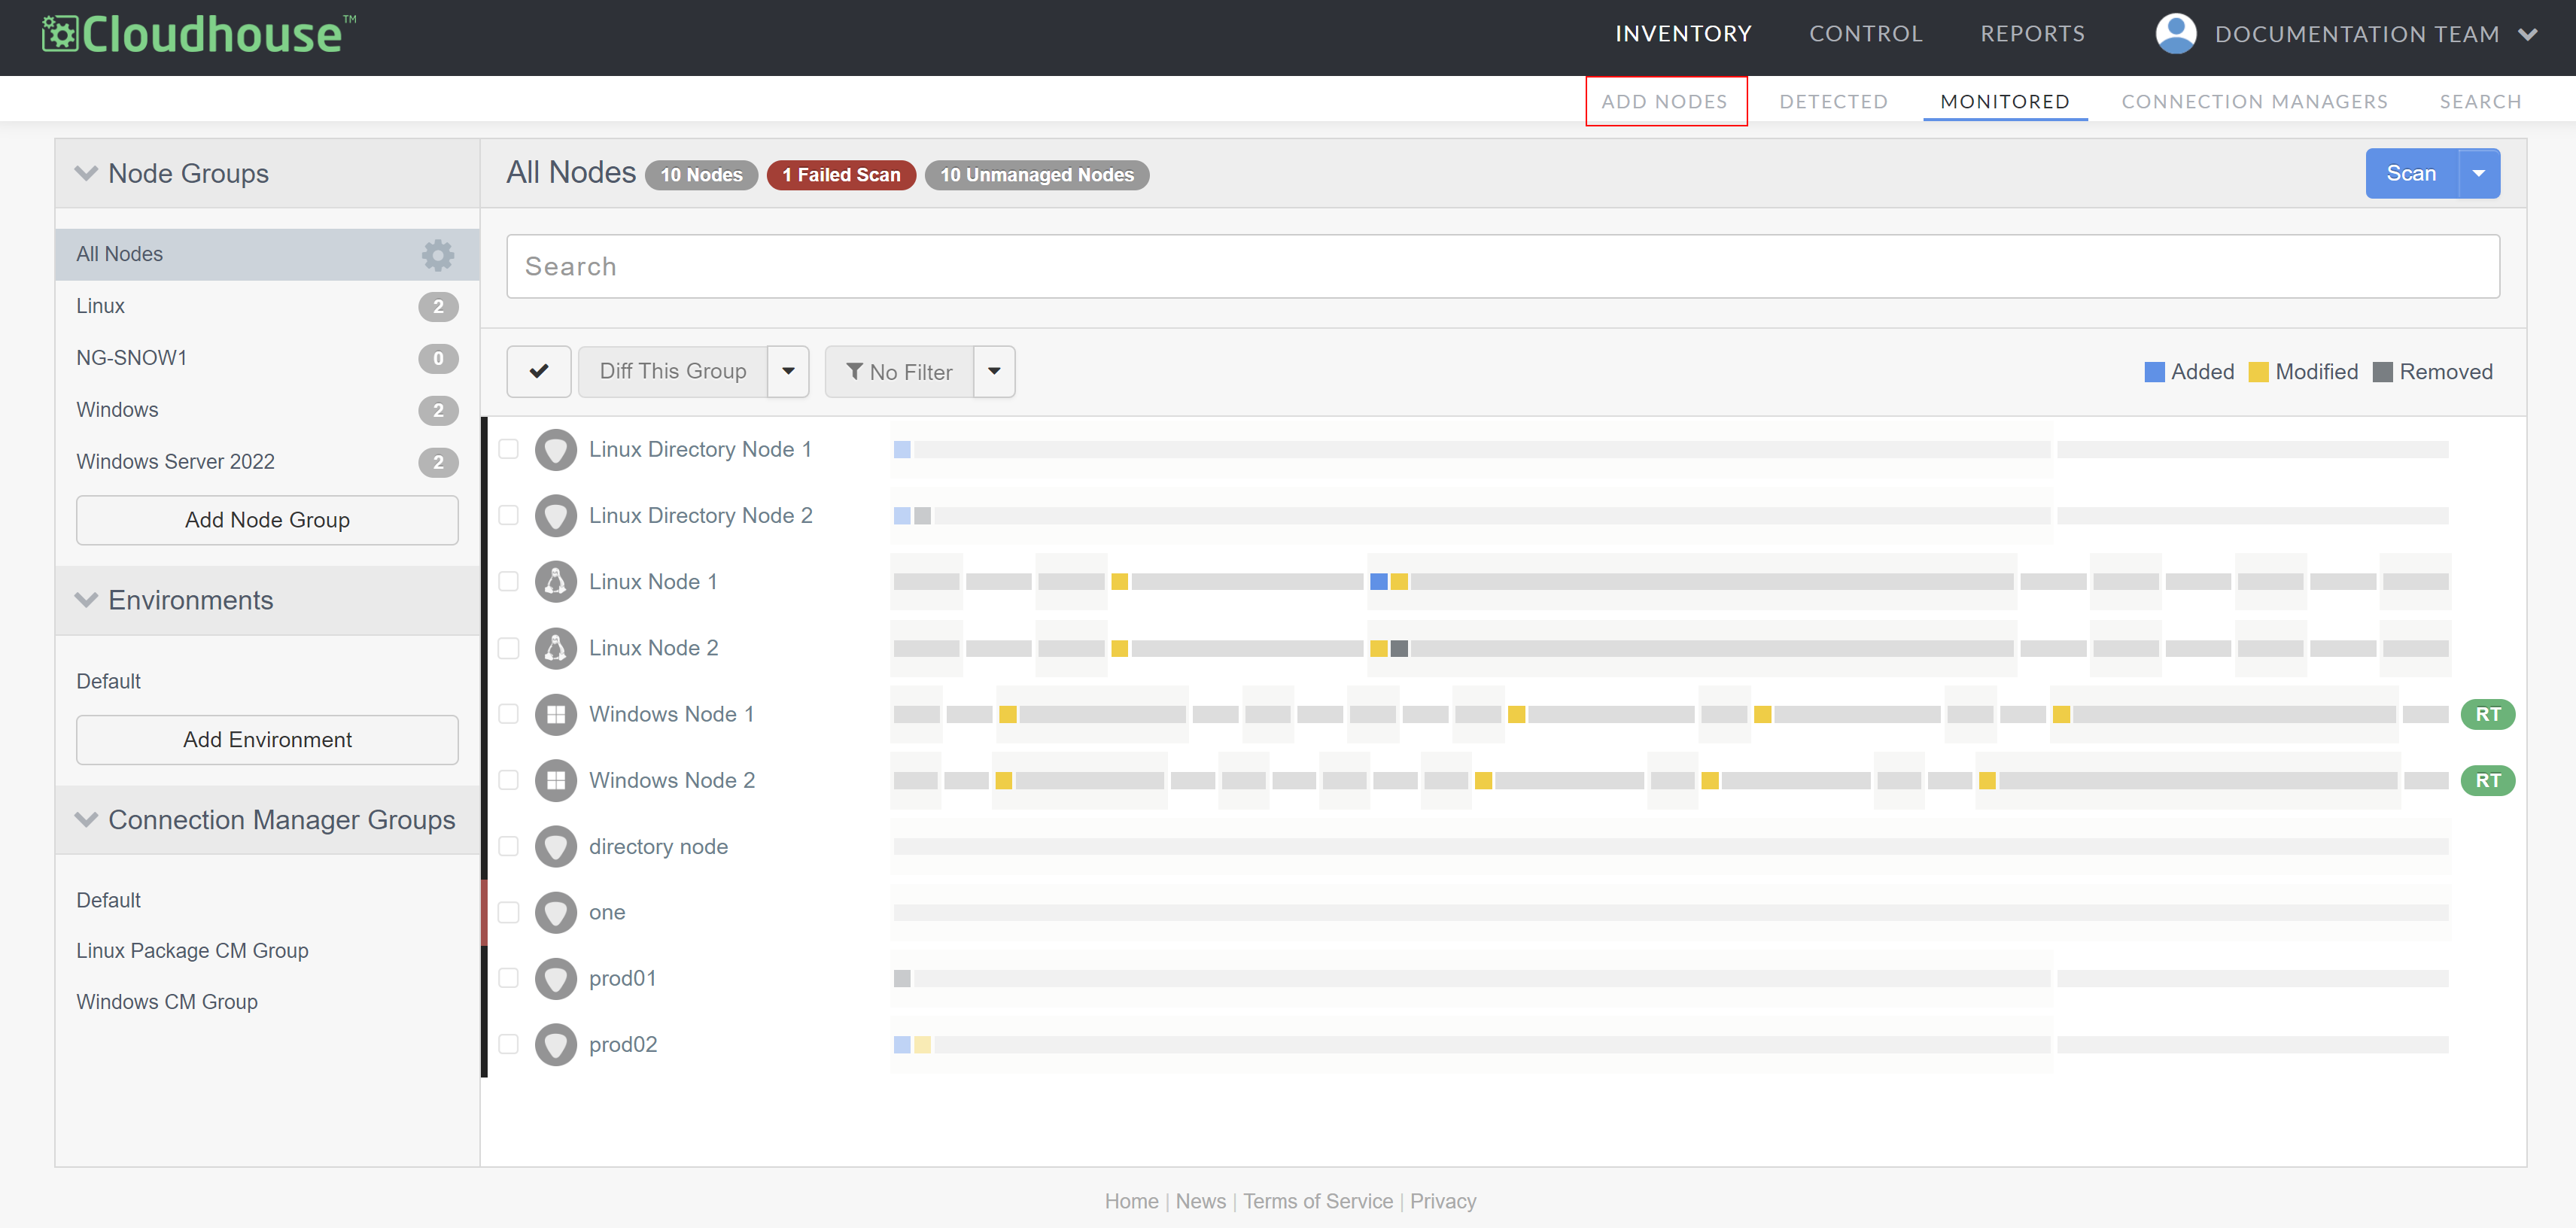
In the Guardian web application, navigate to the Add Nodes tab (Inventory > Add Nodes). The Add Nodes page is displayed.
-
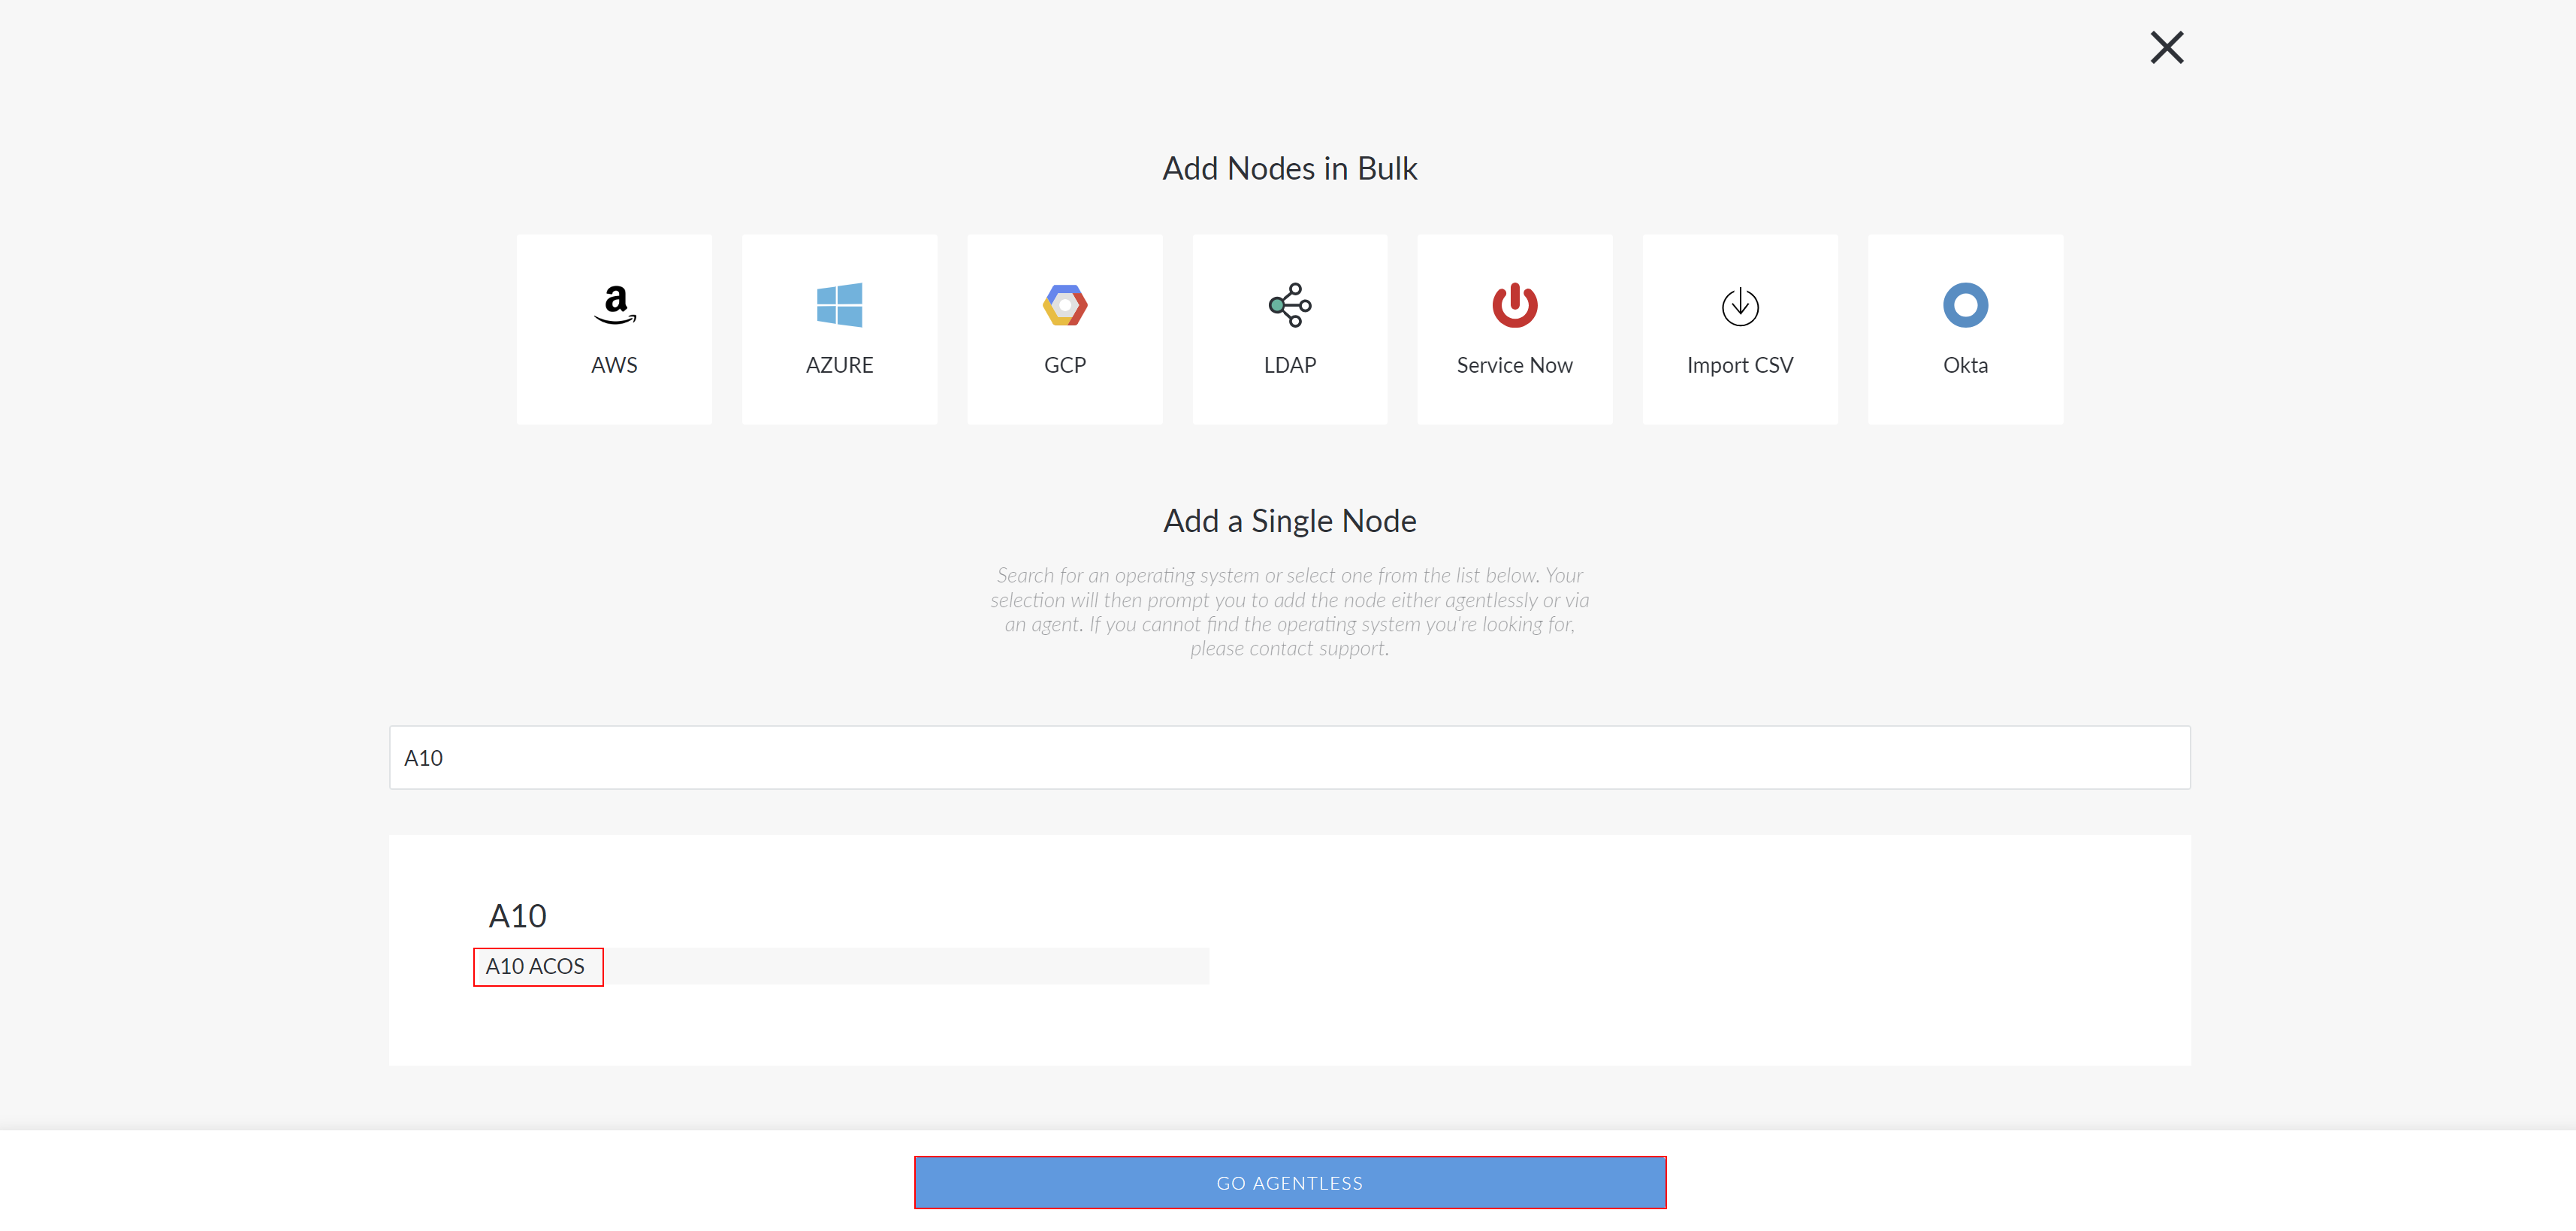
Type the name of the node type you want to add in the search bar.
-
Select the node type you want to add and click the Go Agentless button to proceed. The Connect Agentlessly to [Node Type] page is displayed.
-
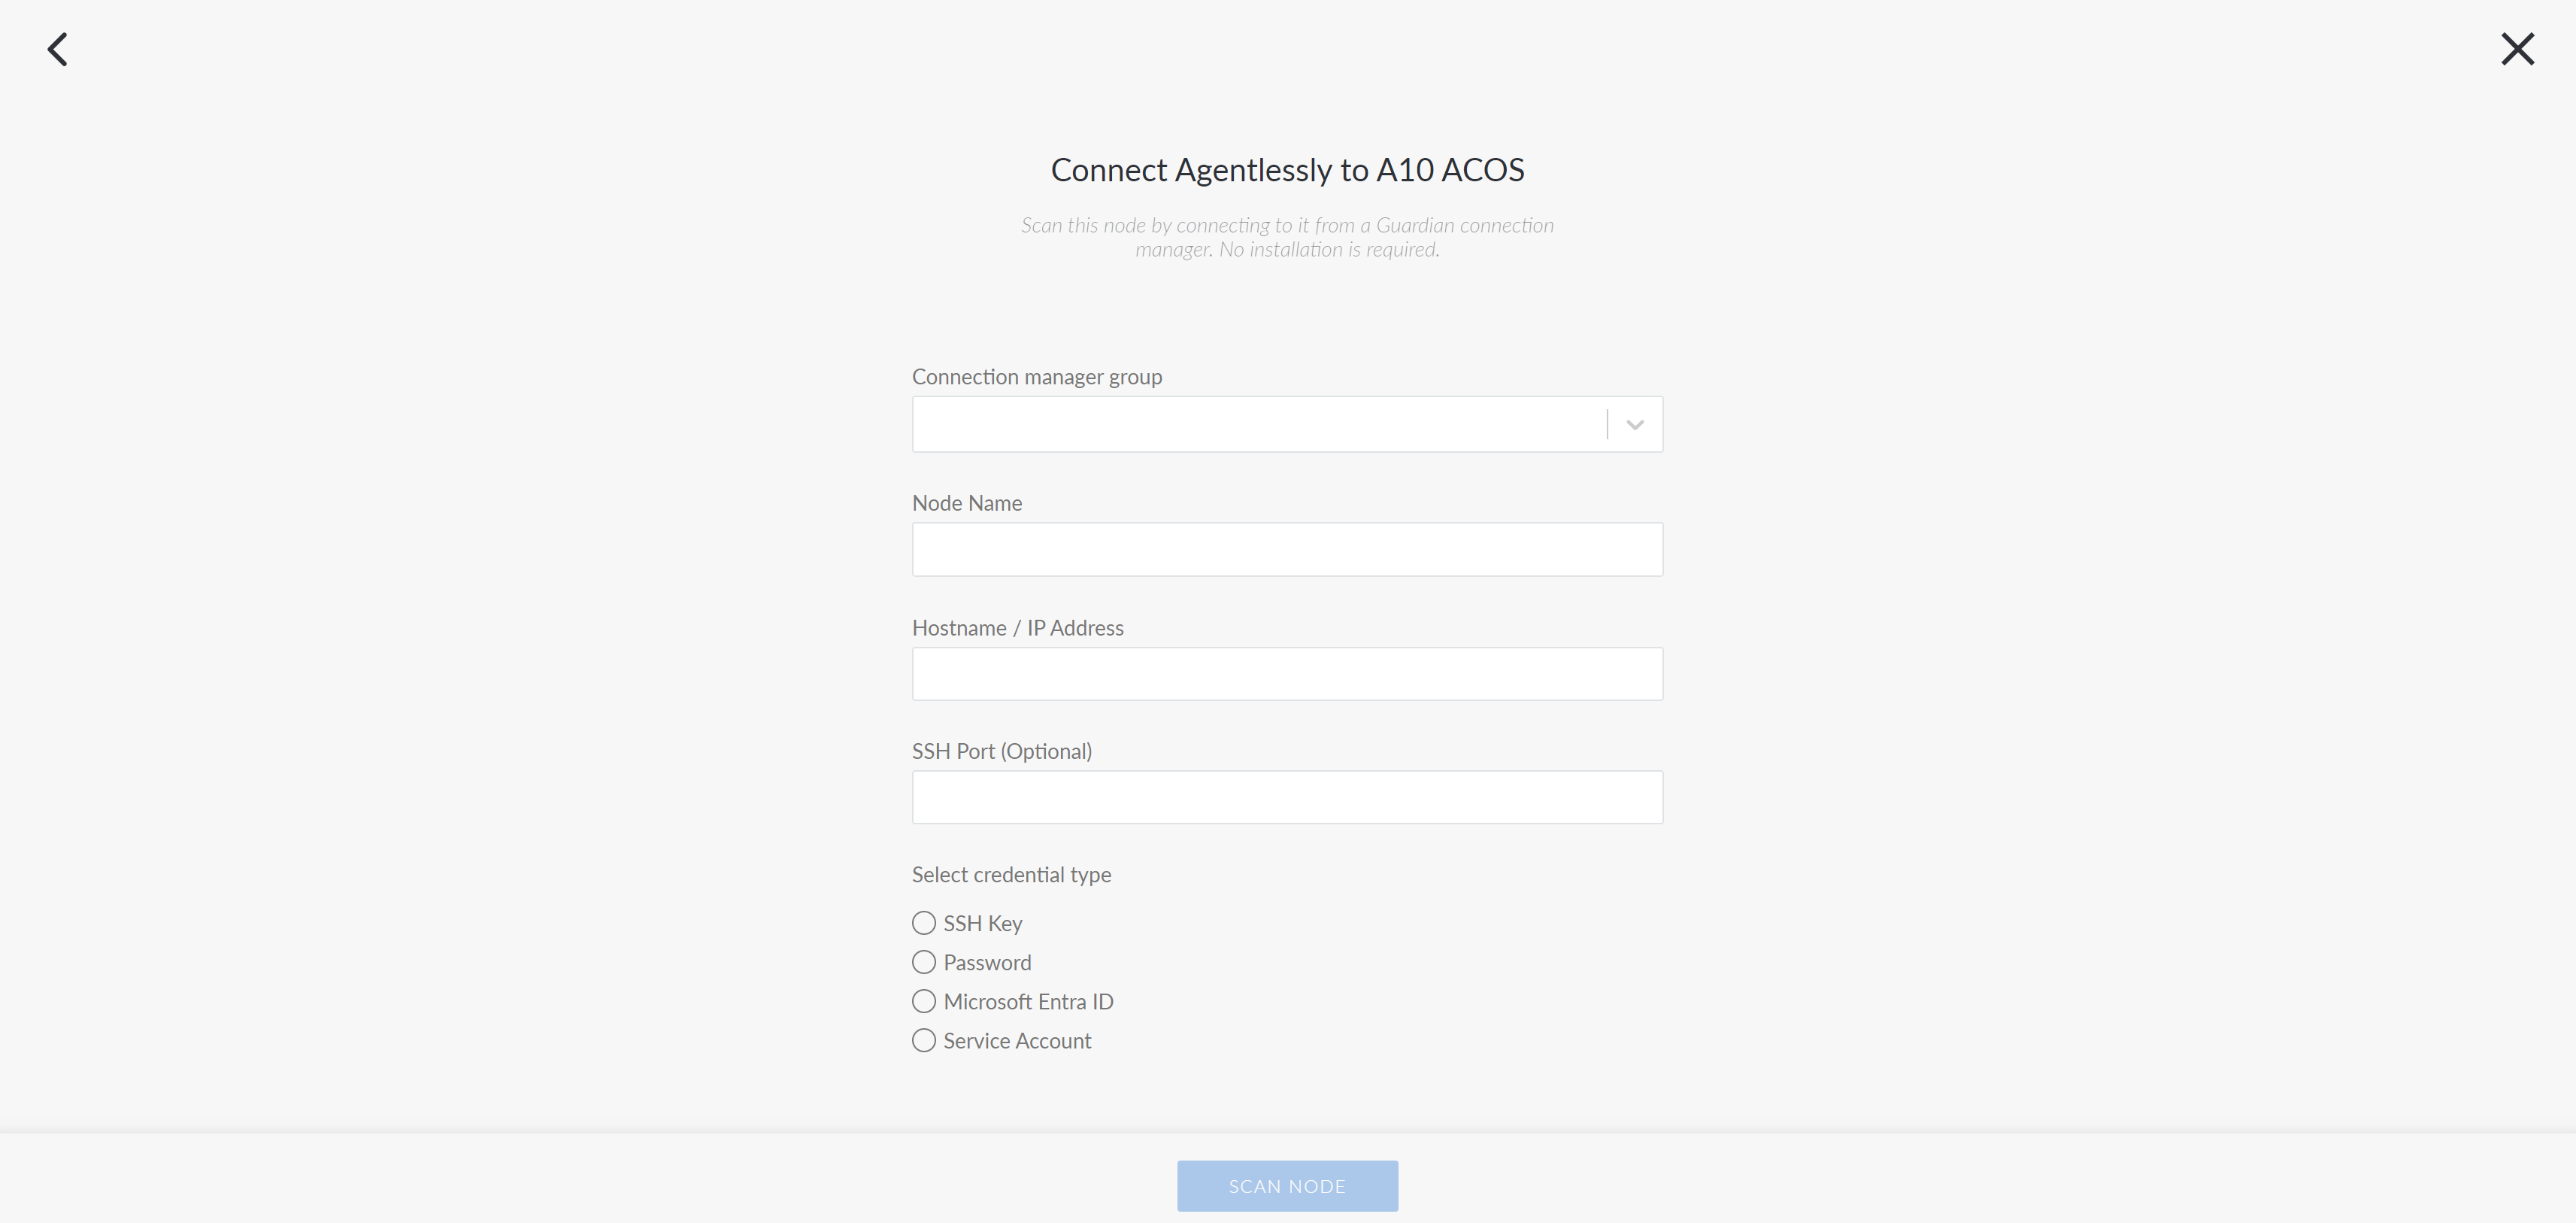
Here, complete the following options:
| Option | Description |
|---|---|
|
Connection Manager group drop-down list |
The Connection Manager group that is responsible for scanning your SSH node. Select a Connection Manager group from the drop-down list. |
|
Node Name field |
The name of the node. The value you enter here will be used as the display name in Guardian. |
|
Hostname / IP Address field |
The hostname of your node. Provide the address to connect to for Agentless scanning via the Linux Connection Manager. Note: Typically, this is the fully qualified domain name (FQDN). However, it could also be the IP address. |
|
Path to JSON file field |
The directory path where the JSON file is stored. For example, Warning: This option is only available if you select to add a 'JSON file' node. |
|
Path to script field |
The directory path to the script file that will be executed. For example, Warning: This option is only available if you select to add a 'Script path' node. |
|
PowerShell script path field |
The directory path to the PowerShell script that will be executed. For example, Warning: This option is only available if you select to add a 'PowerShell' node. |
|
SSH Port (Optional) field |
The SSH port number that the Linux Connection Manager uses to communicate with the target nodes for scanning. If no value is provided, Guardian will default to port 22. Note: If you enter a port number that is different to the default (port 22), make sure that it matches the port number that the administrator of the target node is using to run their SSH server. |
|
Select credential type radio buttons |
The credentials to be used when authenticating Guardian's access to the node. The following options are available:
|
- Once you've completed the above options click Scan Node to add the node to your Guardian instance.
Now, Guardian performs an initial scan of the node. You can wait on this page for the scan to finish, at which point you will see a View Scan button. To view the results of this initial scan, click View Scan. However, you can also navigate elsewhere while Guardian performs its initial scan of the node. You can then view the status of the scan on the Job History page (Inventory > Job History). For more information on what to do next after adding a node, see below.
Key-Based Authentication
To use a public key to authenticate Guardian's access to the node, you need to enable key-based authentication by adding Guardian's public key to your node's authorized keys file.
To enable key-based authentication, complete the following steps:
-
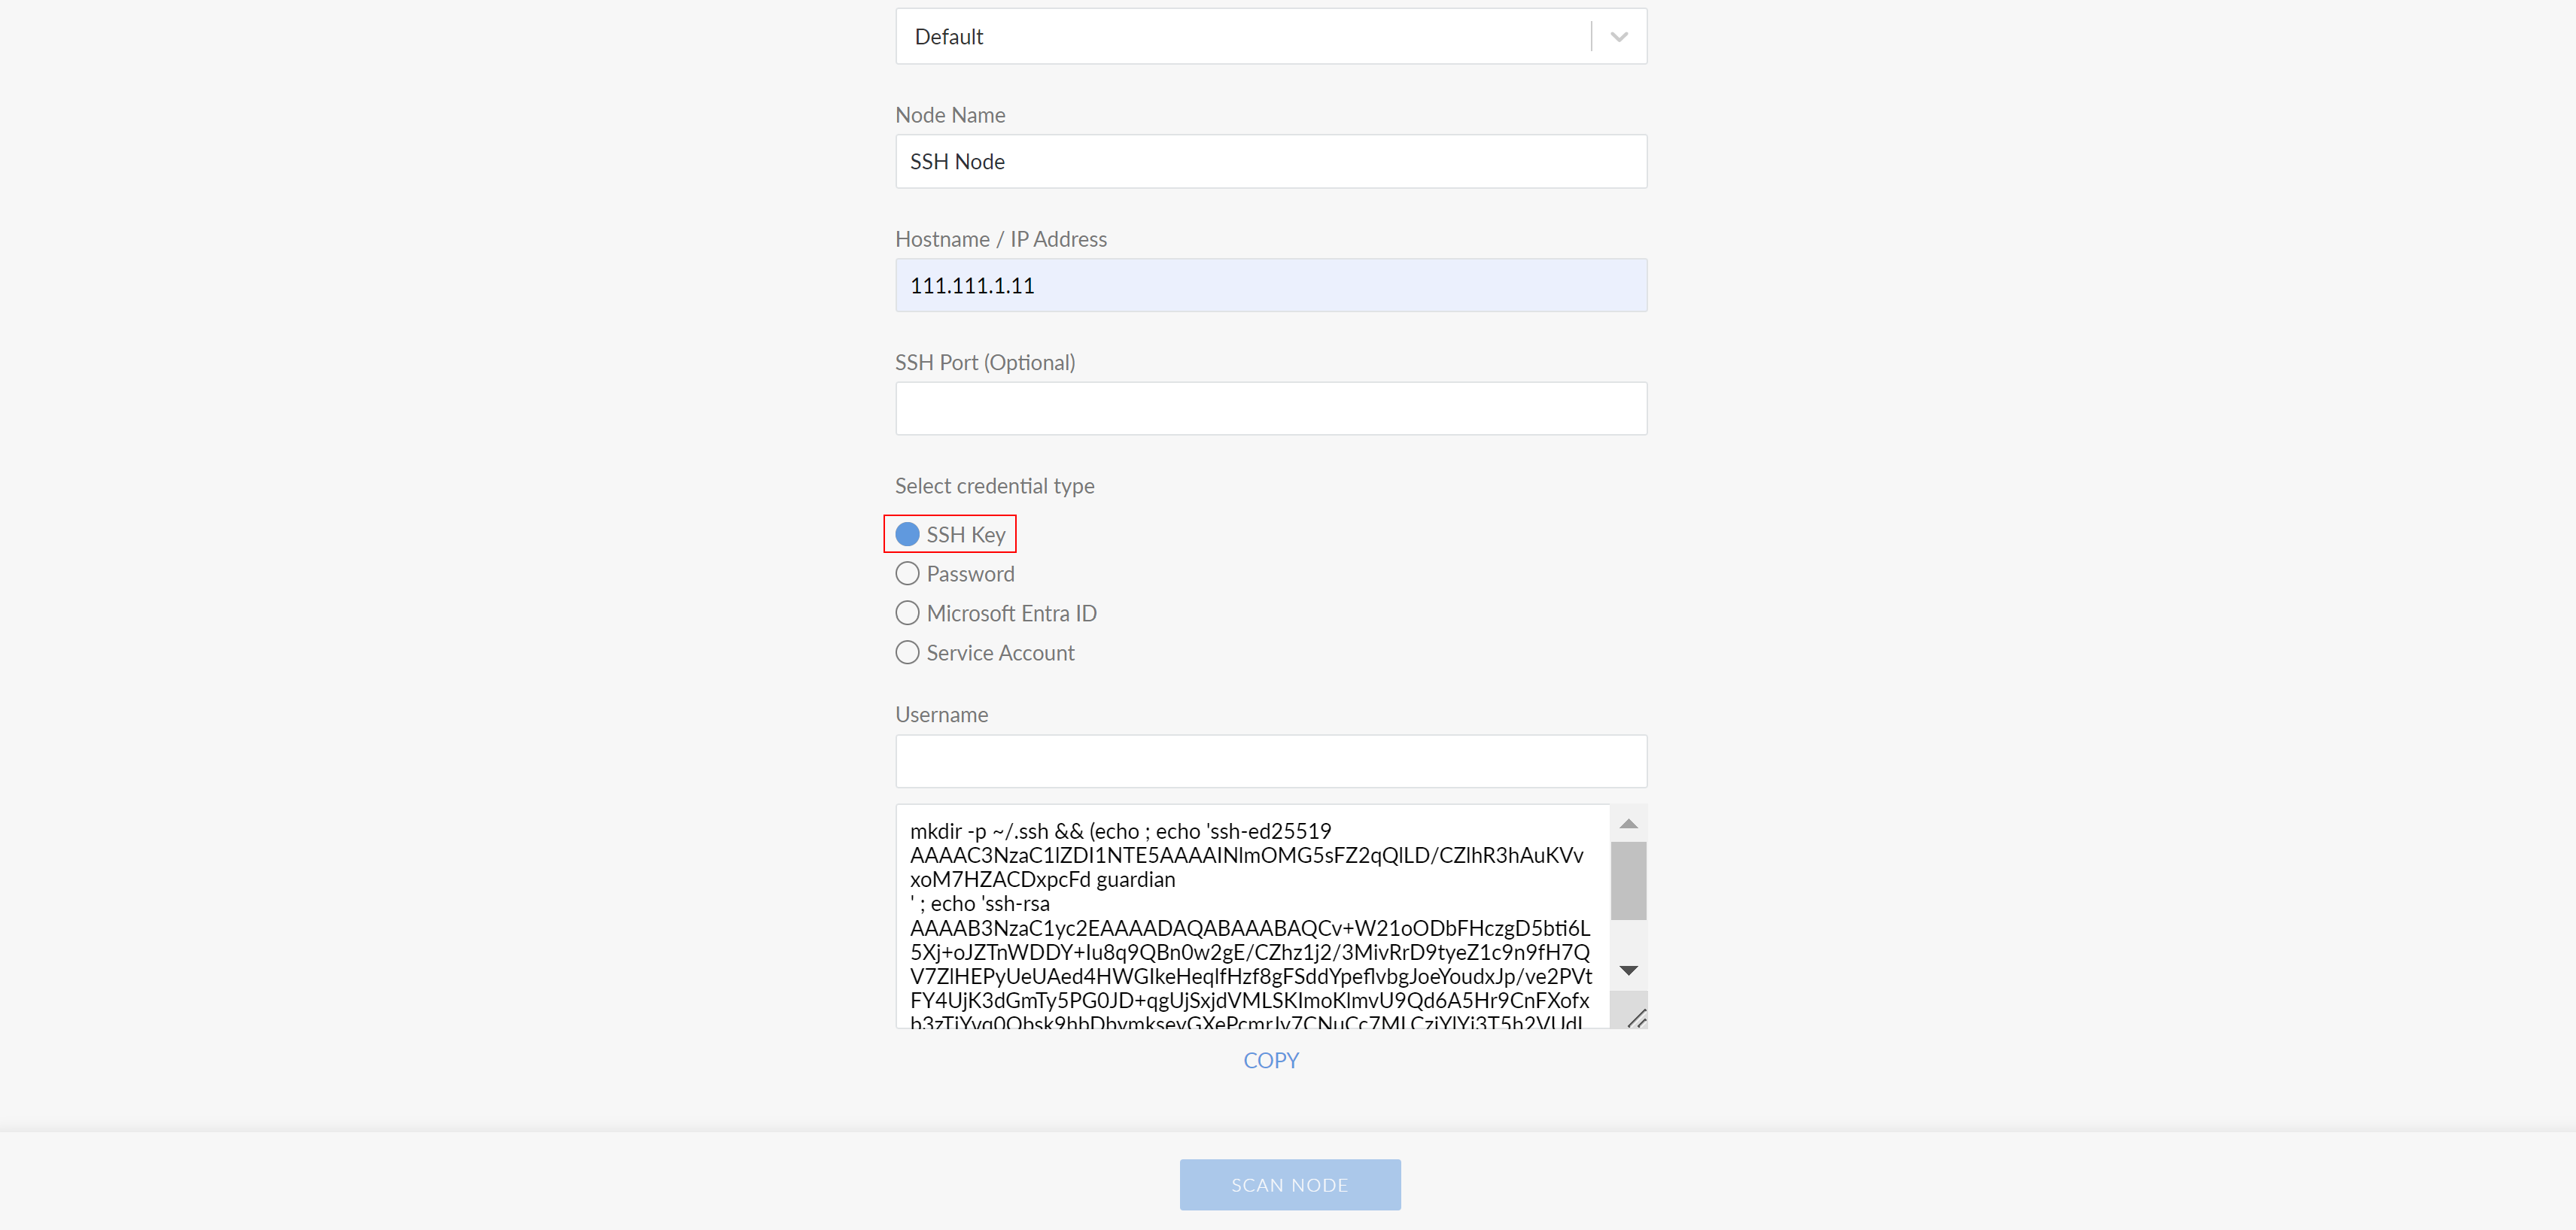
In the Connect Agentlessly to [Host] page, select the SSH Key option under the Select credential type radio buttons.
-
Enter your Username and copy the command displayed.
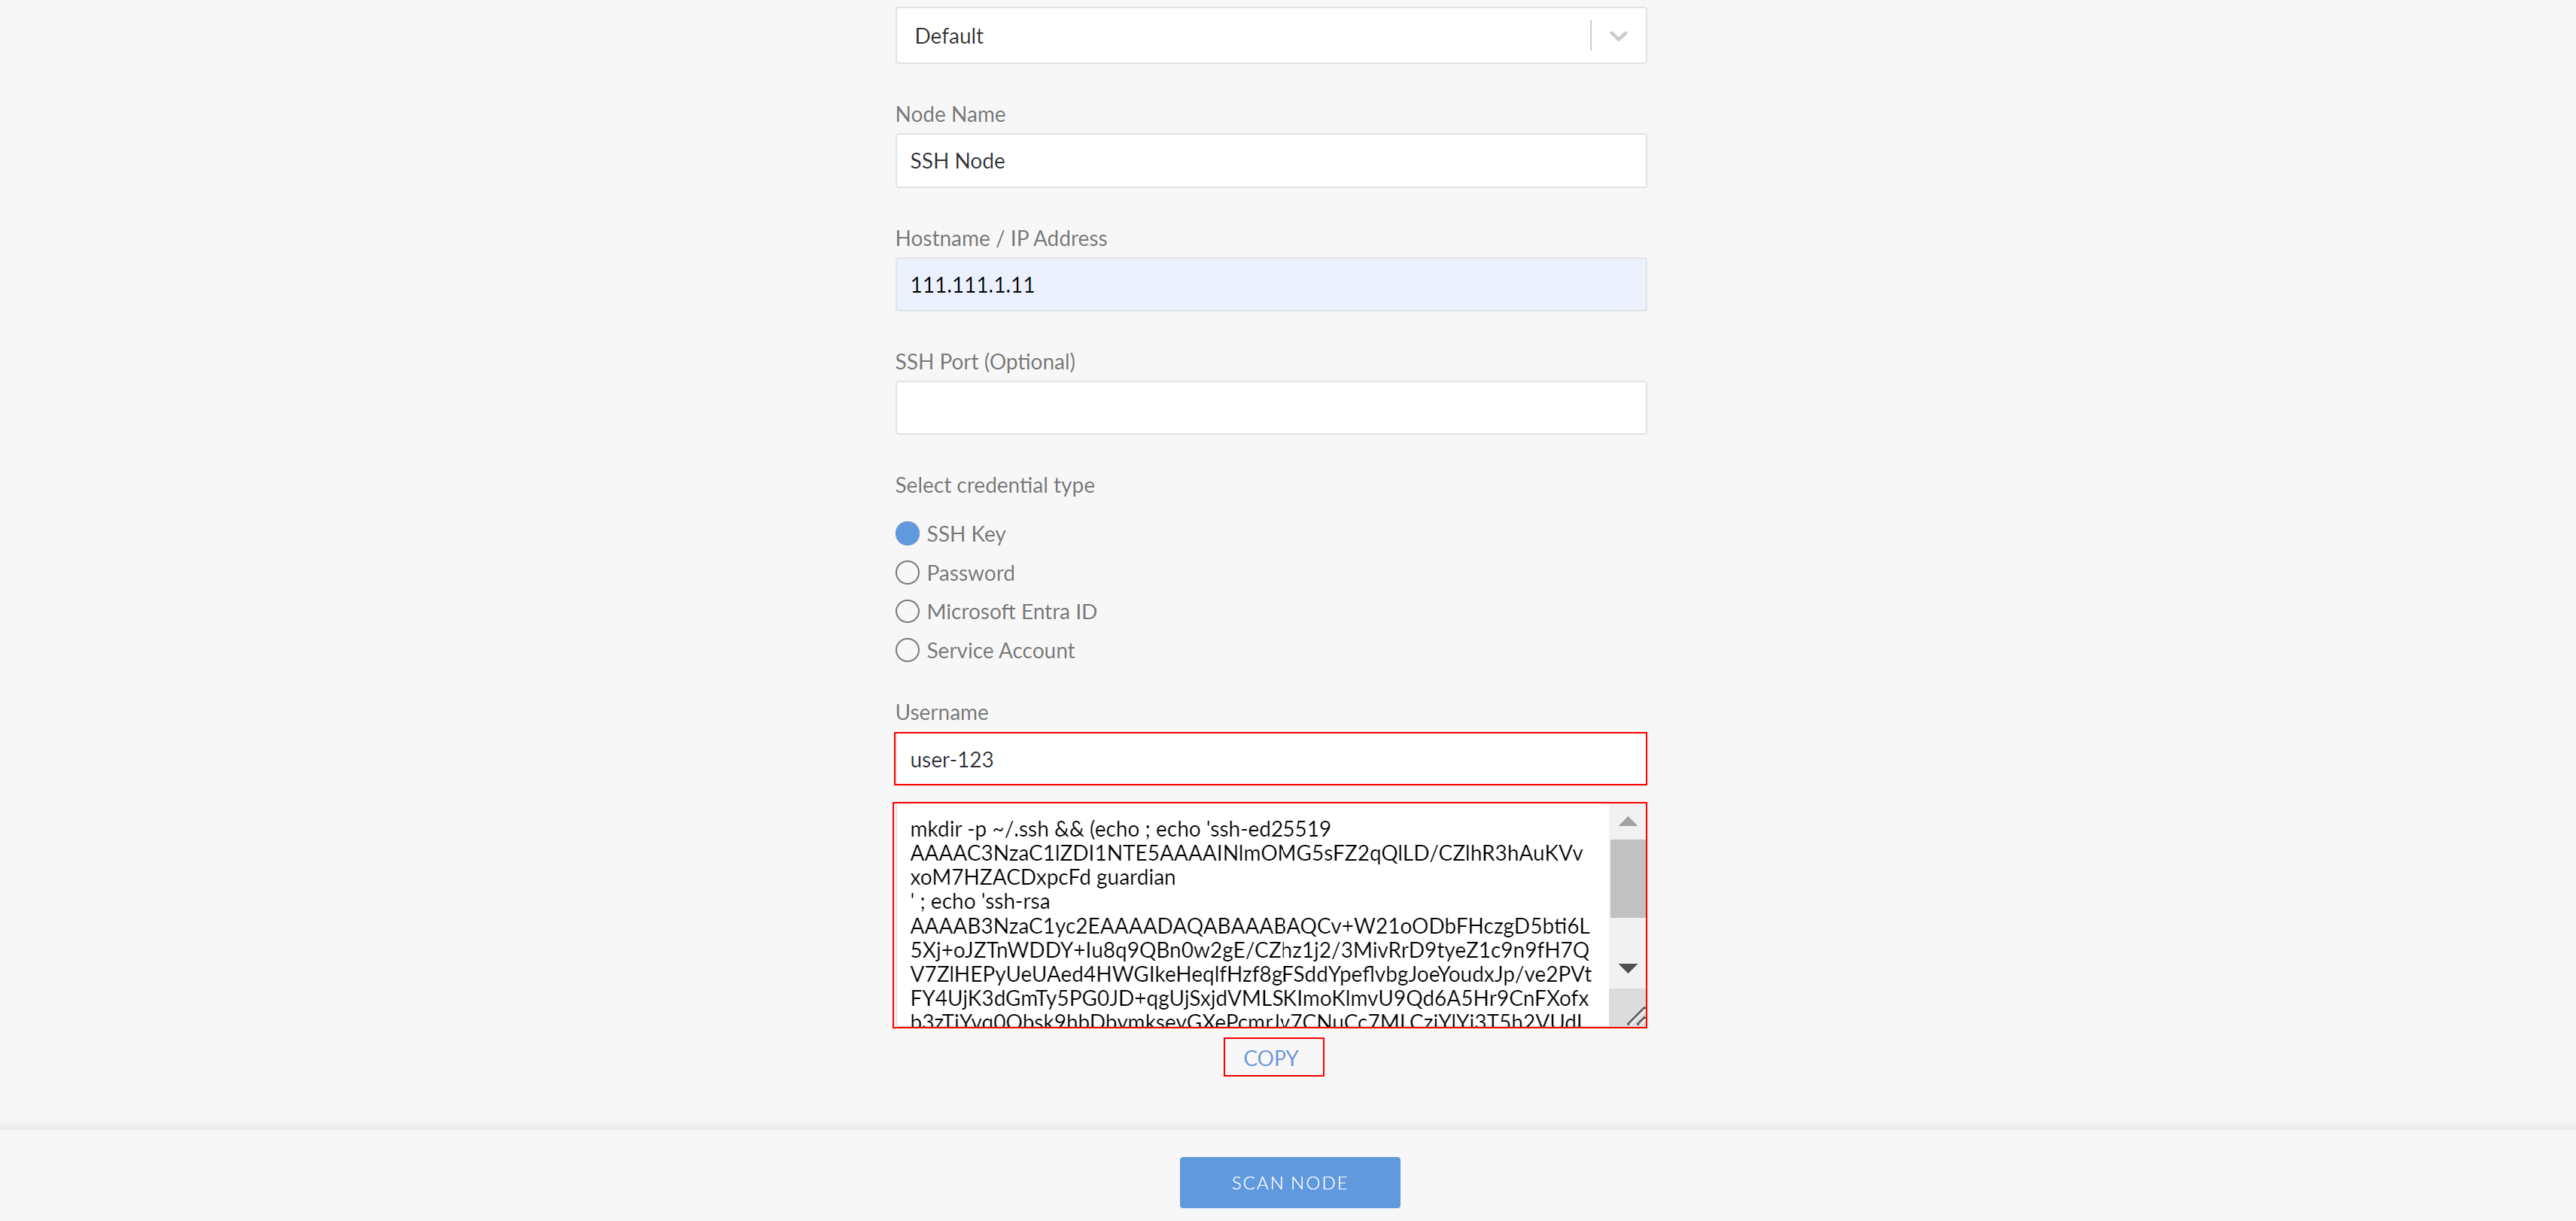
-
Log into your server under the account you want to connect to Guardian as.
- Paste the command into the console of your server.
Once complete, the public key is appended to the user account's SSH authorized keys file.
Next Steps
Once you've added nodes to Guardian, there are a few next steps you can take to get the most out of Guardian and the data it collects. Refer to the topics below for more information on where to go from here.
- Node Scan Results – View and filter the data collected by Guardian every time a node is scanned.
- Node Groups – Group nodes together based on similar properties like node type, location, and more.
- Scan Options – Customize what is scanned on a given node during a node scan.
- Configuration Differencing – View differences between two nodes, a group of nodes, two scans of the same node, and more.
- Policies – Define expected configuration states and apply them to nodes or node groups.
- Integrations – Bring together different systems, applications, or components to work as a unified view and perform different tasks.